|
Curso de Paint Shop Pro
(PSP)
08 Texto Emboss
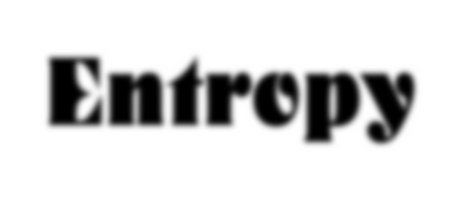
Step 1 This technique gives a nice "quilted" effect
to any text or drawn shape that you choose. To start, open a new file,
with a white background and 16 million colors. Add some text in black or
draw some shapes or designs. I think antialiased graphics work best. For
colorizing purposes, you may want to save your text selection to an
alpha channel (Selections: Save to Alpha Channel). If you're working
with a shape, use the magic wand to select the black areas and then save
that to the alpha channel. When you're done, deselect everything (Selections:
None).
Step 2 Next, we're going to duplicate our
background layer for later use (Layers:Duplicate). After the layer is
duplicated, return to the background layer by selecting it in the Layers
pallette or menu. To avoid confusion, choose Layers: View Current Only,
so that we can see what we're doing in the next few steps. Now apply a
gaussian blur (Image, Blur: Gaussian Blur) Set the radius to about 3.00.
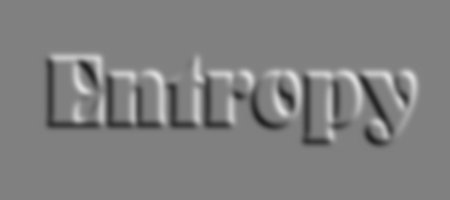
Step 3 After the blur, apply the Embossing filter (Image,
Other:Emboss). Your image should look something like the shot below.
Depending on your graphic, you may need to smooth out the grays at this
point. If necessary, you can add 6% uniform noise to remove any gradient
patterns that appear (Image, Noise: Add . Check the Uniform box and set
the slider to 6).
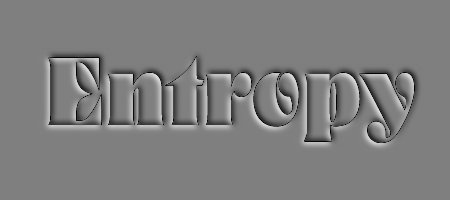
Step 4 Now we return to our second layer by
selecting it in the Layers palette or menu. In the layers menu, select
Properties. Change the blend mode from 'Normal' to 'Difference'. This
gives the basic quilted effect shown.
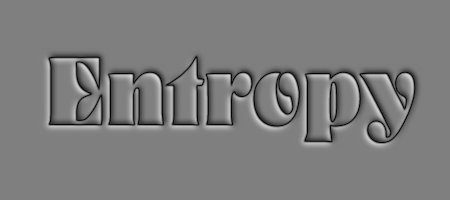
Step 5 If your shapes or text were antialiased, you
may have noticed a jagged black edge around the incised areas. To remove
this artifact and add a soft black outlline to your shape, go to Image,
Blur: Soften.
Step 6 If you want to add color to your design,
simply add a new layer to your graphic (Layers: New). Set the Blend mode
to 'Color'. Then load the selection you saved earlier (Selections: Load
from Alpha Channel) and fill with the color of your choice. Most colors
work well, but Yellows tend to be a bit murky.
Step 7 To color the outside of your graphic, simply
invert your selection (Selections:Invert) and again fill with color. Be
sure not to miss any interior areas. I find that using the Spray can set
to a large size works well for this. Filters such as Poster Gradient (from
Filter Factory Gallery V) can add additional color interest.
Step 8 With the blend mode of the second layer set
to 'Difference', you get the quilted effect shown above. Setting the
Blend Mode to 'Burn' or 'Multiply' gives an interesting raised effect.
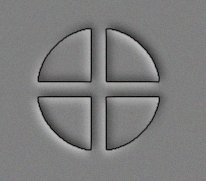
Step 9 As you can see, the effect works equally
well with drawn shapes. The graphic shown started as a black circle with
white lines drawn through it.
Espero que les sirva de algo
la ayudita
|
|
|