|
Curso de Paint Shop Pro
(PSP)
06 Botón
Step 1 Start by opening a new file, around 300 x
300 pixels will do, with 16 million colors and a transparent background.
Next click on the Shapes Tool
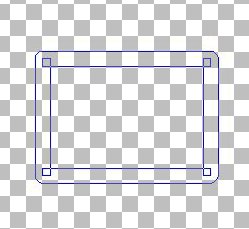
Step 2 Now draw a good sized rectangle, whatever
size you want your button to be. You'll see a blue outline figure. The
outline shows you the size of your rectangle and the width of your edges.
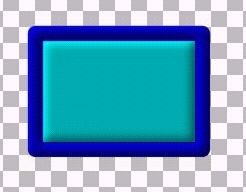
Step 3 Release the mouse and your rectangular shape
will appear. It will have an edge corresponding to your current
foreground color and a filled interior that matches your background
color. Here I've used two shades of blue. Note the deformation control
box around your graphic, a feature of the new vector shapes and text. If
you don't like the shape of your button you can deform it now by pulling
at the control boxes on the sides and corners., rotating it with the
middle handle, or apply other deformations by clicking on the side
handles while holding down the shift or control keys. If you want to
resize your button without changes the aspect ratio, right click on a
corner and move in or out. The great thing about these vector shapes is
that no matter how much you deform them they keep their nice crisp edges.
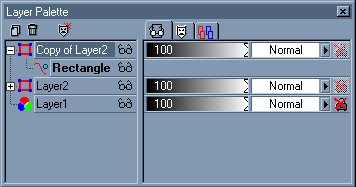
Step 4 Now to start creating that 3 D effect. First
we duplicate our rectangle on another layer. Go to the Layers menu and
scroll down to Duplicate. Or if your a palette lover, right click on the
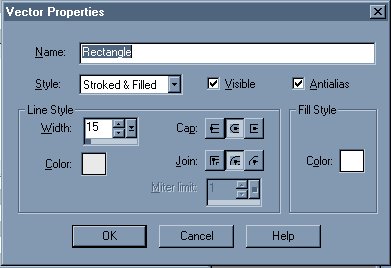
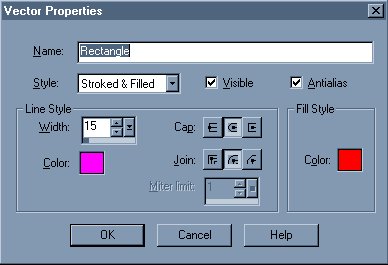
vector layer Step 5 Double click where it says rectangle and all
of the properties of the vector object will be displayed in the popup
box. From this box you can change the colors, line width, join pattern,
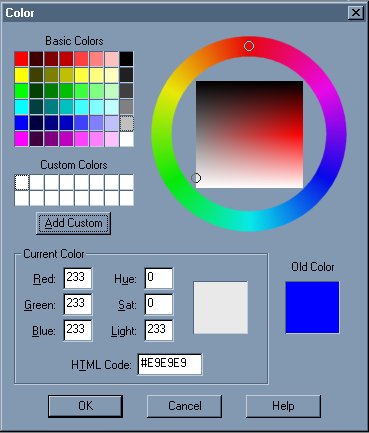
and style of your object. We are going to just change the colors. Click
on the Fill Style color swatch. A standard PSP color selection menu will
pop up. Change the color to white. Step 6 Now click on the 'Line Style Color' box. In
the color selection menu, choose the lightest gray color, and then slide
the color to an even lighter value. Be sure that you don't make it white
though. I may have overdone it just a bit here, but you want a light
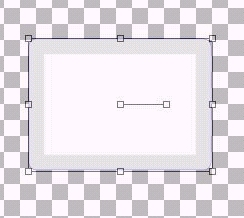
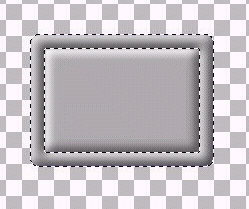
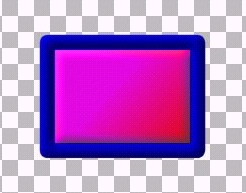
gray color. Step 7 You should now have a graphic that looks
pretty much like teh one below. A light gray edge and a white interior.
Step 8 We need to apply some effects to this
rectangle, but we can't do that while it is a vector object. We can
easily convert it to a normal raster layer by going to the layers menu
and choosing Convert to Raster, or by right clicking the layer in the
Layers Palette and choosing that command. The little control handles
around the graphic should disappear.
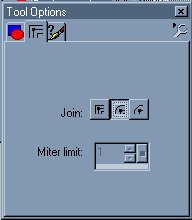
Step 9 Choose your Magic Wand from the toolbar and
click on the interior of the rectangle. if you don't get a clean
selection, turn your Tolerance down in the Tool Options palette. A
setting of 10 should work, but occasionally you may need to get lower.
If you still can't get a good selestion you may need to back up a few
steps with the Edit:Undo option and make the edge color on the rectangle
a bit darker. After you have your selection, expand it by 2 pixels to
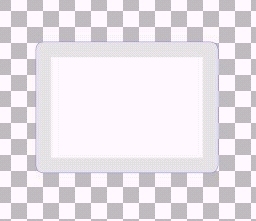
get the whole inner area (Selections, Modify: Expand). Now go to the new
Effects section of PSP 6. You'll see a bunch of stuff that wasn't there
in PSP 5. For this tutorial, you want to select Inner Bevel. The control
menu that pops up has lots of options, but we are just going to use a
preset. In the Presets drop down box, choose Pillow. Now you may want to
try some of the other presets, like Round or Metallic. I just happened
to think that pillow gave a nice effect. Your inner section should now
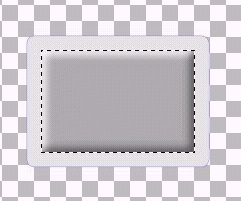
have a 3D effect to it. Step 10 Use your Magic Wand again to choose the edge
color. Again, you may need to adjust your tolerance to get a clean
selection. There is a little trick I learned that will work, however,
even if the colros are really close. Change your layer opacity to 0 (in
the Properties section of the Layers menu) and set the Magic Wand to
Sample Merged and you'll get a clean selection based on the colors
underneath. Turn the opacity back up to 100 and apply an inner bevel to
your edge. You should now have a nice two area 3D button.
Step 11 Here's where we start using that vector
rectangle that we left on the last layer. Deselect your edge if you
haven't already (Selections: None), check the Layers Palette to make
sure the top raster layer is still the selected one. Now change the
Blend Mode of the layer to 'Darken'. You can do this by accessing the
Properties Dialogue box from the layers menu or from the menu obtained
by right clicking the layer in the Layers Palette. Choose Darken in the
Blend Mode drop down menu. You might also want to try 'Multiply' as a
blend mode for a slightly different effect. What you should see is that
the colors from the lower vector shape now show through, but the 3 D
effect is still there. Step 12 Right now you're saying to yourself "So what???
It's just another button." But THIS button has easily editable color
options. Click on the + next to your vector layer with the rectangle and
then double click on the Rectangle entry. Again you get the Vector
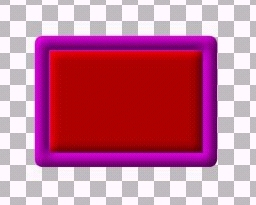
properties box. Here's the fun part. Change the colors of the line and
fill. here I've used a purple and red.
Step 13 Lo and Behold, you now have a completely
different color scheme for your button, and you didn't even have to
start from scratch. You can store this button as a .PSP file on your
drive and make new buttons anytime you want. Give them as gifts, trade
them with your friends, or zip them up for download on your graphics
site. (Okay, I'm dreaming.)
Step 14 If you really must have a gradient or other
color scheme on your button, rasterize the bottom vector layer (Layers:
Convert to Raster), select the interior with the Magic Wand, and expand
the selection by two pixels (Selections, Modify: Expand). Before you add
your gradient I would suggest coloring in the whole area with the Air
Brush tool to remove any antialiasing artifacts at the edges. below I've
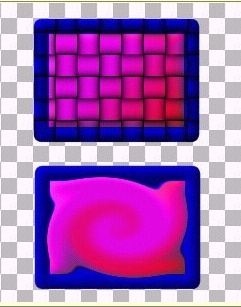
used a purple or red gradient. Step 15 Dont't forget that there are other effect
that can be applied to your button after you have merged the layers.
These two buttons were done using the Weave and Twirl effects with the
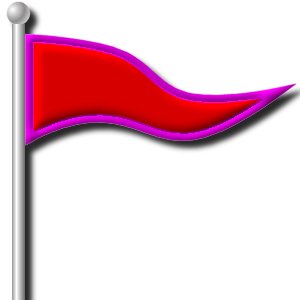
button shape selected. Step 16 Also, don't limit yourself to squares,
rectangles, or even circles. The penant shape below was done with the
point to point line tool and some Node editing (Hint, to close your
figure using the point to point tool, right click on the last node
(box), move down to Edit in the popup menu, and then choose Close). With
something like this you can change the colors to match your favorite
team.
Espero que les sirva de algo
la ayudita
|
|
|