|
Curso de Paint Shop Pro
(PSP)
01 Texto al Rededor
Paso 1 Start by opening a new file, 16 million
colors with a white background. You must start with a square graphic. I
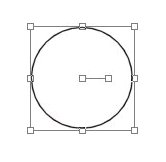
started with a file 300 x 300 pixels. Click on the shapes Tool
Step 2 Draw a circle of whatever size you want.
Remember to leave room around it for your text though. You'll notice
that after you've layed down your circle, it has what looks like a set
of deformation controls around it. That's one of the features of vector
shapes and text: they are easily deformed and don't lose any of their
definition in the process.
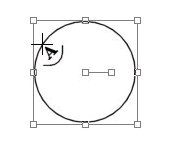
Step 3 Next, choose the Text tool and position your
cursor over the circle. You'll be able to tell when you have it
positioned correctly because the cursor will change into an "A" over a
semi-circle.
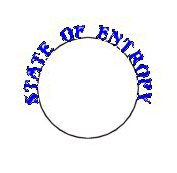
Step 4 Click to apply your text to the circle. In
the text dialogue, you have some new options. You can set the color,
font, and size of your text and can have different colors, fonts and
sizes on the same line. Make sure that the text size that you choose is
small enough to fit around your circle without overlapping. Check 'Antialias'
and 'Floating' and be sure your text is centered (In the Text menu there
are three text alignment buttons: left aligned, centered, and right
aligned). No, you do not need to use vector text to go along a path (though
you can if you really want to). Using Floating text actually makes it
much easier to use if you want to add effects. Lay down your text, and
then apply any effects (such as Blade Pro or Eyecandy) that you wish to
use. Promote the text to a new layer (Selections: Promote to Layer.)
when you're done.
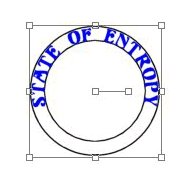
Step 5 Now here's where we put the text on the
bottom. First select the Shapes Tool again and position the cursor at
the same point that you did for the first circle. Draw a new vector
circle, this time making it large enough that it touches the top of your
text.
Step 6 Now we do something that sounds weird. Go to
Image: Flip. You shouldn't see any real change, but the interesting
thing is that when you apply text now, it will be on the INSIDE of the
circle. Choose the text tool and apply the rest of your text to the
OUTER circle. It will actually appear over the text you already layed
down, but don't worry.
Step 7 Now go to Image: Rotate. Check the box
marked 'Right' (under Direction), and '180' (under Degrees.) Make sure
that the 'All Layers' box is unchecked. Your text should flip over. Just
place it at the bottom of your circle. Promote the text to a new layer
when you're done applying any effects.
Step 8 Finally, get rid of the circles. If you look
in your Layers Palette, you should have two vector layers. They are
marked with a box
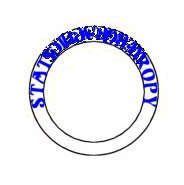
Step 9 If you want, you can now add a sphere, or
globe, or any other logo to complete the effect. I used a sphere that I
created using a technique that I will post soon.
Espero que les sirva de algo
la ayudita
|
|
|