|
Curso de Photoshop
6.0
47
Lineas Curvadas
Paso 1 Haremos un nuevo documento
(Ctrl+N). Paso
2 Creamos un nuevo
layer (Shft+Ctrl+N). Paso 3 Double click on the Line tool, in the
line options set the weight to 5 or more pixels depending on the
thickness of your wire. Paso 4 Draw a straight Horizontal line (Tip:
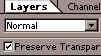
Press the shift key while drawing a line). Step 5 Click on the 'Preserve Transparency' box
for your line layer, and apply a black to white Linear gradient to the
line. Step 6 Unclick the 'Preserve Transparency' box
of the layer. Now go to the Wave filter: Filter> Distort> Wave. Leave
the options set to Default except for the ones mentioned below. Step 7 To add color, just Duplicate your wire
layer, turn on the 'Preserve Transparency', and fill the duplicate wire
with the color of your choice. Then set the color layer to either 'Overlay'
or 'Softlight'. Step 8 Now for the lighting effect: Duplicate
the colored layer and fill it with white (make sure the 'Preserve
Transparency' is ticked on before filling it). Step 9 Once it's filled, select the contents of
the layer by holding your Ctrl key and clicking the Layer name. With the
selection selected around the wire shape, choose any Selection Marquee
tool and use your arrow keys to nudge the selection down by 1-2 pixels,
depending on how thick your wire is, and hit Delete. Step 10 If you feel the highlight is too strong,
adjust the 'Opacity' of the layer, or apply a 0.5 Gaussian Blur to it.
Espero que les sirva
de algo la ayudita
|
|
|