|
Curso de Photoshop 6.0
24 Planeta
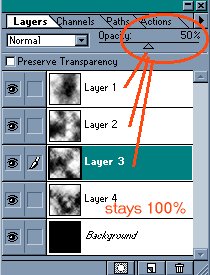
Step 1 Create a new document 100x100 pixels. Fill the Background/Layer 1
with Black. Create a new layer. Fill the layer with 50% Grey. Duplicate
this layer 3 times. For simplicity rename the layers like Example 1. Step 2 Use Difference Clouds Filter on Layer 1: Filter> Render> Difference
Clouds, ensure default colors are chosen by typing "D" . Step 3 Spherize Layers 1,2,3 and 4: Filter> Distort> Spherize - 100%,
Normal. Use the Circle Marquee tool choose an area of Layer 1 that
includes the area that was spherized but does not touch the sides of the
picture. Invert the selection: Shift-Control-I. Hit the Delete button.
Choose Layer 2 and hit Delete. Choose Layer 3 and hit Delete. Choose
Layer 4 and hit Delete. Deselect: Ctrl-D. Increase the size of the
canvas: Image> Canvas Size - 200x200 pixels. Fill the Background with
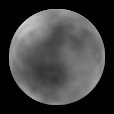
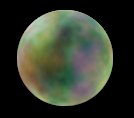
Black again. Your picture should look something like this:
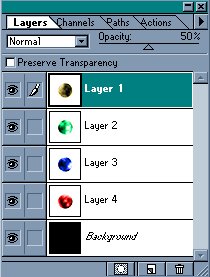
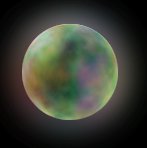
Step 4 Before starting this step, make sure you are in RGB mode. Tick 'Colorize'
case in Hue/Sat. menu. Adjust the Hue/Saturation of Layer 4: Control-U -Hue=0
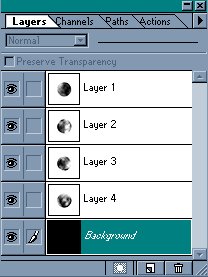
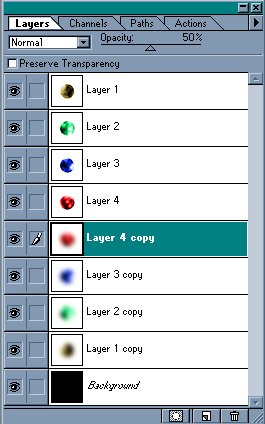
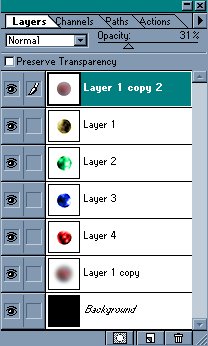
(Red). Your picture should now look similar to this: Step 5 Copy Layers 1,2,3 and 4, placing the layers in the order shown in
image below. Step 6 (a subtle difference) Flatten the four blurred layers into one layer by choosing Layer 4
Copy and hitting: Control-E three times. Copy the flattened level you
created and move it to the top of the Layers list.
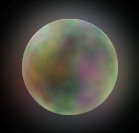
Espero que les sirva de algo
la ayudita
|
|
|