|
Curso de Photoshop 6.0
12 Mover el
objeto Step 1 Before trying this tutorial please check out the
First Animation Project of the site to get familiar with the
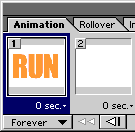
working of Image Ready 3.0 Step 2 The layer palette of photoshop will look like this. Observe it
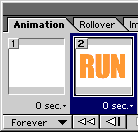
carefully. Save your file. Step 3 Figure1:File > Jump To > Image Ready 3.0 Figure2: Drag the first frame to the right so the place of
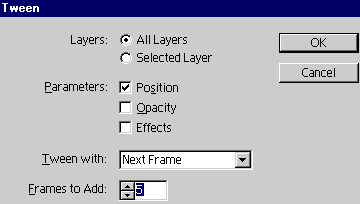
the frames will be interchanged. Step 4 Select the first frame. In the Animation Palette click the small
triangle at right top. Click Twin. The dialog box will appear.
Select the number of frames you want to add for animation. Click OK.
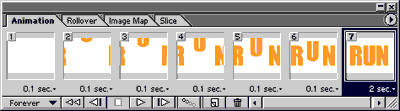
Step 5 The Animation palette will turn into this. Step 6 There is a small black triangle at the bottom of each frame in
the Animation palette. It is used to set the time. Click it and set
the time. You can select any number of frames at a time by pressing
Shift and set the same time for the selected frames.
Espero que les sirva de algo
la ayudita
|
|
|