Para ver la explicacion hagan un
click sobre los diferentes íconos
2 Efecto Sangre
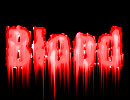
Step 1
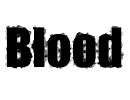
Create new file with 72 PPI and white background. The
mode has to be Grayscale. Type the text with thick font.
We have used impact.

Step 2
Select > Load Selection (Choose Layer Transparency)
Layer > Flatten Image
Select > Inverse
Step 3
Figure 1: Filter > Pixelate > Crystallize (cell
size 4)
Select > Inverse
Figure 2: Noise > Add Noise (Guassian, Monocromatic,
Amount 70)
Blur > Guassian blur (Radius 2.0)
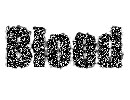
Figure 1 |
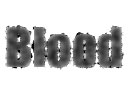
Figure 2 |
Step 4
Image > Adjust > Curve (make the curve as shown in fig.)

Step 5
Figure 1: Press Ctrl + D to deselect
Image > Adjust > Invert
Figure 2: Image > Rotate Canvas > 90 CW
Filter > Stylize > Wind
Method : Wind Direction : From the Right
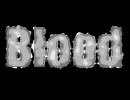
Figure 1 |
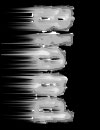
Figure 2 |
Step 6
Image > Rotate Canvas > 90 CCW
Image > Mode > RGB
Image > Adjust > Hue Saturation
Click Colorize
Drag the Saturation slider to 100
Drag the Lightness slider to -5
|
|
|
Espero que les sirva de algo
la ayudita

