 |
|
|
|
|
|
|
|
|
|
|
|
|
|
|
|
|
|
|
|
|
|
|
|
|
|
|
|
|
|
|
|
|
|
|
|
|
|
|
|
|
|
|
|
|
|
|
|
|
|
|
|
|
| index |
|
|
Due to Yahoo bandwith limitations and this site being continuously locked down to exceeding bandwith, I have built a new site at the below link. I will be completing the build photos and narrative at both sites. |
|
|
|
Final Site Update
09/07/08 |
|
|
|
|
|
|
|
|
http://marksa1458.myhosting247.com/index.htm |
|
|
|
Dyno Jet by Glen-L |
|
|
|
 |
|
|
The Dyno Jet is a small runabout boat powered by a Jet Ski engine and Pump.
Charteristics:
Length Overall 11' 1" Beam 5'6"
Hull Depth 18" Hull Weight 125 pounds
My goal is a speed of 35 mph and the ability to pull tubes and kneeboards.
|
|
|
|
|
|
|
New |
|
|
|
1 |
2 |
3 |
4 |
5 |
6 |
7 |
8 |
9 |
10 |
11 |
12 |
13 |
14 |
15 |
16 |
17 |
18 |
19 |
20 |
21 |
22 |
23 |
|
|
Page |
|
|
|
|
|
|
 |
|
I am terrible at taking pictures but I am doing my best to keep a picture log of the activity up to date. First and foremost I have to thank my wife, who's untiring patience has allowed the time needed to tackle this project. She also has a great nack for diverting my son's attention! I also have to thank Morgan who's help has been instrumental in keeping this project going.
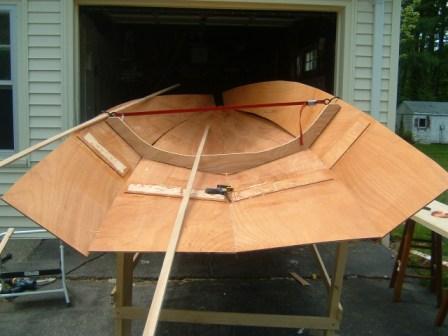
Picture 1 is actually several days into the project. The plywood has been cut, encapsulated with Epoxy and butt-joined. I am beginning to stitch the panels together. This went fairly well even though I had come down with a nasty stomach bug and it was a very humid day. |
|
|
|
|
|
 |
|
More stitching complete, you can start to see the hull shape coming together.
I am concentrating on adding pictures, so I will add more comment later. |
|
|
|
|
|
|
 |
|
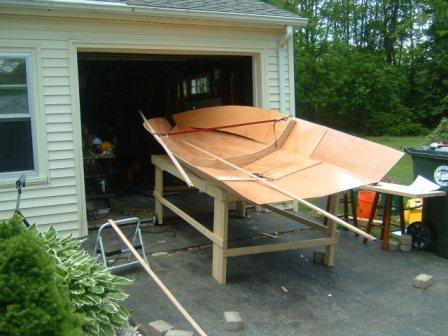
| Another Angle |
|
|
|
|
|
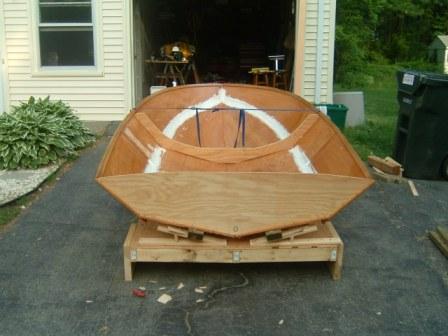
| As I said, I am terrible at taking pictures, this is quite a bit further along in the project. The picture is small, but you can see the chine rail along the top of the side panels. This was interesting to install as the white oak not only has to bend in, but also has to bend down. I started at the bow working very slowly to the transom. I pre-drilled and installed drywall screws every four inches. After the sheer was in, I removed the drywall screws in increments of 4, coated the sides and sheer with epoxy and installed brass screws. After the sheers were complete, I put down the inital coat of epoxy fillets on the chines. You can see the initial hull shape and the first fillet and see the angles of the boat. Filleting is an art that I still haven't mastered. |
|
 |
|
|
|
 |
|
|
|
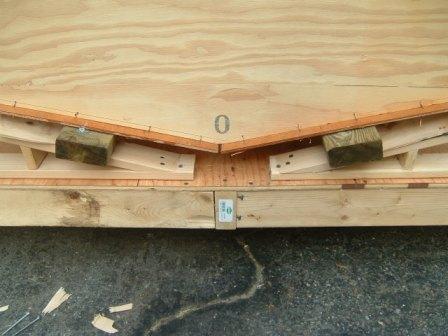
| Here you can see transom stitched to the bottom planking. Knowing what I know now (that saying will become a common theme...) When we were fitting up the motor (shown later) we needed every available inch we could get, it would have been better to bring the transom to the very end of the plywood. It would have also been better to make the boat a little longer... |
|
|
|
|
|
Email me @ [email protected] |
|
|
|
|
|
|
Next |
|
|

|
|
|
|
|