'Chloe' - our Van conversion

Home
Background
First Steps
Purchase
Start Conversion
Mock Up
Seats
Cab Floor
Electrics
Reversing Camera
Fridge
Floor
Cooker and Sink
Toilet
Walls
Roof
Cab
Step
Bed
Awning
Wardrobe
Insurance
Bike rack
Windows
Costs
Conclusions
Links

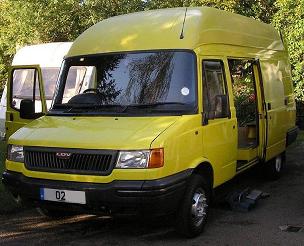
Welcome to our project to convert our shiny 'little' yellow van into a de luxe camper. Hopefully I will have time to describe the myriad steps both for our own amusement and to maybe help some others. Quite why a heavy solid vehicle designed to carry tons became a delicate lady is beyond me, but the name does help us remember the number plate.

We bought the van 26/9/07 and finally we had our first outing on 20th March, have a look here

  • After one month on 26/10/07...
    • we had had the van checked over by our mechanic and a new flywheel installed at a cost of (gulp) �800
    • fitted one swivel seat in place of the original double passenger seat
    • widened the gateway to the drive (while the van was at the garage
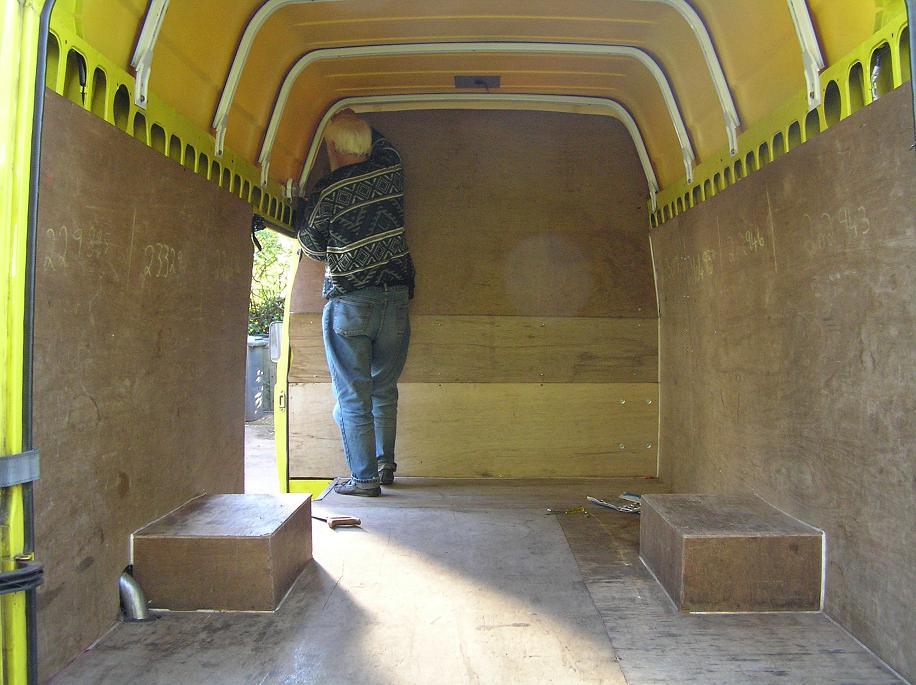
    • removed the relevant bits from the caravan but achieved little else apart from the first mockup of the layout
    • The van was dotted with bits of zinc primer, had bits of dashboard spread everywhere, had mats drying in our estate car, still had a leak so we will probably have to replace the windscreen rubber and endless tasks started but nowhere near completed.

    So far we have had to drill one hole (for a seat bolt) in the shell of the van (scary moment!).
    We have now spent �4,161 with probably another �2,000 to come. Oh dear. Plus, I have worked 175 hours (in addition to days spent widening the gates!) so at �5ph this would add �875 and if I were to pay myself a more decent (albeit fictitious) salary of �40ph (like most garages) it would add �7,000. So the real cost is somewhere between �5,000 and �11,000 - so far.

  • After 2 months on 26/11/07...
    In addition to the one hole from last month, we have had to cut seventeen more holes in the shell of the van (one seat bolt, three screw holes for the handbrake cover, two bolts and one cable feed for the camera, one large fridge vent, one drainage hole for the sink with two bolt holes, one gas cupboard vent, one large hole for the water inlet and 4 bolt holes to fit it).
    We have now spent �4,325 still with �1,500 to �2,000 to come. This month I ended up with 9 hour days rather than 10 hour days when the light lasted longer, so a mere 194 hours. So the total hours spent to date is 369. So at �5ph this is �1,845 and at �40 it is �14,760. So the real total cost is somewhere between �6,000 and �19,000 - so far.

  • After 3 months on 26/12/07...
    In addition to the eighteen holes from previous months, we have had to cut 15 more holes in the shell of the van (one massive hole for the fridge vent with 8 bolt holes, one chimney hole for the fridge with 4 bolt holes, one ginormous hole in the roof for the roof window, two bolt holes for the step).
    We have now spent �4,634 with maybe �1,000 to come. This month I ended up with mere 8 hour days due to lack of daylight and with Christmas events, managed a bit less work. So another 120 hours making the total hours spent to date 489. At �5ph this is �2,445 and at �40 it is �19,560. So the real total cost is somewhere between �7,000 and �24,000 - so far.

  • After 4 months on 26/1/08...
    In addition to the 33 holes from previous months, we have had to cut four more holes in the shell of the van (one hole for the vent and 3 bolt holes).
    We have now spent �4,664 still with �1,000 to �1,500 to come. Another 128 hours making the total hours spent to date 617. At �5ph this is �3,085 and at �40 it is �24,680. So the real total cost is somewhere between �7,700 and �29,000 - so far.

  • After 5 months on 26/2/08...
    Definite progress, however, in that for the first month, I've avoided cutting any more holes in the van shell!
    We have now spent �4,999 but the bulk of the spend is now completed, maybe another �500 to come. Another 189 hours making the total hours spent to date 806. At �5ph this is �4,030 and at �40 it is �32,240. So the real total cost is somewhere between �9,000 and �37,000 - so far.

  • After 6 months on 26/3/08...
    So finally, we have a working campervan. There are still plenty of things to do, but at least we can now use the van and knock the remaining items off one by one. We had our first outing on 20th March, have a look here.
    We have now spent �5,383, maybe another �500 to come for the windows, mattress etc. Another 190 hours making the total hours spent to date 995. At �5ph this is �5,000 and at �40 it is �39,800. So the real total cost is somewhere between �10,000 and �45,000.

  • After 7 months on 26/4/08...
    We have now spent �5,268, and the only remaining significant expense is the fitting of the windows, for which I think we have found a friend of a friend About another 160 hours this month, which is largely time for the interior decoration department ie Yvonne (who forgot to keep count). So the total hours spent estimate for the whole build is about 1200. At �5ph this is �6,000 and at �40 it is �48,000. So the real total cost is somewhere between �11,500 and �55,000.

  • After the frenetic activity of the main build, things settled down. We slowly got the inside trimmings of bits of carpet sorted out and the windows fitted and the bike rack installed. Every time we go out in the van we come back with another list of things to do. But pretty much the list becomes full of more and more trivial items.


    More or less in chronological sequence, these were the various steps:

    Click here to get the background to the project.

    First steps were planning and layout design, to decide what van to buy

    The van purchase came eventually after endless work on the internet over the summer of 2007 - on 26/9/07

    First work to strip out the van and see if our layout worked

    Mock up of the layout

    Seats purchase, fitting, swivelling and so on

    Cab floor problems of soggy carpet, rust and horrors

    Electrical circuit and components

    Reversing camera plus screen and wiring

    Fridge cupboard construction and then positioning and cutting of vents

    Floor insulation and boarding

    Cooker and Sink unit

    Toilet compartment

    Wall insulation and cladding

    Roof insulation and window

    Cab roof cupboard area

    Step attached to the underside by the sliding door

    Bed frame sections

    Awning bought from EBay

    Wardrobe fitting

    Insurance and other paperwork

    Bike rack fitting to vack door

    Windows in the side an back doors

    Costs versus budget

    Conclusions some thoughts, ideas, notes that might be helpful

    Email Dennis Wheeler if you wish to comment or ask questions

    Links to other sites

    Hosted by www.Geocities.ws

    1