In order to get the layout right, so we could check the 'living' space, we had first to fit the swivel seat(s).
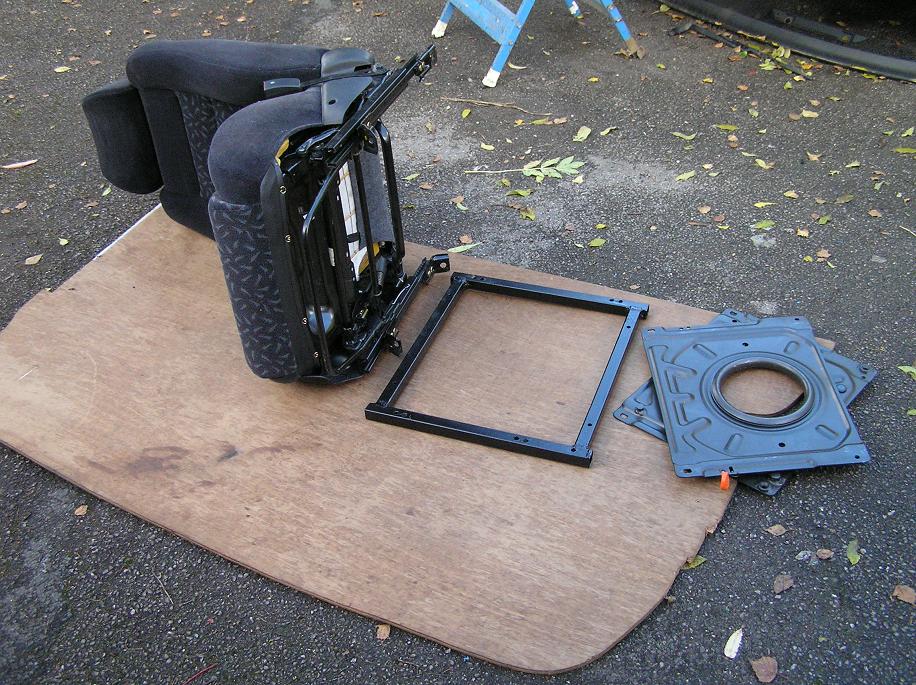
I got two seats from the dump for �10 each. I was not sure if they would fit, but probably OK. Clearly they would need a frame made to fit to support them. Then I bought 2 swivels from Marcle (see links) and I was not surprised to find that there were none made for the LDV. It is the penalty for not choosing a more common van like a Transit. I bought two (�170) for a Ducato and gambled that I could make them fit.
But, after a week of trying to dry the seats out, they still had big stains, so I took them back to the dump and got two more that were better - no cost, just a swap, what a nice breakers yard. Having cleaned them up (finding �1.30 in the process, so these seats have been great value!) I needed to cut off the current fittings and make new ones to fit the swivels.
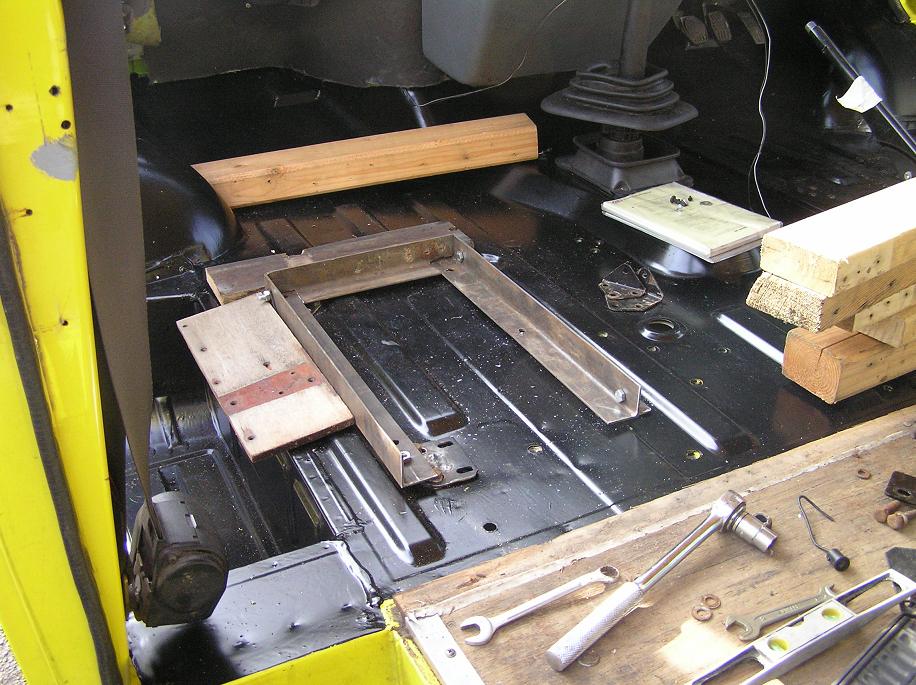
In removing the old seats we found a very wet foam carpet on top of standing water and rust, as here
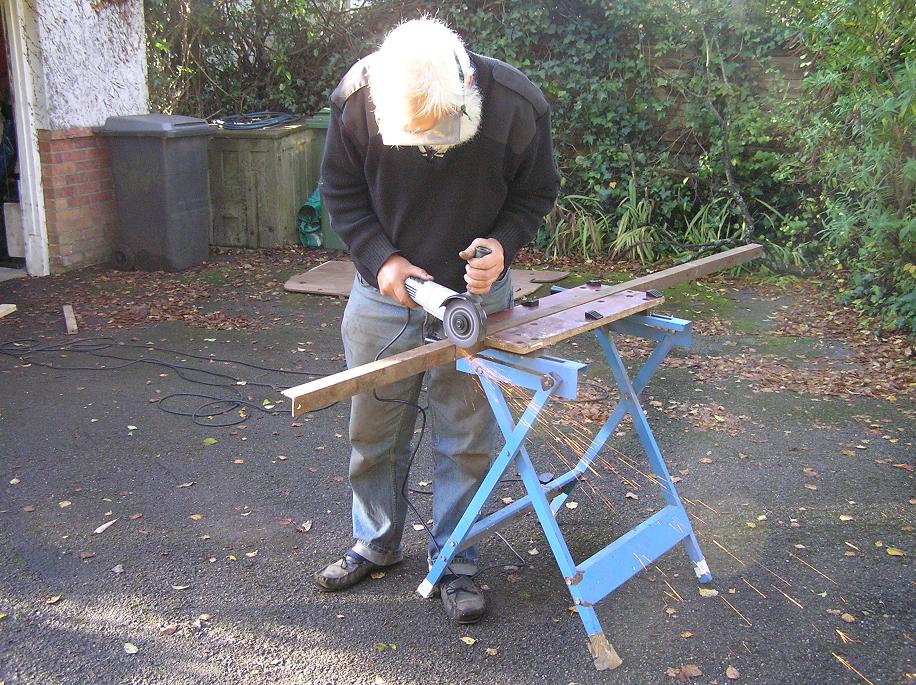
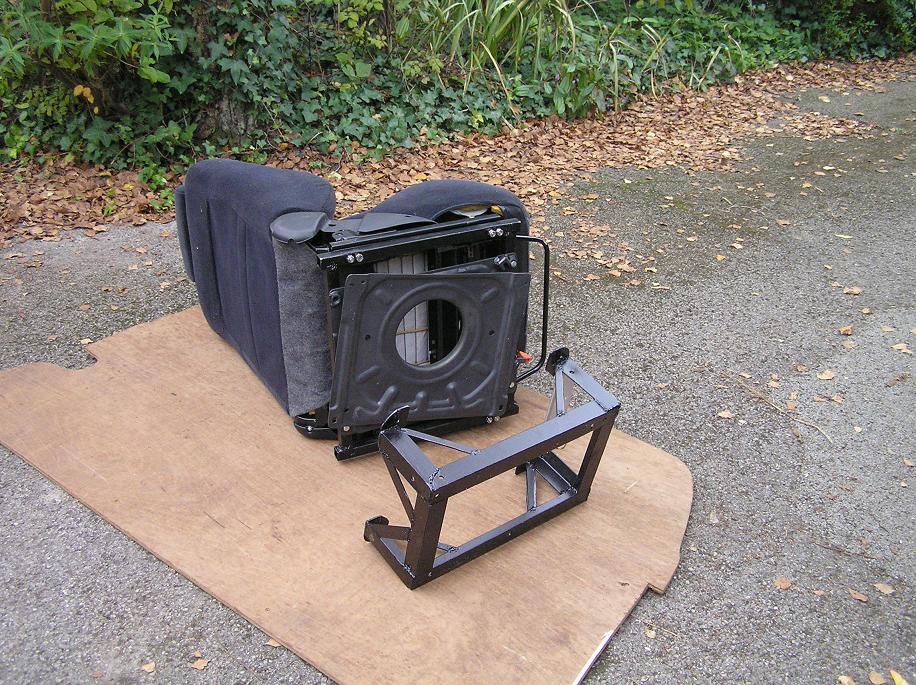
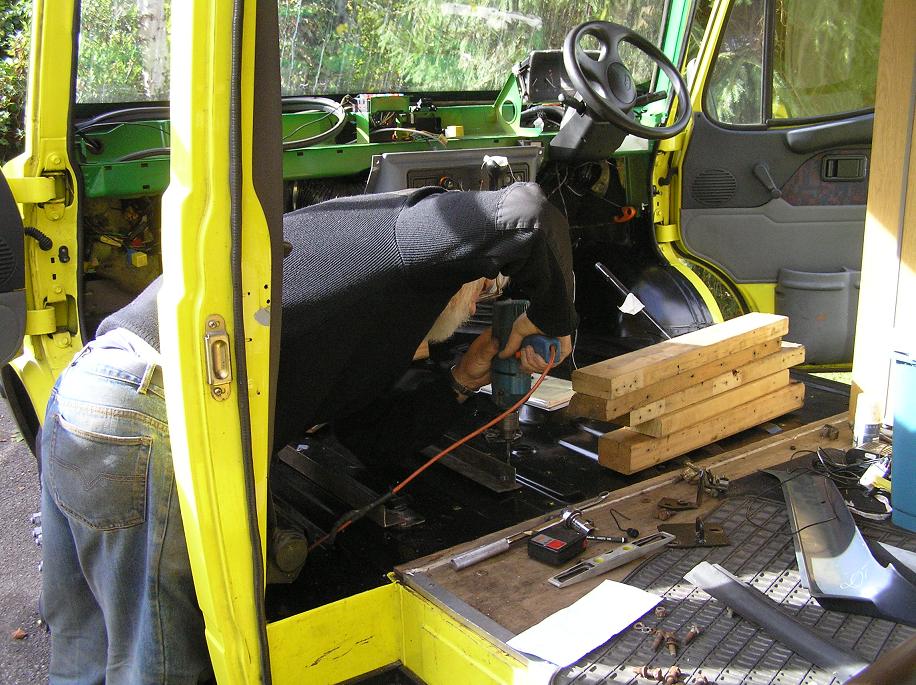
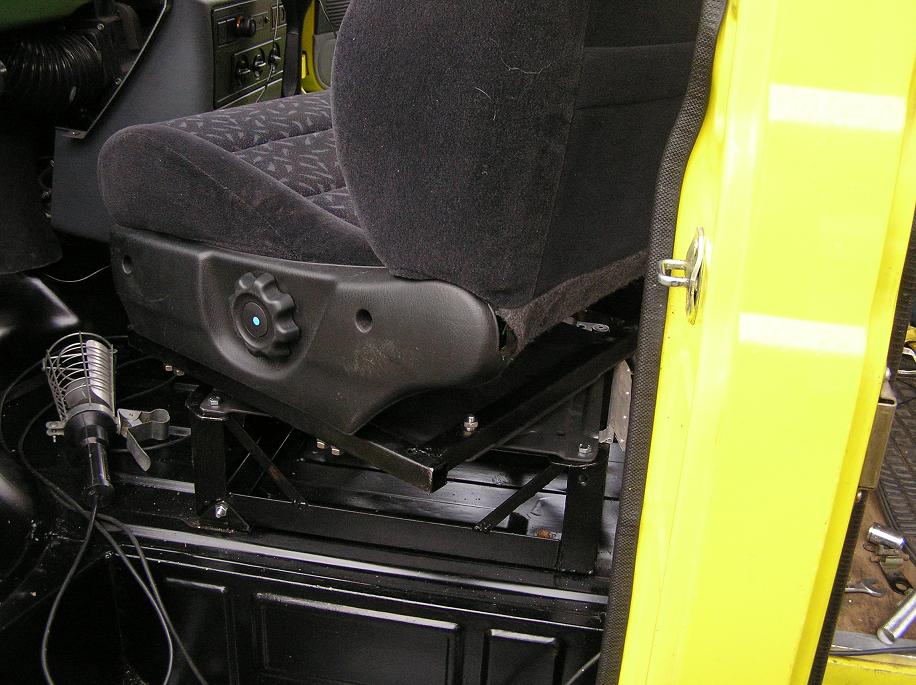
Having got some usable seats, I made a rectangle of box section, salvaged from the frame holding the bulkhead of the van. It was hard to get the bolts to line up perfectly and if they didn't line up, the sliding mechanism of the seat was not freely moveable.
With hindsight, I'd have used a heavier steel and a flat plate rather than the box section.
So the box fitted to the seat and the top of the swivel and then I made an angle iron frame, c 6" high to fit back to the original mounts. In practice, I could reuse the front two mounts and rejig one of the rear ones, but the fourth had to be constructed. This meant drilling our first hole in the van - scary. Mind you there are 56 holes in the cab area for myriad mounts or whatever, so an extra one is hardly worth worrying about.
The box section was a lot of cutting and welding, but I doubt this will end up as the weak point. Within the box is a small cupboard.