The initial things to do were to
- Strip out the plywood cladding and the naff bulkhead.
This revealed a dirty, but rust free interior, thank the Lord. The plywood over the wheel arch was attached by a couple of rusty screws though and so these needed sorting. (The plywood floor would come up later, once we'd done the interior mock up, to be sure it's in good condition and to lay insulation). - Check inside and out for things that needing fixing.
I found a few rusty bits which I touched up but nothing major. I did see that the belts that stop the rear doors swinging too far open keep getting caught in the door jam and hence some rust there - another thing to fix sometime.
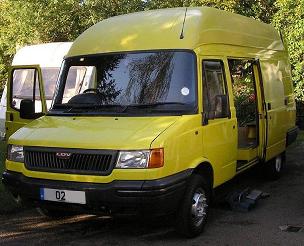
And now we understand better the difficulties of an LDV. It is hard to get the parts. I kind of expected this, but I thought buying paint would be easy enough, but the LDV doesn't figure in any of the paint books at local shops and the local dealer was not overly helpful. But with a link from the lovely SBMCC site to a paint shop that offered a discount, I discovered that the paint code translated to an ICI paint Canary Yellow. More work on the internet linked Dulux to ICI and an email told me that the paint was discontinued, but could be mixed in the shops and they sent me the paint mix code. So I got a tin and waited for some dry weather to try it out ...
Having tried the paint, it was nowhere near the right colour. So I went back to Homebase and complained long enough for them to offer me another tin half price. It seems they can scan in a colour and then mix it to match (98% correct they told me), but their scanner was broken ...
Of course to scan the colour, it needed to be clean, so I washed the bonnet (and hence found more leaks!), and then used the colour restorer stuff and then polish. Those of you who know how clean I normally keep my car, will know that this was a rare treat indeed for the little van.
The next week (with scanner back in action) I took off the bonnet and carried it in to be scanned. If I'd known they could do this, I'd have done that in the first place! Having carted the bonnet around the supermarket and bought the revised colour, and waited for a fine day... it is now all touched up and the colour match is pretty darned good. I reckon this is a good way of buying car paint, if you have ways of removing bits of car to take to the supermarket! - Move the spare wheel out of the van and fit a cradle underneath
This van came with that done already - yippee! However when I looked at the spare, I saw it was pretty well bald and when I pumped it up, the air rushing out of the hole in the tyre was more than the air pump could pump in. Why was I not surprised? Off to the dump to get a secondhand tyre for �15. - Get our friendly local mechanic to service and check over the engine etc.
Ho hum, well I did expect some work, and I suppose I should be happy that he thinks the van is in basically sound shape. However, he found the flywheel was breaking up. It seems that LDV used a dual mass flywheel with two parts, one denser than the other, and it was a duff idea - after a while they break up. They decided to re-engineer them as a single mass, because they basically didn't work. The normal thing to expect is that it is a problem with the starter motor - we checked the history again and, yes, a new one had been fitted, so best guess is that our vendor knew of this problem, fixed the easy (aka cheaper) bit and was pleased to avoid the bigger expense.
The cost was �803, including a new tyre that had 2 punctures and a shock absorber.
Not staggeringly good news, but not completely unexpected that some costs would be involved. Let's hope that this is the end of the bad news - but I'm not holding my breath! - Mock up the interior to see if the plan will really work.
- In order to complete the mockup, I needed to get the front seating right
- Meanwhile, for the week the van was with the garage, I digressed into widening our drive to make reversing in easier, which meant demolishing one of the brick gateposts, and digging out new footings, and removing a tree that was in the way, and digging out its roots, and rebuilding the post a foot back, and pointing the bricks, and laying rubble and brick on the wider drive section, and welding on two extra bits to the outer side of each wrought iron gate to fill the new space (cut from the sides of a pair of very similar gates given us years ago by a neighbour) and then, of course, having to clean and paint the whole lot ... (and a very good job he made of it too :)) - though he has yet to concede the need to widen the drive itself the rest of its length to give him the full turning space needed (sparing the border shrubs en route) to get the van parked in its bay in front of the porch!- Ed.)