
Software
Hard drive is categorized according to its interface. The older interface is known as Parallel ATA (PATA) while the newly developed few years back is Serial ATA (SATA). The former interface of hard drive seems to be phasing out soon as the popularity of the latter hard drive is steadily increasing. In terms of performance, SATA hard drive performs at higher transfer rate of 150Mbps, faster than the traditional PATA hard drive with maximum transfer rate of 133Mbps. Nevertheless, the prices of both type of drives are almost comparable. In simple words, more performance for the same buck. In addition, the new SATA2 drives with 300Mbps transfer rate are available in the market.
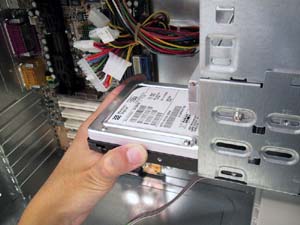
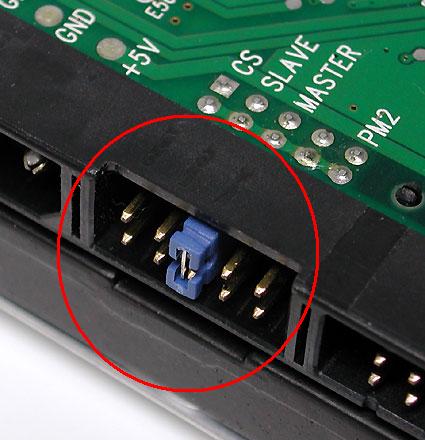
Insert the hard drive into any empty 3.5" drive bay. Secure it with at least 2 screws. Adjust the jumper setting for the appropriate choice of master or slave, or leave it at cable select.
Click to enlarge
Step 1
Click to enlarge
Step 2
PATA Hard Drive Installation
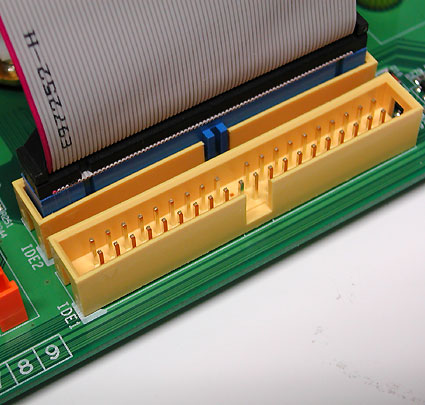
Connect the end of either master or slave of the PATA cable, preferably ATA-133 80-pins, to the hard drive while the other end to the PATA interface on the main board.

Click to enlarge
Step 3a
Click to enlarge
Step 4a
SATA Hard Drive Installation
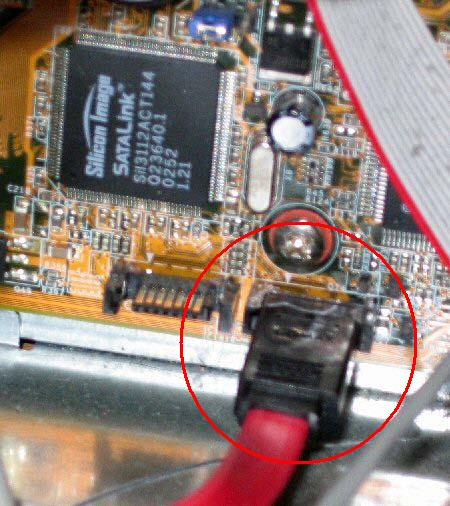
Connect any end of the SATA cable to the hard drive while the other end to the SATA interface on the main board.

Click to enlarge
Step 3b
Click to enlarge
Step 4b
©2006 CHC Team