
Software
Chassis have different type depending on main board sizes or users' preference and chassis sizes. In general, there are two types:
Main board size:
- ATX (Advanced TX)
- Micro ATX
- ATX
- Extended ATX
- BTX (Balanced TX)
- Micro ATX
- ATX
- Extended ATX
Chassis size:
- Full Tower
- Medium Tower
- Cubic
- Flatbed
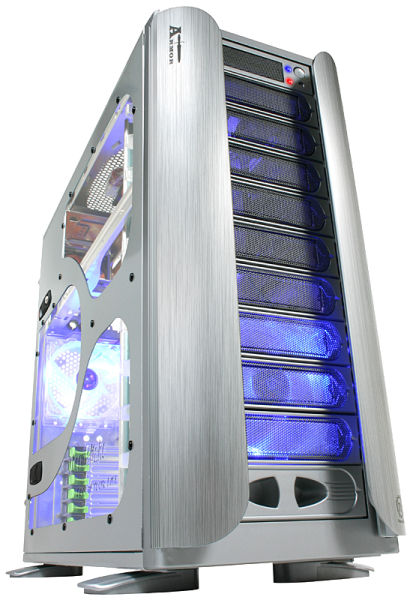
Click to enlarge
This is Thermaltake Armor ATX and BTX compatible full tower casing. Its cost might hurt your wallet a little, but it is one of the most reputable besides Cooler Master's CM Stacker 830. Anyway, an economical casing with decent amount of expansion slots and good internal airflow would do the trick. It is not necessary to have an enthusiast casing except for case modders or overclockers.
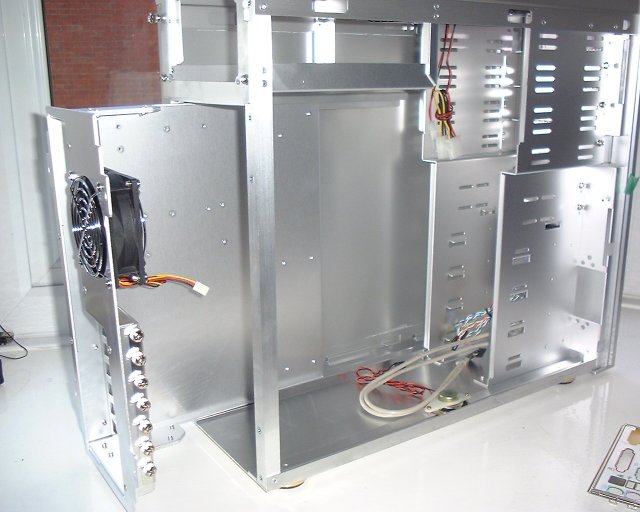
Click to enlarge
Let's get started. The first step is to inspect the chassis for any damages inflicted during transportation or delivery. If everything is green, use a screwdriver or just simply use your hand is thumbscrews are provided to remove the side panels and main board tray. Do take note that not all chassis have removable main board tray.
Make sure the side panels and main board tray are well placed. You do not want them end up being crushed or damaged especially the windowed side panels.
©2006 CHC Team