Design By Renee
FirstSteps2Alottafun Lesson Eight Part Two The Script
Please Note***These pages will be
graphic intense, they will take a while to fully download. Use your refresh button to
reload the page to check for updates on this page. ...Renee
The Script
This script is a Left Border Multi-Image Transition Scroll. Which means that we will have 3 images that will fade from the first image to the second, then to the third, then it begins again. Portrait position graphics work best for side border scrolls.
FirstStepper's Click Here To Download Script
**Note, The screen captures for how to get your copy of the script are the same as previous lessons.. They are still the same for lesson eight.
Please follow these directions step by step.
1. Click above for script.
2. It will open to a blank html page that will be showing a white background and
scrolling boxes that have a red x in them.
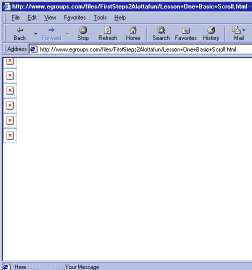
Next click view/source.
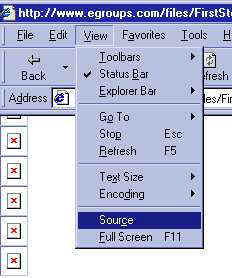
This will open up Notepad with the text version of the script.
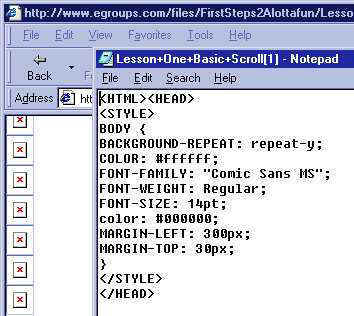
We will need to save this to the firststeps scripts folder we created.
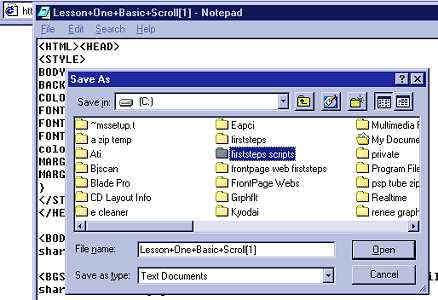
Click file/save as and open the path to your folder, and save the text file.
You can now close the windows. We are going to go to that same folder and re-open
that text file that we just saved. Go to start/program files/windows
explorer/c:/firststeps scripts/ and double click on the file you just saved to open it. It
will open in Notepad. We are going to make a copy of this text file to enter
our stationery in. Make it a rule to Never work on the original.
Now, right click anywhere inside the Notepad window and click on select all...
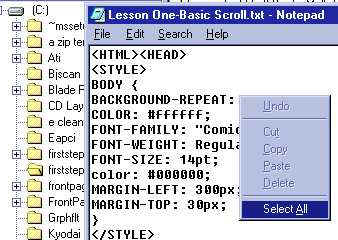
This will highlight all the text a dark blue. Now right click again in the window and
click copy...
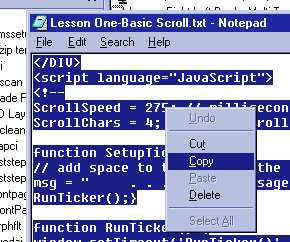
This places a copy of the text file on your clipboard. Close the windows. Now click
the shortcut to Notepad that we created at the beginning. This will open up a clean file.
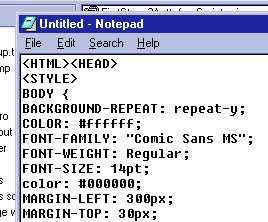
Right click anywhere inside the window and click paste.
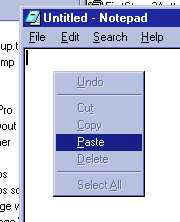
You should now have a copy of the script.
Ok, with that all done we are ready to enter our stationery
into the script!
Just follow the directions. Remember this, there is NO room for error in scripts.
Even a dot in the wrong place will create a script error window. You must become familiar
with the script and where you are making the changes. Go step by step and change where I
have instructed you to do. This should feel a little more familiar to you.
So if you are ready, let's do it!!
The Script
<HTML><HEAD>
<STYLE>BODY {
This section tells you what color is the first loaded
into the computers viewer. It is actually the color behind your stationery. I put mine at
the main color I chose for my background. Most computers will show this color before the
actual stationery.
BACKGROUND-COLOR: #ffffff;
This is the color you want your font to be seen on
your stationery.
COLOR: #000000;
The font family describes the font you want to use and
see in your stationery. But know this, if the receiver does not have the same font in
their fonts folder, they will only see their "default" font on your stationery.
FONT-FAMILY: "Comic Sans MS";
Font size is determined by what font you choose, some
fonts at 14pt are really small, and some are a normal reading size. Determine this by the
font you are choosing. If you change the font size here, since 14pt is "normal"
there is sometimes a place down in the script you will need to change to match or it will
not change. It is in this script. If you change the font size here, scroll
down below and change it also.
FONT-SIZE: 14pt;
Place the margin at the width of your graphic. ***Tip:
If your margin is right up against the graphic, down below in the image
width and height, add 10 pixels to the width of your graphic. It will fool
the script!!
MARGIN-LEFT: 250px;
MARGIN-RIGHT: 0px
}
</STYLE>
</HEAD>
Your background image is what will cover the whole
background. The bgColor is
the same as you entered above. It's the color your viewer will put behind
your stationery.
<BODY background="file://C:\Program Files\Common Files\Microsoft Shared\Stationery\IMAGEBKG.jpg" bgColor=#000000>
This is where your first image for the border scroll
will go. Be sure and put in the height and
width. ***Add 10 pixels to width on each
image, to move font 10 pixels over from each image
<IMG id=bkg1 src="file://C:\Program Files\Common Files\Microsoft
Shared\Stationery\YOUR IMAGE.JPG"
style="position:absolute;top:0; HEIGHT: 300px; LEFT: -1800px; WIDTH:
250px">
This is where your second image for the border
scroll will go. Be sure and put in the height
and width. ***Add 10 pixels to width on each
image, to move font 10 pixels over from each image
<IMG id=bkg2 src="file://C:\Program Files\Common Files\Microsoft
Shared\Stationery\YOUR IMAGE.JPG"
style="position:absolute;top:0; HEIGHT: 300px; LEFT: -1800px; WIDTH:
250px">
This is where your third image for the border scroll
will go. Be sure and put in the height and
width. ***Add 10 pixels to width on each
image, to move font 10 pixels over from each image
<IMG id=bkg3 src="file://C:\Program Files\Common Files\Microsoft
Shared\Stationery\YOUR IMAGE.JPG"
style="position:absolute;top:0; HEIGHT: 300px; LEFT: -1800px; WIDTH:
250px">
Have your midi in your stationery folder and making
sure the titles are exact enter your midi here.
<BGSOUND balance=0 loop=99 src="file://C:\Program Files\Common Files\Microsoft
Shared\Stationery\YOUR MIDI.mid">
<SCRIPT language=VBScript>
REM *** MULTI-LEFT-BORDER-TRANSITION SCROLL SCRIPT ***
REM Edgar V. Poirier
REM [email protected]
REM Thanks to G�rard Ferrandez for the idea ; )
REM August 14, 1999
Dim w, wW, wH, sH, wx, bH, myTimer, Res, vFlag, numLayers
Dim pW(), pH(), x(), y(), xD(), yD(), numPics(), chkPics()
Set w=document.body
REM *** Enter the number of image Layers here ***
numLayers=3
reDim pW(numLayers), pH(numLayers), x(numLayers), y(numLayers), xD(numLayers), yD(numLayers), numPics(numLayers), chkPics(numLayers)
REM *******************************
REM * Set Scroll Direction Below *
REM * For Scroll-Down (yD(x)=1) *
REM * For Scroll-Up (yD(x)=-1) *
REM *******************************
In the section below it determines which
direction you want your scroll to go. A number one (1) scrolls the border
"DOWN". A number minus one (-1) scrolls the border
"UP"..
yD(1)=-1
yD(2)=-1
yD(3)=-1
REM Initialize
sub setUp()
REM Get window dimensions
wW=w.clientWidth
wH=w.offsetHeight
REM Repeat to fix an OE bug
wW=w.clientWidth
wH=w.offsetHeight
sH=w.scrollHeight
REM Set the scroll Width and Height
bH=wH
if sH>wH then bH=sH
for L=1 to numLayers
y(L)=-(pH(L))
chkPics(L)=numPics(L)
REM Adjust number of pics for message length
if int(bH/pH(L))>numPics(L) then
chkPics(L)=int(bH/pH(L))+2
data=""
for i=numPics(L)+1 to chkPics(L)
data=data&"<IMG src='"&document.all("bkg"&L).src&"'>"
next
document.all("box"&L).insertAdjacentHTML "BeforeEnd", data
end if
REM Limit visible area
REM *** IMPORTANT ***
REM IF IMAGES ARE NOT SAME WIDTH, REPLACE NEXT LINE WITH;
REM container.style.width=???
REM Enter the largest width after the = instead of ???
container.style.width=pW(L)
container.style.height=bH
container.style.left=0
container.style.top=0
REM Set the size of the scrolling area
document.all("box"&L).style.height=bH+3*pH(L)
document.all("box"&L).style.width=pW(L)
document.all("box"&L).style.left=0
document.all("box"&L).style.top=y(L)
next
REM Start the first transition
REM after 8 seconds
SetTimeOut "flipIt", 8000
REM Start the scroll.
SF
end sub
REM Image transition
sub flipIt()
container.filters(0).Apply()
document.all("box"&vFlag).style.visibility="hidden"
vFlag=vFlag+1
if vFlag>numLayers then vFlag=1
document.all("box"&vFlag).style.visibility="visible"
container.filters(0).Play()
end sub
REM Come here after after a transition
sub container_onfilterchange()
REM Do the next transition after 15 seconds.
SetTimeOut "flipIt", 15000
end sub
REM universal scrolling routine.
sub SF()
ClearTimeOut(myTimer)
for L=1 to numLayers
y(L)=y(L)+yD(L)
if yD(L)>0 and y(L)>=0 then y(L)=-pH(L)
if yD(L)<0 and y(L)<-pH(L) then y(L)=0
REM Position the background image.
document.all("box"&L).style.top = y(L)
next
REM *** repeat (larger numbers in line below give slower scroll) ***
myTimer=SetTimeOut("SF",24)
end sub
REM Everything starts here
sub Window_OnLoad()
REM Get window dimensions
wW=w.clientWidth
wH=w.offsetHeight
REM Repeat to fix an OE bug
wW=w.clientWidth
wH=w.offsetHeight
REM Get users screen resolution
wx=window.screen.width
REM and adjust font size to match.
Res=INT(wx/128)
If you changed the font size above from 14, change
it here also.
w.style.fontSize = 14+Res
for L=1 to numLayers
REM Get dimensions of background image.
pW(L)=document.all("bkg"&L).style.posWidth
pH(L)=document.all("bkg"&L).style.posHeight
REM Number of images down
numPics(L)=INT((wx*.75)/pH(L))+3
if w.scrollHeight>wH then
hc=w.scrollHeight/pH(L)
if int(hc)<hc then
numPics(L)=int(hc)+3
else
numPics(L)=int(hc)+2
end if
end if
data="<SPAN id='box"&L&"' style='HEIGHT: 4000px; POSITION: absolute; WIDTH: 3000px"
if L<>1 then data=data&";VISIBILITY: hidden"
data=data&"'></SPAN>"
container.insertAdjacentHTML "BeforeEnd", data
REM "Tile" the background (NOTE: Image is not positioned.)
for i=1 to numPics(L)
data=""
data="<IMG src='" & document.all("bkg"&L).src & "'>"
document.all("box"&L).insertAdjacentHTML "beforeEnd", data
next
next
vFlag=1
REM Lets get started.
setUp
end sub
REM This runs if the window size is changed.
sub Window_OnResize()
setUp
end sub
</SCRIPT>
<!-- This is the "fake" background made up of a SPAN inside a DIV - DO NOT CHANGE OR MOVE THE FOLLOWING -->
<DIV id=container style="FILTER: BlendTrans(Duration=2); HEIGHT: 600px; LEFT: 0px; POSITION: absolute; TOP: 0px; WIDTH: 800px; Z-INDEX: -1">
</DIV>
</BODY>
The higher the number the slower your ticker script
will scroll. ((I like mine at 450))
<script language="JavaScript">
<!--
ScrollSpeed = 450; // milliseconds between scrolls
ScrollChars = 4; // chars scrolled per time period
Enter your ticker script message here. Can be the name
of your stationery, have a nice day, your name, anything you would like others to see.
Keep your message in between the quotation marks, do not put any other quotation marks in
the ticker script. Leave some space between the first set of quotation marks and your
message so that it is not up against the wall of your computer.
function SetupTicker() {
// add space to the left of the message
msg = " . . . .
Your Message Here . . . . ";
RunTicker();}
function RunTicker() {
window.setTimeout('RunTicker()',ScrollSpeed);
window.status = msg;
msg = msg.substring(ScrollChars) + msg.substring(0,ScrollChars);}
SetupTicker();
<!-- end -->
</script>
<!--VERMEER BOT=HTMLMarkup EndSpan -->
</HTML>
Well you are almost there!
Screen Captures are the same as lesson one. This part of your
scripting does not change.
After you have entered in all your information, your Notepad text will need to be
saved. The same script has to be saved two ways.
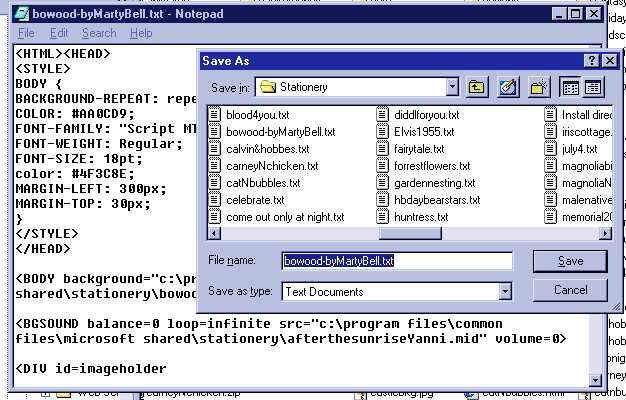
#1. Click file/Save As
When the Save As window pops up, put a name in for your
stationery
The bottom window has as Text document, that is correct
so save it to your stationery folder.
We still have to Save As a HTML file so our computers
can read the script. So click SAVE/AS AGAIN but this time
open the drop down window, and make ALL FILES as the save as type.
Then using your cursor take the .txt file extension off of the
end of your stationery name and type in .html (make sure the dot is there) and click
save again.
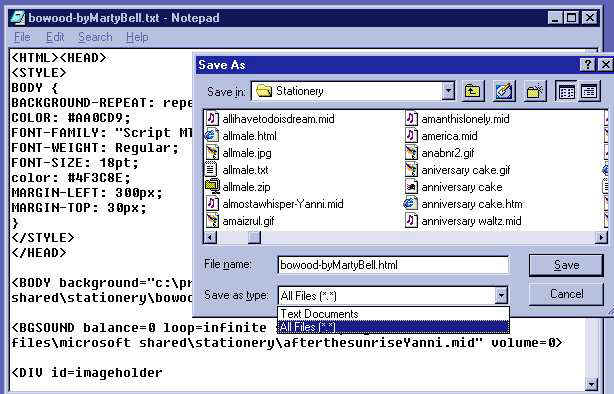
You should now have two files for your stationery, one is stationery name.txt
and the other is stationery name.html
Leave your html notepad open.. we are now going to look at the stationery.
Are you getting a little more familiar with the steps?
OK... now open your Outlook Express, click Message/click New message using/click
select stationery.
In the stationery view window move the scroll bar till you see your stationery. You
will only see the html version. Click on it, and click ok.
Now your stationery should have opened up in the New Message Window.
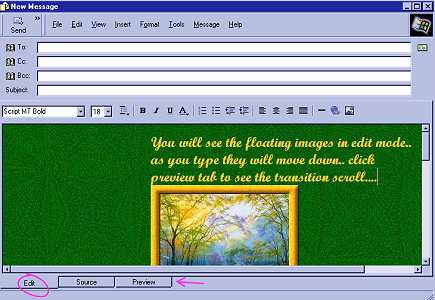
**You will notice that your scrolling images
are not in the edit window. You will see your images "floating" They will be normal in the preview mode.. Click on the preview tab to view the scrolling
gif or .jpg, your font size and colors. If you need to make any
changes, close the window, make your changes in your notepad, save, then open your
stationery again in your Outlook Express. Don't Forget to
save your changes in both the HTML and TXT versions.
Click on the preview tab to see the scroll and ticker and hear the music.
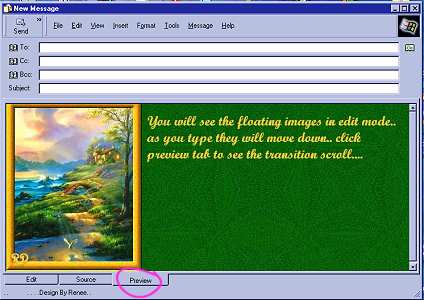
Is everything working? Do you see the scroll? Is your ticker displaying your message?
Do you hear your midi playing?
If you did NOT get an error window CONGRATULATIONS!!!! YOU DID
IT!!!
Now click back to the edit tab and test your font, is the color light enough? Is it
too close to the graphic or too far away? Is it large enough or too large? Do you want to
change anything? If you do, close the stationery, maximize the notepad html and make the
changes, click save (since it is still active and open you can make changes) and open your
stationery again to view the changes.
If you made changes you must save as both html and txt again
If you are quite happy with everything then send the stationery to yourself to verify its
working correctly. If it is, and you have saved both your html and txt, then close your
Notepad you are done with lesson eight!
If in the future you want to make changes in this stationery, open up the txt file, make your changes, save as both .txt and html again.
Click
Here To View Finished Stationery
This will take a moment to load, as I have placed it as a txt version, This way you can
click on View/Source so that you can see the actual stationery changes that I made. You
can see the names and sizes and colors. Use your "back" button to return to this
page
Please Sign my Guest
Book!
I Would Love To Know You Were Here!

Proud Member Of

All Backgrounds And Images Created In

Site Designed And Maintained With
![]()
Backgrounds
and Site Design
Created By
Design By Renee
RD
Copyright 1999-2000-2001 Renee Davis
![]()
Welcome
Home Lesson
Index Lesson
One
Lesson One-Part Two Lesson Two
Lesson Two-Part Two Lesson
Three Lesson Three Part-Two
Lesson Four Lesson
Four Part-Two Lesson
Five Lesson
Five Part-Two Lesson Six
Lesson Six Part-Two
Lesson Seven Lesson
Seven Part-Two Lesson Eight Lesson
Eight Part-Two
Lesson
Nine Lesson Nine Part-Two
Lesson Ten Lesson
Ten Part-Two
PSP View
Links