Design By Renee
FirstSteps2Alottafun Lesson Four
Please Note***These pages will be
graphic intense, they will take a while to fully download. Use your refresh button to
reload the page to check for updates on this page. ...Renee
In lesson
four you will
learn how to make two framed graphics, and a background that the framed graphics
scroll over. The script is a double vertical scroll over a fixed
background.
So if you are ready, let's get started!
Please Right click on this graphic, click save picture as/name it
in window/make sure it is listed as a jpg and save to our c:/firststeps folder.

DewOnRose.jpg
Artist Unknown
Please open Paintshop Pro (from now on, aka PSP), click file/Browse
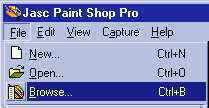
Browse to your firststeps folder and doubleclick on the
image to open it up in PSP. By now you should be familiar with the browse
feature so I will not add a screen capture for it. If you need reference,
please check Lesson One.
Now click window/duplicate because we are getting in the habit of NEVER
working on the original!

Close your original and its safe!
If you have ever seen a painting on wicker, this is the goal we are going to try and achieve. So please click Image/Effects/Weave

This is really a nice filter to work with! the Effects are
unlimited!
Here are the settings I am using, but please feel free to adjust and see
different effects.
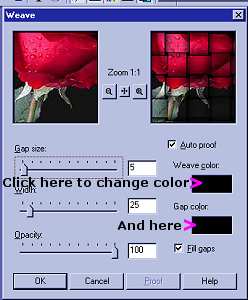
And here is what our graphic should look like!

Please save as a name.psp or name.jpg to your folder so we don't lose what
we have so far! I know, it looks plain, but we have our frame to make now
too!!
I am going to work with a silver color frame, but you are free to choose
pick any color you would like. So please click on your background color
and enter this color setting.

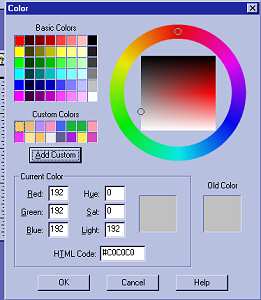
HTML Code #C0C0C0
Now click Image/Add Border
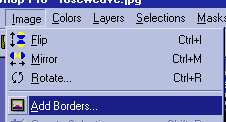
and use these settings:
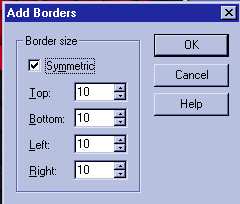
It will look like this, but we still have our inner bevel to do:
Please click on your magic wand tool ![]()
Use these settings in the tool options window 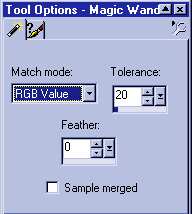
Click once on the silver border and you should now have the "marching
ants" around both sides of the border we added.
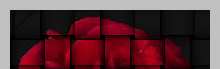
Please Note*** To save space I am just showing a
"partial" of the graphic..
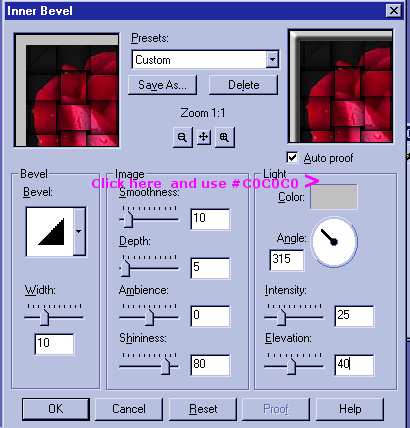
Now to make our frame, please click
Image/Effects/Inner Bevel
And use these settings:
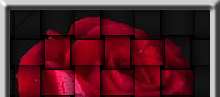
This should be what your graphic is looking like:
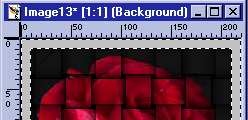
Now, since we gained some added length we need to resize our graphic, so
please click Image/Resize and enter the HEIGHT back to 300px and click
ok.
Note*** The Width will automatically change when you
enter the Height.

Now is a good time to click File/Save again!!! Just incase!!
Since we will need two images, let's duplicate our image by clicking
Window/Duplicate again. Now on this second image, let's click
Image/Mirror, this will give us another image but just a mirrored image of
our first graphic.
Now is the time to put your signature on your graphic. By now you have an
idea of your own "sig tag", so I will leave that to you to do.
Now click File/Save and save this image as nameRight.jpg.
You can also File/Save As the first image as nameLeft.jpg and now
save both to your stationery folder.
c:/program files/common files/microsoft
shared/stationery
They will be there and ready to enter into our script.
But First!! We still have our background to
make!!
So if you will please click your new image icon ![]()
And use these settings:
1024px by 300px Transparent

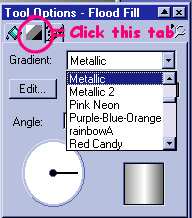
We are going to be using a Linear Gradient for the background, so that the
bkg has a soft metallic look. But first we need to pick our foreground and
background colors.
For the Foreground... HTML code # E6E6E6
For the background... HTML code # C0C0C0

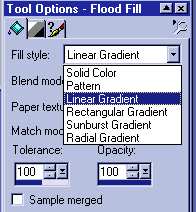
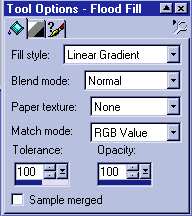
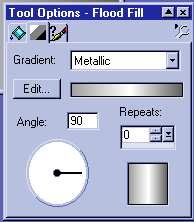
Now please click your flood fill tool ![]() and choose these settings in the tool options window:
and choose these settings in the tool options window:
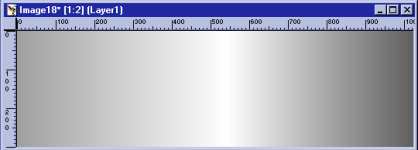
Now flood fill your transparent bkg with the gradient and you should see
your bkg resemble this:
You are free to choose any bkg you like. Now please save your bkg to your
stationery folder as namebkg.jpg and we are ready to enter our images into
the script!!!!
Here is a sneak peek at the "stat" so far!
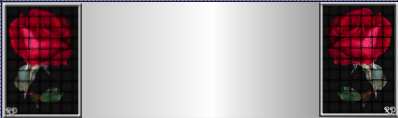
OK?? Hope you think so! Well, now that our images are ready it's
time to do the script. Is it becoming less scary? Now, come on, say yes!!!
So if your ready let's do it to it!!!
Lesson Four Part Two
The Script
Please Sign my Guest
Book!
I Would Love To Know You Were Here!

Proud Member Of

All Backgrounds And Images Created In

Site Designed And Maintained With
![]()
Backgrounds
and Site Design
Created By
Design By Renee
RD
Copyright 1999-2000-2001 Renee Davis
![]()
Welcome
Home Lesson
Index Lesson
One
Lesson One-Part Two Lesson Two
Lesson Two-Part Two Lesson
Three Lesson Three Part-Two
Lesson Four Lesson
Four Part-Two Lesson
Five Lesson
Five Part-Two Lesson Six
Lesson Six Part-Two
Lesson Seven Lesson
Seven Part-Two Lesson Eight Lesson
Eight Part-Two
Lesson
Nine Lesson Nine Part-Two
Lesson Ten Lesson
Ten Part-Two
PSP View
Links