Design By Renee
FirstSteps2Alottafun
Lesson Two
Please Note***These pages will
be graphic intense, they will take a while to fully download. Use your refresh button to
reload the page to check for updates on this page. ...Renee
In lesson two you will
learn how to make a framed graphic, and a background that the framed graphic scrolls over.
So if you are ready, let's get started!
Please right click
on graphic and save picture as, give it a name.jpg make sure you are saving it
as a .jpg, and save it to your firststeps folder.

Graphic Title: Earthly Delight
Artist: Jim Warren
http://www.jimwarren.com
We are also going to be working with a picture tub (aka tub's),
so please click here to download the tub. It will open in PSP
You should have a folder in PSP called Tubes. If you do not, please go to your c drive to
make one in PSP.
PSP 6 Users:: download
tub here
PSP 7 Users:: download tub zip here
Illustration to show Tube file location only.
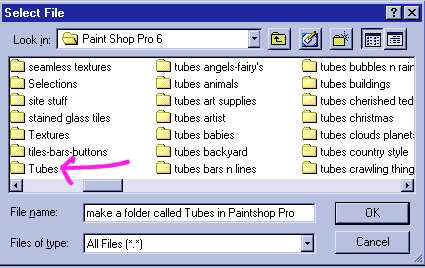
*Note, once you start collecting tubes, it is best to keep them organized.
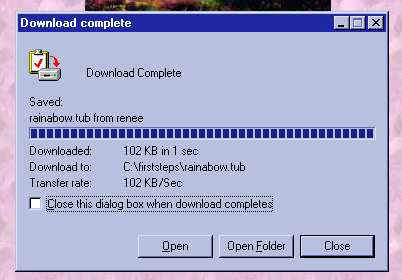
Here are the directions to saving this tub file.

You will need to unzip to your Paintshop Pro Tubes folder

Next Step. Click Open
 .
.
After clicking open, it will open up in PSP. Next Step File/Export/Picture Tub

Next Step, Since there is only one picture across, there is a one there. If there were
more you would put the total across. Same with down, there is only one so there is a one
there. If it were more you would put the total down. Then you would fill in total cells...
Since we only have one across, and one down, the total of cells is one. If there were no
name in the Tube Name section, you would name the tube. It has a name, so click ok.

You now have a tub called Rainabow.
This tub was collected on the net a very long time ago. To whoever deserves credit. thank
you, please email me with your name and I will give recognition.
We are just about ready to start!!!
If you are ready then please click File/Browse, go to your
c:/firststeps folder and double-click on the graphic we are using.
Click Windows/Duplicate, then close the original.
Take your dropper![]() and
choose two colors, a dark color for the frame, and a light color for the background image.
and
choose two colors, a dark color for the frame, and a light color for the background image.
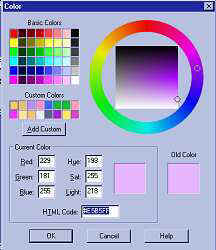
Please note I put the darker on the background color square. I am using for the light
color, #E5B5FF, and for the dark color, #7C47A3.

If you would like to use the same colors, take your dropper and click on the color
square to open the HTML Color Editor. Type in your color # and click ok.
You can add to custom colors so that you have it saved. It helps to write them down so
when your entering the colors in the script, you have the # handy.
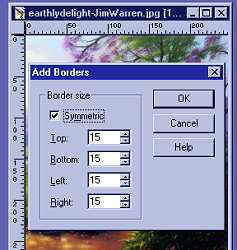
Making sure your graphic is active, click Image/Add Borders
this will add a border of whatever color you have in the background color square.
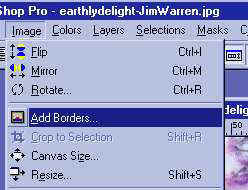
In the Border window that pops up, choose symmetric and 15px.
Click ok.
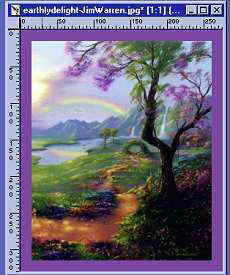
Your graphic should now look like this.
Take your magic wand,![]() and click once on the border we just added. There will be
"marching ants" all around the border, inside and outside.
and click once on the border we just added. There will be
"marching ants" all around the border, inside and outside.

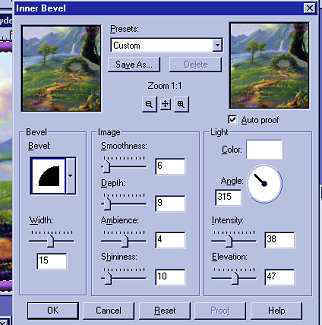
Now click Image/Effects/Inner Bevel and set your settings to these(you are free to
play around with them too, this is just a lesson to familiarize you with different
tools.)You can click Presets up at the top of the window and save these settings for
another project. When you have the settings finished, click ok..
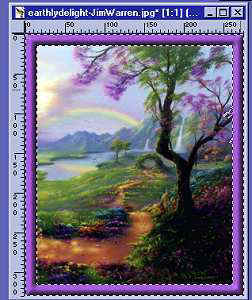
Your graphic should now resemble this.
Click selections/none, this removes the "marching ants". Then click
Image/Resize,
and set the height to 300px and click ok.

We lost a small bit of clarity during the resize, so to clear our graphic up a bit,
click Image/Sharpen/Sharpen

If you want to add your signature "sig tag" now would be the time.
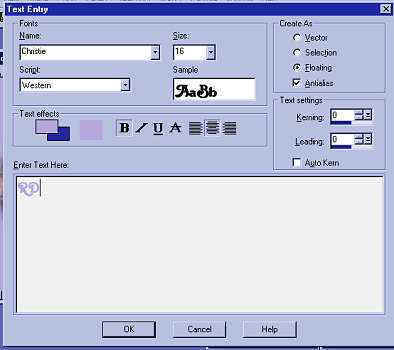
Click on the text tool,![]() Click on your graphic and the text editor will open.
Click on your graphic and the text editor will open.
You can choose a color by moving your cursor over the graphic. It will turn into a
dropper and you can choose a color.
Enter your text click ok.
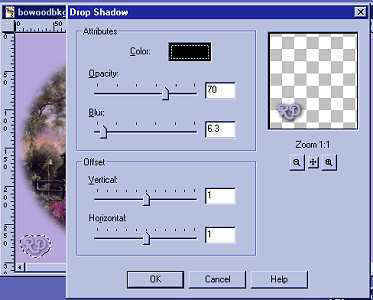
I add a drop shadow to mine, and these are the settings I use. Feel free to adjust
the settings and see the different effects you can get. You can put a light color behind
and it gives it a glow look... Adjust your Offset to change the drop shadow direction.
Now is the time to save our work so far. So please click File/Save and save as
whatever you name it.psp in your psp projects folder.
You can now minimize the framed graphic, we won't need to do anything with it for
now.

Click your New Image Icon![]() and in the New Image window, use these settings...
and in the New Image window, use these settings...

Remember the front color view window is the foreground.. If you have them switched, click
on the little black arrows and it switches the windows around.
Now that we have our background open, lets add a little noise. Click
Image/Noise/Add and use these settings.

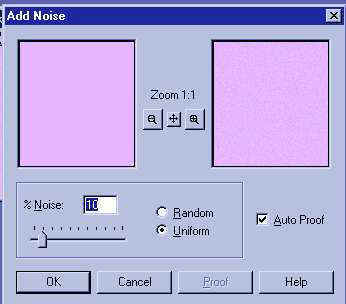
It gives your image a fine grain look.
Now we are going to add our rainabow tub to the background.
Click your tub tool,![]() ,
and your tool options window opens to your tub folder. Open the drop down window and
go down alphabetically till you have the Rainabow in your window. Your settings should
match these.
,
and your tool options window opens to your tub folder. Open the drop down window and
go down alphabetically till you have the Rainabow in your window. Your settings should
match these.

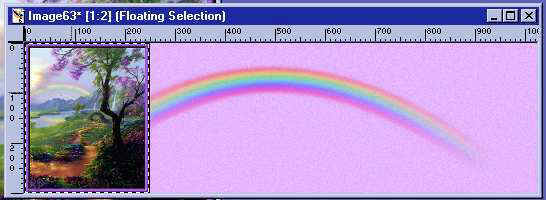
Now place your tub tool on your New Image background, watching your co-ordinates in
the lower left window of your worktop, move until you have these co-ordinates showing,
then click.

This should be your result.

Pretty cool huh! Now we are ready to save our graphics.
If you would like to take a sneak peek at what your graphic scrolling over the
background will be, click on your graphic on the upper blue of the graphic window to make
it active. Then right click on it, highlight and click copy(or do this from the upper tool
bar). Then go to your background, click on the upper blue top to make it active and right
click, highlight paste as new selection and click.
You should now have a copy of your graphic on the
background with "marching ants" around it. This means its floating.
Click your mover tool,![]() and move the graphic to the left, making sure the
"marching ants" are on the inside of your background window. Click to
set the graphic in place.
and move the graphic to the left, making sure the
"marching ants" are on the inside of your background window. Click to
set the graphic in place.
Ok, that was just a peek!! Now go to the very top tool bar and click Edit/Undo Move
Selection, and keep doing this until you have clicked undo paste as new selection. The
Undo feature will get a lot of use!
Now its time to save the graphics!! Click on the upper blue section of your graphic
to make it active. Now go to File/Save as, give it a name.jpg and
save it to your stationery folder. c:/program files/common files/microsoft
shared/stationery/yours here.jpg
Do the same with your background.
Now they both should be in your stationery folder.
You can choose a midi and place it in your stationery folder, then everything is all
in one location ready to enter into the script.
Well..... If your ready we can go on to part two of lesson two!!!
Please Sign my Guest
Book!
I Would Love To Know You Were Here!

Proud Member Of

All Backgrounds And Images Created In

Site Designed And Maintained With
![]()
Backgrounds
and Site Design
Created By
Design By Renee
RD
Copyright 1999-2000-2001 Renee Davis
![]()
Welcome
Home Lesson
Index Lesson
One
Lesson One-Part Two Lesson Two
Lesson Two-Part Two Lesson
Three Lesson Three Part-Two
Lesson Four Lesson
Four Part-Two Lesson
Five Lesson
Five Part-Two Lesson Six
Lesson Six Part-Two
Lesson Seven Lesson
Seven Part-Two Lesson Eight Lesson
Eight Part-Two
Lesson
Nine Lesson Nine Part-Two
Lesson Ten Lesson
Ten Part-Two
PSP View
Links