Design By Renee
FirstSteps2Alottafun Lesson Seven
Please Note***These pages will be
graphic intense, they will take a while to fully download. Use your refresh button to
reload the page to check for updates on this page. ...Renee
Lesson Seven is a Multi-Image Left Border Vertical Scroll. We will be making 3 "Shadow Box" framed graphics that will scroll over a fixed background. Again, we will make a simple background and concentrate on the images.
Please Right click on these graphics, click Save
Picture As/name it
in window/make sure they are listed as a jpg and save to our c:/firststeps folder.

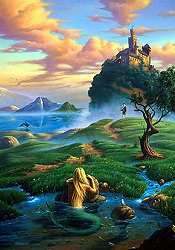

Stairway To Heaven; Prince And the Mermaid; If I Were
A Mermaid And You Were A Unicorn
Artist: Jim Warren
http://www.jimwarren.com
By now you should be familiar with some of the steps. I will be using less screen captures. If you get lost, refer to a previous lesson.
Please open the graphics now in PSP. Click
Windows, then click Duplicate, and close your original graphics. Make it a
habit to never work on an original.
We are going to make our background first. It will be a simple bkg because
we will be concentrating on the graphics for the scrolling border!
Ok, click your new image icon![]() and use these settings:
and use these settings:
300 x 300 Transparent
We are going to be making a seamless tile. So choose a color from one of
the graphics for your bkg. I am using #8BC2FF Click your flood fill tool![]() and flood fill your transparent window.
and flood fill your transparent window.
Now click Image/Noise/Add and use these settings.

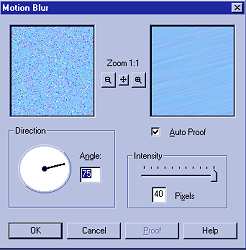
Now click Image/Blur/Motion Blur and use these settings:
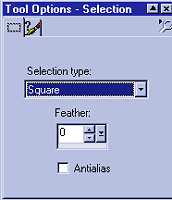
Now click your Selection Tool![]() and use these settings:
and use these settings:
Now placing your Selection Tool on the image, put it at co-ordinates 75 x
75
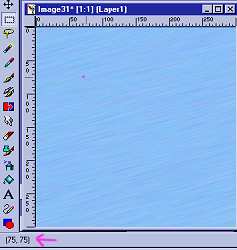
Holding down your left mouse click, slide the selection tool down and to
the right till it reads 150x150 on your co-ordinates, and release the
button.
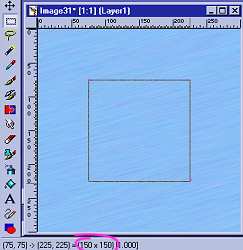
You will now see "marching ants" around your square. Now on your
top tool bar, click Selections/Convert to Seamless Pattern:
You should now have a 150x150 seamless tile.
Now click New Image icon, use these settings 1024x300 Transparent:
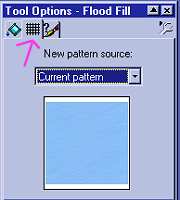
Click your flood fill tool and use these settings:
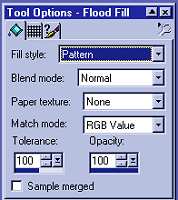
Click on the middle tab, and choose your seamless tile and flood fill your
1024x300 Transparent window with the tile.
You now have your seamless bkg. Click File/Save and save it to your
stationery folder:
C:/Program Files/Common Files/Microsoft Shared/Stationery/yourimagebkg.jpg
Now we are ready to make our "Shadow Box" frames.
First, choose a color for the frame, and also choose a color that is NOT
in your graphic:
I am going to use #148CE8 a darker blue than the bkg and a pink #FE28E2
that is not in my graphic:

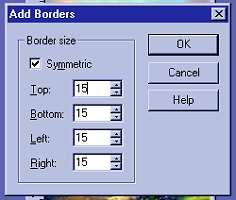
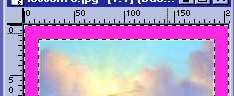
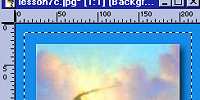
Now choosing one of the graphics, on your top tool bar click Image/Add
Borders and use 15 Symmetrical:
That bright pink border is not going to stay!! Select your magic wand![]() and click once on the pink border. You should have "marching
ants" around the border.
and click once on the pink border. You should have "marching
ants" around the border.
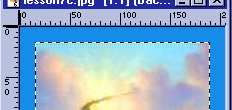
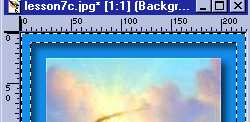
Now select your flood fill tool![]() and flood fill the border with your chosen color:
and flood fill the border with your chosen color:

The reason we do this is if we choose a color from our image, when we go
to select our border, the "marching ants" may bleed over into
the image. This way you have a clean border.
Now on your top toolbar, click Selections/Invert
You should see the "marching ants" just around your graphic now.
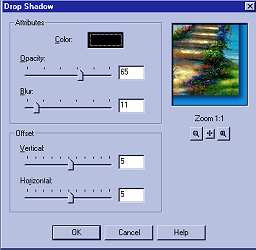
Now click Image/Effects/Drop Shadow and use these settings:
Now again, click Image/Add Border but this time use 10 symmetrical:
This should add a 10px pink border around the first border.
Select your magic wand again, and click on this new border, and you should
have "marching ants" around the border we just added:
Again, select your flood fill tool![]() and flood fill the border with your chosen frame color.
and flood fill the border with your chosen frame color.
Now on your toolbar click Selections/Invert you should see "marching
ants" around the previous blue border:
Now go to Image/Effects/Cutout and use these settings: make sure the
shadow color is black:

Now click Selections/Invert you should now have "marching ants"
around the border we just made:
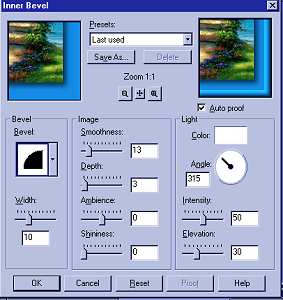
Now click Image/Effects/Inner Bevel and use these settings:
Click Selections/None.
Now is the time to add your signature. And save to your stationery folder
as yourimage1.jpg
C:/Program Files/Common files/Microsoft Shared/Stationery/yourimage1.jpg
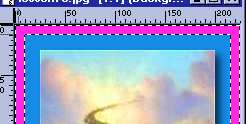
And now do the same steps to the other two graphics. And this is the
finished graphic.

Practice with changing colors and settings and you will find your own
tastes and styles. You are only limited by your own imagination.
Here is a sneak peek of the border and bkg.

I hope you are finding these tuts useful and that you are gaining
knowledge in using different settings in Paintshop Pro. If you are done
with your other two images and you are ready, let's get to the
script!!
Part Two The Script
Please Sign my Guest
Book!
I Would Love To Know You Were Here!

Proud Member Of

All Backgrounds And Images Created In

Site Designed And Maintained With
![]()
Backgrounds
and Site Design
Created By
Design By Renee
RD
Copyright 1999-2000-2001 Renee Davis
![]()
Welcome
Home Lesson
Index Lesson
One
Lesson One-Part Two Lesson Two
Lesson Two-Part Two Lesson
Three Lesson Three Part-Two
Lesson Four Lesson
Four Part-Two Lesson
Five Lesson
Five Part-Two Lesson Six
Lesson Six Part-Two
Lesson Seven Lesson
Seven Part-Two Lesson Eight Lesson
Eight Part-Two
Lesson
Nine Lesson Nine Part-Two
Lesson Ten Lesson
Ten Part-Two
PSP View
Links