Design By Renee
FirstSteps2Alottafun
Please Note***These pages will
be graphic intense, they will take a while to fully download. Use your refresh button to
reload the page to check for updates on this page. ...Renee
Lesson Three
Feeling a little
more at ease yet?
You can practice with lessons one and two with different graphics and settings. I
encourage you to explore PSP. The only limitations are your own.
Lesson Three will be a background and a transparent image. The script is a right
border scroll. So you will be making a background, and also a transparent image from
a tub. The transparent image will be scrolling over the background on the right side.
PSP 6 Users, click here to download tub
zip.
PSP 7 Users click here to
download tub zip
Please refer to lesson two on how to download and install the tub.
We are going to be
making a background using the "Blinds" filter in PSP. We will make a
"plaid" effect background and this is the tub we will be making into a
transparent gif to scroll over the background.
I do not know who is
the creator of this graphic. If anyone knows who the Artist is, please email me with that
information, as I would prefer to give credit where credit is due.
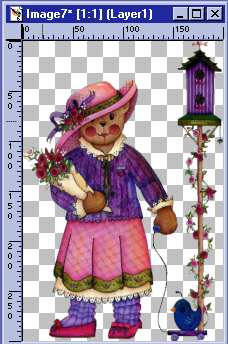
You are free to use whatever tub you prefer. For this lesson I will use the Teddy
Bear Tub. Isn't she adorable!
So if your ready
let's begin!
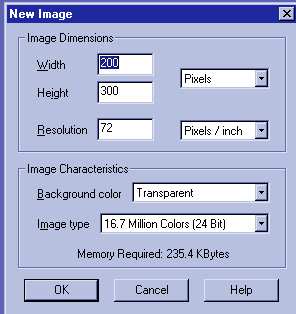
First click your new image icon![]() and use the following settings:
and use the following settings:
Click ok.
Now click on your tub tool![]()
and in the tool options tub window
scroll down until you have the Teddy bear Tub selected in the preview window.
Go to your new image window and using your rulers and watching the co-ordinates put
your tub tool on these co-ordinates 100 x 150 and click. You should now have your
Teddy Bear in the center of the window.

Now we are not going to need to make the transparent gif just yet, so lets save her
as a psp.. Click file save as,
TBear L3 and highlight .psp and save her to your psp projects folder. Saving it
this way means we do not lose the transparency and will be able to make it into a
transparent image.
Take your dropper tool and choose two light co-ordinated colors from the T Bear
image.
I am using a light rose from her hat #DD7BB3 and
a light
purple-blue from her "sock" #A67DC0 
We are going to make our background
"tile" now, so please
click the new image icon![]() and use these
settings.
and use these
settings.
Height 150 x Width 150 background white and
click ok.
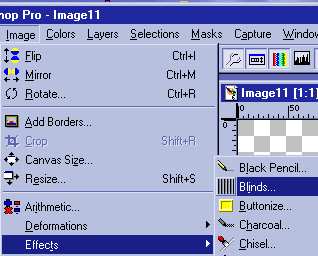
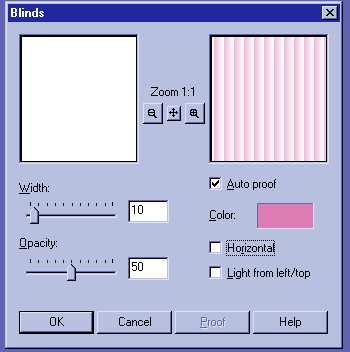
Now go to images/effects/Blinds
When you open it you will need to click on the color square and the HTML color
editor open and type in one of the color numbers you chose, I am using #DD7BB3 then click ok.

Adjust your settings to match these.
Now we are going to do this again, but use the other color, I am using color
#A67DC0,

Only this time put a checkmark in front of Horizontal.
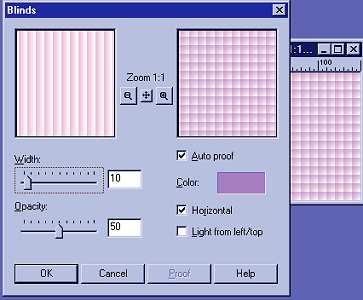
Here's what it looks like so far..
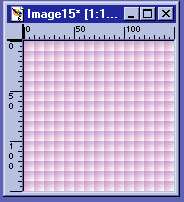
I know not so great yet! We have another step to do!
This time go to Images/Effects/Mosaic Glass

And use these settings:and click ok.

Your tile should now look like this:
We lost some color so to fix this go to colors/adjust/hue saturation and lightness.
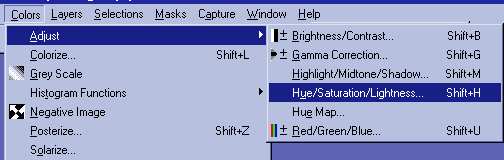
And use these settings and click ok:

And here is the result, just a little brighter in colors
Now would be a good time to save as , so go to file save as/give it a name and save
it as a .psp in our psp projects folder. Saving it this way give you the opportunity to
reuse it again.
Now, we are ready to create our background!
So please click your new image icon and use these settings:
Width 1024px
Height 300px
Background transparent
Click ok.
Now Click your flood fill tool![]() and your
tool options window will have flood fill at the top, in the fill style change to patterns
and your
tool options window will have flood fill at the top, in the fill style change to patterns
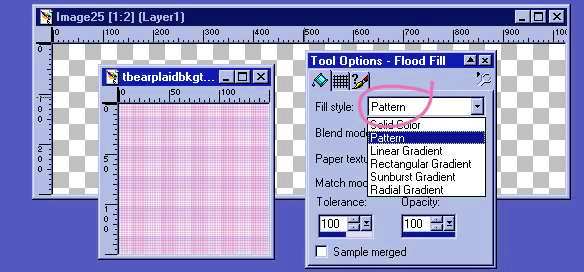
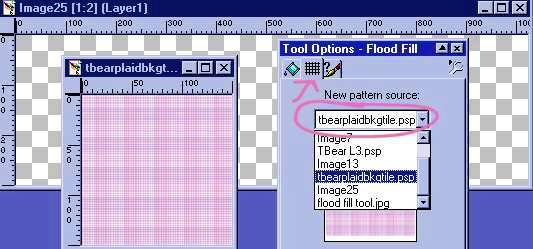
then click the middle tab on tool options and make sure the
plaid tile is highlighted in the window.
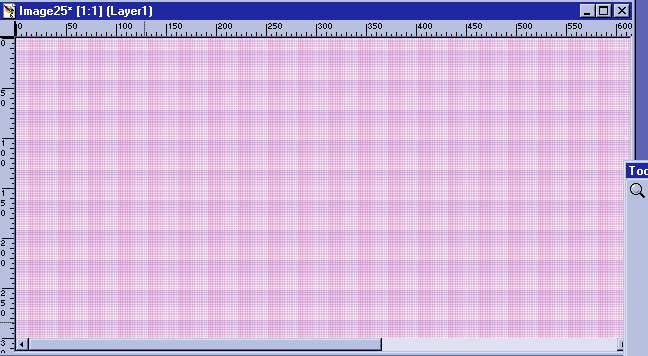
Now we are going to flood fill our plaid pattern in to the 1024px by 300px new
image transparent window. So just take your flood fill tool and click anywhere inside the
window.

If it looks a little small, click on your zoom tool ![]() and left click once
to make it normal size. Right click to reduce the size.
and left click once
to make it normal size. Right click to reduce the size.
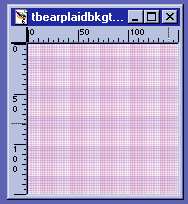
Here is our background image
Please Note*** I am not the original creator of this
plaid bkg. I received directions from someone in a stat list a long time
ago. My intention is not to claim it as my own creation. If the original
creator will contact me, I will be very happy to place their credit
here. I just loved the effect!
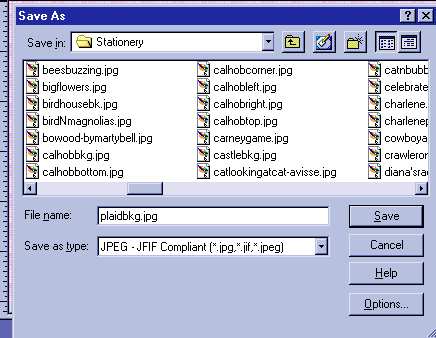
Now save your bkg in your stationery folder as a jpg.
c:/program files/common files/microsoft shared/stationery/plaidbkg.jpg
We are just about to make our transparent image so we are getting closer to
having the first part of lesson three part one completed!!
Are you ready?
Ok then! Let's get started!
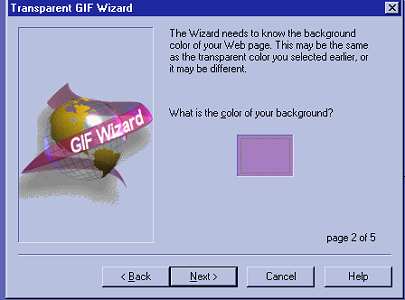
Please maximize our Teddy Bear and click File/Export/ Transparent Gif

In the Transparent gif saver window, click on the Use Wizard at the bottom left
hand corner.

Put a dot in front of "use existing transparent areas"
***Note our second color choice is in preview window***
Then click next....

It is asking what color is your background because it will fill in the
transparent areas with the color you choose. I am going to leave it as this color choice,
you can click on the square or on your graphic to choose a color. Click Next
Put a dot in front of
"NO CHOOSE THE BEST COLORS"
ALWAYS USE THIS ON ALL TRANSPARENT IMAGES!!!
Click Next

Just leave the settings as they are in page four and click next.

Again leave settings where they are
and click finish.

Save your L3TBear as a gif in your stationery folder.
c:/program files/common files/microsoft shared/stationery

This is what your stationery is looking like, we still have part two, "The
Script" to go, but you are half way to finishing another lesson!!
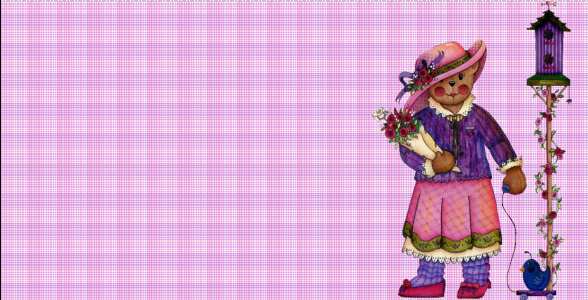
Lookin' pretty good to me!!
Are you ready to get started on the script!!
Good!! Well then let's get started!!!
Lesson Three Part
Two
The Script
Please Sign my Guest
Book!
I Would Love To Know You Were Here!

Proud Member Of

All Backgrounds And Images Created In

Site Designed And Maintained With
![]()
Backgrounds
and Site Design
Created By
Design By Renee
RD
Copyright 1999-2000-2001 Renee Davis
![]()
Welcome
Home Lesson
Index Lesson
One
Lesson One-Part Two Lesson Two
Lesson Two-Part Two Lesson
Three Lesson Three Part-Two
Lesson Four Lesson
Four Part-Two Lesson
Five Lesson
Five Part-Two Lesson Six
Lesson Six Part-Two
Lesson Seven Lesson
Seven Part-Two Lesson Eight Lesson
Eight Part-Two
Lesson
Nine Lesson Nine Part-Two
Lesson Ten Lesson
Ten Part-Two
PSP View
Links