Boiler
Click On Thumbnails To Enlarge
NEW 11/08/2002
The boiler is a copper assembly. It consists of 15 tubes and 1 superheater flue and operates at 80psi.
For our boilers we decided to buy kits from Blackgates Engineering. These include all the material (including flanged plates) required excluding rivets, silver solder etc.
Alastair is currently busy machining all the tubes and bushes. Meanwhile he sent the flanged plates to me so they could be drilled to accept the tubes. One great feature of these flanged plates is that the majority of the holes are centre 'popped' ready for drilling.
Here's a picture of the plates before drilling :-
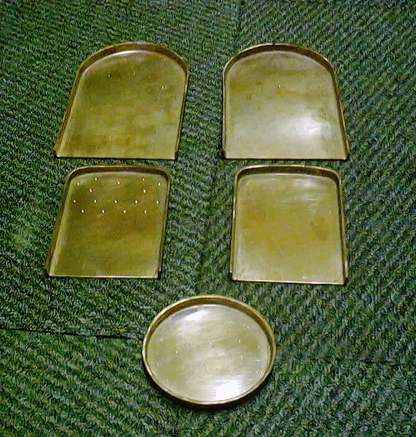
From the top left to bottom centre the plates are backhead, throatplate, firebox tubeplate, firebox backplate and smokebox tubeplate.
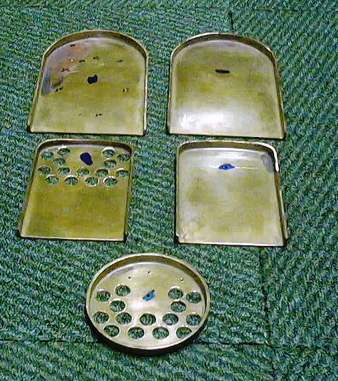
The picture below shows the same plates but after having all the bush holes pilot drilled and the tube holes drilled to final size. The holes marked with 'blue' are those which need to be bored due to their large size.
Watch this space .........
NEW 29/12/2002
And wait they did .... and a bit more ....... and finally I got round to an update! Well having completed the tube holes Alastair began machining the tubes. These were machined to length and then turned down to fit the holes in the tubeplates. This allowed the tubes to be stood vertically in the plates without them falling through! At the same time Alastair also bored the holes in the tubeplates for the superheater flues.
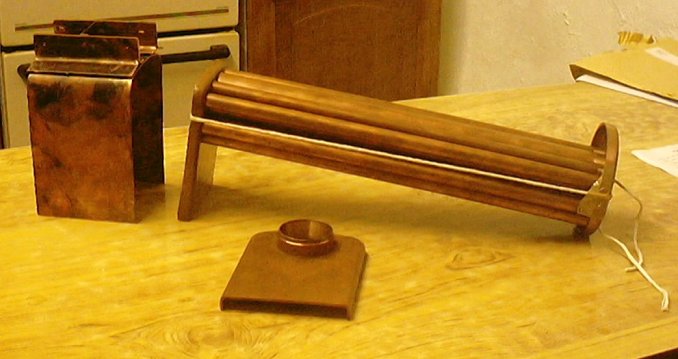
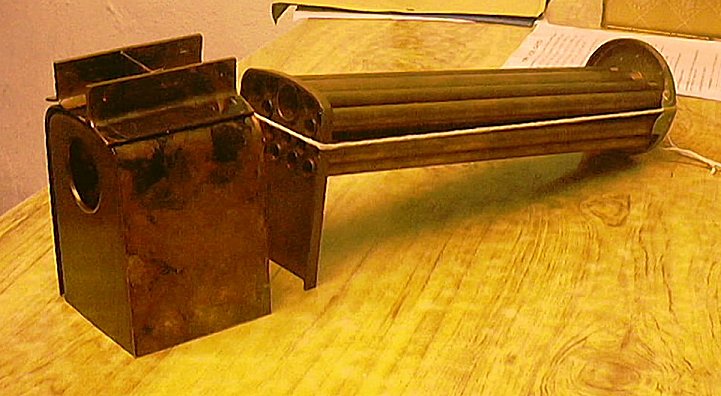
Once I received the bits the first job was to make the inner firebox wrapper. First job - anneal the copper plate. It took 3 heaatings in the end to anneal the entire plate. The next thing to be done was to form the plate around the tubeplate and back plate. This was done using clamps and then carefully bending by hand. At the same time I also made up the crownstay. THe pictures below show the parts before silver soldering.
It was now time to remove the string - but first I made up a diagram of the tube layout and numbered each tube, each one being carefully labeled as it was removed. Here's a picture of the labeled tubes.
The opportunity was then taken to drill the stay hole in the firebox tubeplate. This will allow me to drill through theses holes into the throatplate and fit the stays before the backhead is in situ (i.e. from inside the firebox). After a thorough annealing, cleaning and pickling the inner wrapper was then riveted to the tubeplate. The tubes were then fitted into the plate. Rings of silver solder were fitted over each tube and then pushed tightly against the tubeplate. Silver solder was laid around the wrapper / plate joint. Obviously all was well fluxed as well. This was then setup vertically in the 'brazing pan' and then heated gently from inside the firebox. It took about ten minutes before the solder finally reached temperature and flashed. Here's some pics of the finished item :-

I also tried these boiler innards in the frames - a glimpse of what's to come - see them on the Assembly 2 page.