|
|
Setting the Environment
|
|
|
5
|
Environment
|
|
The environment defines the appearance of your scene's surroundings. It can be a simple colored background or a complex three-dimensional texture. The environment also defines global lighting, shader glow, and dynamic properties (for example, gravity and turbulence) for your scene.
All scenes must have an environment. By default, the environment is black (giving the appearance of no environment). You can edit the default environment, save the environment for use in other scenes, or you can load an environment that you have previously saved.
In This Section:
Creating a 3D Environment
|
|
|
|
|
You can use an environment texture to create a three-dimensional background for your scene. If you are raytracing your scene, any reflective surfaces will accurately reflect the environment.
To create a 3D environment:
-
1
-
Double-click the environment swatch in the Multi-lister to open the Control Window.
|
|
See Control Window on
page 33.
|
-
2
-
In the Control Window, click the Map button (to the right of the Color parameter) to open the Texture Procedures window.
|
|
See Texture Procedures
Window on page 94.
|
-
3
-
In the Texture Procedures window, click Environments to open the environment texture section.
|
|
See Environment Textures on
page 105.
|
-
4
-
Click the button of the environment texture you want to use.
-
An environment texture swatch appears in the Multi-lister,
the environment texture is displayed on the environment
swatch, and the Control Window updates to display the
environment texture parameters.
-
5
-
Customize the environment texture by editing the parameters in the Control Window.
Environment Parameters
|
|
|
|
|
The environment parameters define the appearance and properties of the environment.
Background

The Background parameters control the appearance of the background.
Color
-
- The color of the background. The default setting is black.
Pix File Backdrop

The Pix File Backdrop parameters let you specify an image file, or a series of image files, to use as a background.
Backdrop
-
- The name of the image file to be used as a 2D backdrop.
Sequence
-
- Appends the frame number to the backdrop file name. Set Sequence ON if you want to use a series of pix files (that is, an animation) as a 2D backdrop.
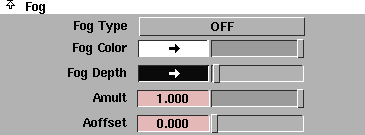
Fog
The Fog parameters control whether the environment contains fog, and let you specify fog properties. Use environmental fog to simulate fog, mist, dust, haze, smog, disbursed smoke, or to simulate great distances.
|
|
|
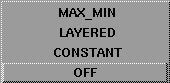
Fog Type
-
- The type of fog present in the environment.
Fog Color
-
- The color of the environmental fog. Change Fog Color to simulate smog (brown fog), or to create the illusion of great distance (blue fog). The default setting is white.
Fog Depth
-
- Determines the distance you can see through environmental fog. (The color Value controls fog density in the direction of the camera's view.) Fog Depth is the distance away that a surface must be before it has half of its light scattered by the fog. Fog density also depends on the scale of your scene. Small scenes require a higher Fog Depth value than large scenes to have the same effect.
-
- The slider range is 0 (nothing visible) to 1 (most objects visible). The default color Value is 0.039.
Amult
-
- A scaling factor applied to the Fog Depth value when Fog Type is LAYERED. The slider range is 0 to 1. The default value is 1.
Aoffset
-
- An offset factor applied to the Fog Depth value when Fog Type is LAYERED. The slider range is 0 to 1. The default value is 0.
Layered Fog Parameters
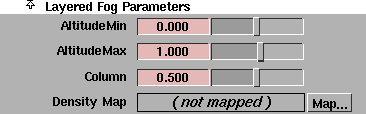
The Layered Fog Parameters control the appearance of layered environmental fog. They are only available if Fog Type is LAYERED.
AltitudeMin
-
- The lower boundary for environmental fog. The slider range is -10 to 10. The default value is 0.
AltitudeMax
-
- The upper boundary for environmental fog. The slider range is -10 to 10. The default value is 1.
Column
-
- The column in a Density Map file used to calculate the vertical density of the fog. The valid/slider range is 0 (left side of the Density Map file) to 1 (right side of the Density Map file). The default value is 0.5.
|
Tip:
|
Animate the Column value between 0 and 1 to vary the
layers of fog during an animation. Use an image file or ramp
texture with some horizontal variations as a Density Map.
|
Density Map
-
- The image file or texture that determines the vertical density of the fog. The Column value determines which column of the Density Map file is used to calculate the vertical density of the fog. The default Density Map is a smooth ramp.
|
Tip:
|
Use a vertical or diagonal ramp texture. If you use a
horizontal ramp texture, the fog will have a constant vertical
density.
|
Max/Min Fog Parameters

The Max/Min Fog Parameters control the appearance of MAX_MIN environmental fog. They are only available if Fog Type is MAX_MIN.
Min Distance, Max Distance
-
- The minimum and maximum distance from the camera within which a constant density fog exists. The slider range is -10 to 10. The default value is 0 for Min Distance and 10 for Max Distance.
ShaderGlow
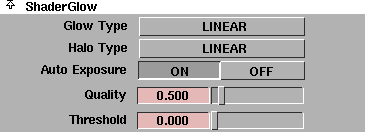
The ShaderGlow parameters determine the type of effect produced when a shader's Glow Intens value is non-zero. See Glow Intens (Glow Intensity) on page 82.
|
|
|
Glow Type
-
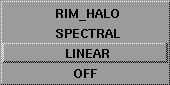
- The type of glow a shader produces when its Glow Intensity value is non-zero. The default setting is LINEAR.
| OFF
| No glow
|
| LINEAR
| Glow slowly diminishes from the surface
|
| SPECTRAL
| Lower wavelengths (red) refract (or spread) more than the higher frequencies (blue)
|
| RIM_HALO
| Forms a circular ring with a soft central glow. The size of the ring is determined by the halo Spread value.
|
|
|

|
Halo Type
-
- The type of halo a shader produces when its Glow Intensity value is non-zero. The default setting is LINEAR.
| OFF
| No halo
|
| LINEAR
| Nalo slowly diminishes from the surface
|
| SPECTRAL
| Lower wavelengths (red) refract (or spread) more than the higher frequencies (blue)
|
| RIM HALO
| Forms a circular ring with a soft central glow. The size of the ring is determined by the halo Spread.
|
Auto Exposure
-
- Evaluates glows in the rendered scene, and based on the maximum intensity found, automatically adjusts the intensity of shader glows. The default setting is ON.
-
- Although Auto Exposure is very useful, you should not use it during an animation. This is because each frame could have a very different intensity adjustment, resulting in glow flicker between frames. See Glows on page 509 for information on eliminating glow flicker.
Quality
-
- Controls the resolution of the glow. The slider range is 0 to 5. The default value is 0.5.
|
Tip:
|
Increase the Quality value to prevent very small glow
sources from vanishing when rendered.
|
Threshold
-
- The minimum brightness at which surfaces will glow. For example, if the Threshold value is 0.5, only surface regions with a rendered intensity over 127 (255*0.5) will glow. The slider range is 0 to 1. The default value is 0.
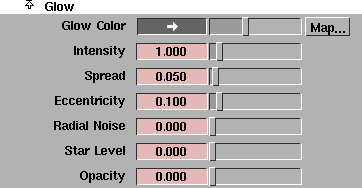
Glow
The Glow parameters control the appearance of shader glow effects. These parameters are similar to the light Glow parameters (see Glow on page 246).
Glow Color
-
- The color of shader glows. The default color Value is 0.392.
Intensity
-
- The brightness of shader glows. The Intensity value acts as a scaling factor applied to Glow Color. As value increases, so does the apparent size of the shader glow effect. A negative value subtracts from other glows. The slider range is 0 to 10. The default value is 1.
Spread
-
- Controls the size of the shader glow effect. Negative values can have odd but useful effects. For example, a Spread of -6 and a 2D Noise of 1 produces an image of a fiery bubble. The slider range is 0 to 1. The default value is 0.05.
Eccentricity
-
- Determines how focused the glow effect is. The slider range is 0 (concentrated glow, fast decay) to 1 (ball-like glow). The default value is 0.1.
-
- The degree to which a glow effect can be focused is limited. For very low values of Eccentricity (0.01), increase the Quality value. Generally, it is better to use a glow with a low Spread value and a halo with a high Spread value.
Radial Noise
-
- Randomizes the spread of shader glows to simulate starburst effects and eyelashes refracting light. The slider range is 0 to 4. The default value is 0.
-
- Negative values of Radial Noise will create a thicker noise. Use the Noise Freq. parameter (under Radial Effects) to adjust the smoothness of this effect.
Star Level
-
- Simulates camera star filter effects. The slider range is 0 to 4. The default value is 0.
-
- The Star Level parameter is often effective when combined with a high value of Radial Noise. Use the Star Points parameter to set the number of points on the star. Use the Rotation parameter to rotate the star.
Opacity
-
- Allows a shader glow to obscure objects. (Opacity can be thought of as the opposite of transparency.) The slider range is 0 to 1. The default value is 0.
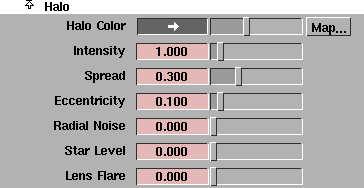
Halo
The Halo parameters control the appearance of shader halo effects. These parameters are similar to the light Halo parameters (see Halo on page 248).
Halo Color
-
- The color of shader halos. The default color value is 0.392.
Intensity
-
- The brightness of shader halos. The Intensity value acts as a scaling factor applied to Halo Color. The slider range is 0 to 10. The default value is 1.
Spread
-
- Controls the size of the shader halo effect. The Spread value also controls the size of the glow if Glow Type is RIM_HALO. Halo size is generally larger than glow size when the halo Spread and glow Spread values are the same. The slider range is 0 to 1. The default value is 0.3.
Eccentricity, Radial Noise, Star Level
-
- Control the appearance of shader halo effects. These parameters operate the same way as the Glow parameters Eccentricity, Radial Noise, and Star Level (see Glow on page 60).
Lens Flare
-
- Simulates a bright light source illuminating the surfaces of several camera lenses. The intensity of the flare is determined by the halo Intensity value. The size of the circles created is relative to the field of view of the camera. The slider range is 0 to 1. The default value is 0.
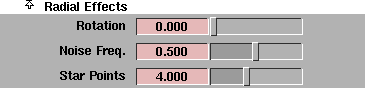
Radial Effects
The Radial Effects parameters control the appearance of shader glow and halo radial effects (Radial Noise and Star Level).
Rotation
-
- Rotates glow and halo noise and star effects about the location of the surface. The slider range is 0 to 180 (degrees). The default value is 0.
-
- The Rotation value affects the following ShaderGlow Glow and Halo parameters: Star Level and Radial Noise.
Noise Freq. (Noise Frequency)
-
- Controls the smoothness of shader glow and halo radial noise (see Radial Noise on page 61). The slider range is 0 to 1. The default value is 0.5.
Star Points
-
- The number of points on glow and halo star filter effects. A Star Points value of 1 produces a comet-like effect. The slider range is 0 to 10. The default value is 4.
-
- Non-integer values could produce a seam or hard line at the top of a star effect when rendered.
Photo Effects

The Photo Effects parameters control the overall appearance of the rendered image.
Film Grain
-
- The level of graininess of the rendered image to simulate the appearance of film stock. The slider range is 0 (no grain) to 1. The default value is 0.
Filter
-
- The color or texture applied to the rendered image to simulate a camera lens filter. The default setting is white (no filter).
Master Lighting Control

The Master Lighting Control parameters act as scaling factors that are applied to all lights in the scene.
Intensity
-
- A scaling factor applied to the Intensity value of all lights in the scene. For example, a value of 2 will double the brightness of all lights in the scene. The slider range is 0 to 10. The default value is 1.
Light Color
-
- A scaling factor applied to the Color of all lights in the scene. The default setting is white.
Dynamics Globals

|
|
See Dynamics on page 281.
|
The Dynamics Globals parameters define environmental properties which affect dynamic simulations. Typically a simulation takes place on the surface of a planet, in some kind of atmosphere, and possibly inside a building or room.
Gravity
-
- The force of gravity on the surface of the planet (relative to the force of gravity on earth) where a dynamic simulation takes place. For example, on the earth's surface, the Gravity value is 1. On the moon's surface, the Gravity value is 0.18. The Gravity value affects the rate at which objects and particles fall. The slider range is 0 to 10. The default value is 1.
Air Density
-
- The density of the atmosphere of the planet (relative to the density of water) where a dynamic simulation takes place. For example, under water, the Air Density value is 1. In earth's atmosphere, the Air Density value is 0.001 to 0.05. The Air Density value affects the buoyancy and air drag of objects and particles. The slider range is 0 to 1. The default value is 0.05.
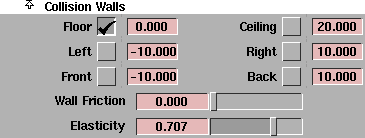
Collision Walls
|
|
See Dynamics on page 281.
|
The Collision Walls parameters define the properties of an enclosed space (for example, a room) in which a dynamic simulation takes place. The Floor, Left, Front, Ceiling, Right and Back values define the boundaries of an enclosed space. Each parameter has a toggle and a numeric field. If the parameter is toggled off, the numeric field has no effect.
Floor, Ceiling
-
- The point on the up-down axis (the Z axis for Z-up scenes, or the Y axis for Y-up scenes) where the floor and ceiling are located. The default for Floor is ON and 0. The default for Ceiling is OFF and 20.
Left, Right
-
- The point on the left-right axis (the X axis for Z-up or Y-up scenes) where the left and right walls are located. The default for Left is OFF and -10. The default for Right is OFF and 10.
Front, Back
-
- The point on the front-back axis (the Y axis for Z-up scenes, or the X axis for Y-up scenes) where the front and back walls are located. The default for Front is OFF and -10. The default for Back is OFF and 10.
|
|
The coefficient of friction is a
measure of how much
sliding friction an object
experiences when it rubs
against a surface. It is
defined as the ratio of the
weight of an object being
moved along a surface and
the force that maintains
contact between the object
and the surface.
|
Wall Friction
-
- Controls how much speed an object loses when it rubs against a collision wall. The Wall Friction value corresponds to the real-world coefficient of friction. The slider range is 0 (frictionless, no speed is lost) to 1 (all speed is lost). The default value is 0.
-
- Approximate Wall Friction values for some common materials are: ceramic tile (0.34), aluminum (0.48), smooth cloth (0.48), paper (0.52), stainless steel (0.57), plastic (0.6 to 0.7), glass (0.61), wood (0.7 to 1), polystyrene (1). Use these values as a starting point, and adjust them to refine the behaviour of objects in the dynamic simulation.
Elasticity
-
- Controls how much speed an object loses when it collides with and bounces off a collision wall. The slider range is 0 (all speed is lost) to 1 (no speed is lost). The default value is 0.707.
-
- Approximate Elasticity values for some common materials are: hard metals, ceramics, rubbers, or plastics (0.7 to 1), soft metals, soil, or flesh (0.2 to 0.5), any liquid (0). Use these values as a starting point, and adjust them to refine the behaviour of objects in the dynamic simulation.
Turbulence (noise)
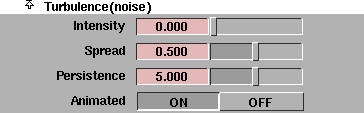
The Turbulence(noise) parameters define irregularities in the air which can influence object and particle motion. These parameters are similar to the volume light Turbulence(noise) parameters.
Intensity
-
- The strength of the turbulence. The slider range is 0 (no turbulence) to 1. The default value is 0.
Spread
-
- Scales the turbulence in space so that a given amount of turbulence covers a smaller or larger volume. The slider range is 0 to 1. The default value is 0.5.
Persistence
-
- Scales the turbulence in time so that it changes faster or more slowly. The slider range is 0 to 10. The default value is 5.
Animated
-
- Makes the turbulence either static (OFF) or animated (ON). Static turbulence does not change over time; eddies are always in the same place. A stream of particles moving through static turbulence always follows the same path.
-
- Animated turbulence changes over time. Particles moving through animated turbulence follow different paths. The default setting is ON.
Turbulence Table
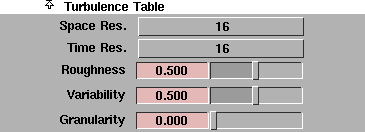
Turbulence is defined by its turbulence table. The Turbulence Table parameters define the turbulence table for environmental turbulence.
The turbulence table can be very large. A turbulence table with a Space Resolution value of 16 and a Time Resolution value of 16 (that is, a 16 x 16 table) takes up over 4Mb. A 32 x 32 table takes up about 36Mb.
If the environment Turbulence Table parameters are the same as the Turbulence Table parameters for any lights that have a non-zero value of Turbulence(noise) Intensity, the environment and those lights can share a single turbulence table, reducing rendering time.
Space Resolution
-
- Defines how large the turbulence table is in X, Y, Z. The turbulence pattern then repeats seamlessly within the environment. The valid settings are 1, 2, 4, 8, and 16. The default setting is 16.
Time Resolution
-
- Defines the resolution in time for animated turbulence. The Time Resolution value is the number of 3D tables that are created. The valid settings are 1, 2, 4, 8, 16, and 32. The default setting is 16.
Roughness
-
- Determines how smooth or rough the turbulence is. The slider range is 0 to 1. The default value is 0.5.
Variability
-
- Determines how smoothly or roughly the turbulence changes over time. The slider range is 0 to 1. The default value is 0.5.
Granularity
-
- Determines how fine-grained the turbulence is. The slider range is 0 to 1. The default value is 0.
|


