8 |
Environment Textures |
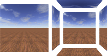
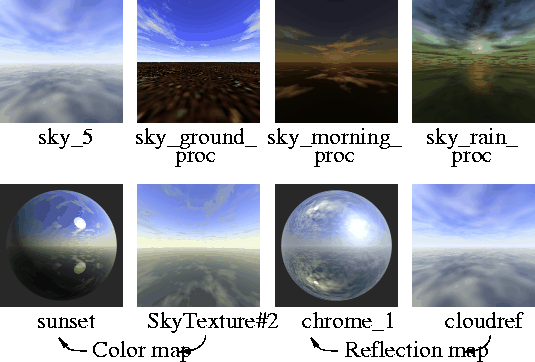
Environment textures simulate three-dimensional spaces by either using a series of image files (Ball, Cube, and Sphere textures) or using a computer graphic procedure (Chrome and Sky textures). Typically, you map an environment texture to the environment as a background for your scene, or to a shader to simulate environmental reflections. Do not map an environment texture to a shader's Bump or Displacement parameter. An environment texture mapped to Bump will produce unpredictable results. An environment texture mapped to Displacement will be ignored. In This Section:
Environment Texture Parameters |
|
|
| |||
The Color Balance, Blur, Effects, and 3D Placement parameters are common to all environment textures. Color Balance, Blur, EffectsSee Texture Parameters on page 101. 3D Placement
Texture Node
Environment Texture Types | |||
|
| |||
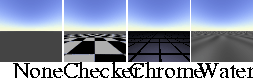
There are several different types of environment textures: ball, chrome, cube, sky, and sphere. | |||
|
|
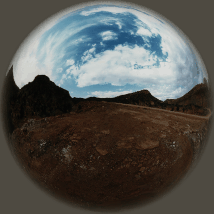
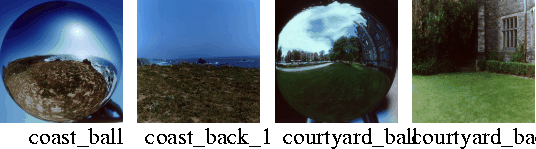
Ball TextureThe Ball texture uses an image (or a series of images) of a highly reflective chrome ball in an environment (real world or computer generated) to re-create that environment. See Ball Texture on page 108. | ||
|
|
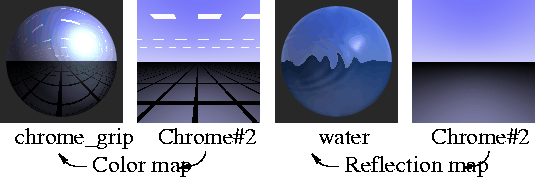
Chrome TextureThe Chrome texture simulates a showroom environment. See Chrome Texture on page 114. | ||
|
|
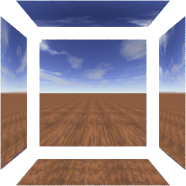
Cube TextureThe Cube texture simulates an environment by mapping six image files onto the inner surfaces of an infinite cube. See Cube Texture on page 117. | ||
|
|
Sky TextureThe Sky texture simulates a planetary environment viewed from the surface of a planet. See Sky Texture on page 118. | ||
|
|
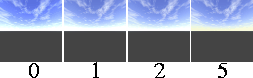
Sphere TextureThe Sphere texture simulates an environment by mapping a texture or image file directly onto the inner surface of an infinite sphere. See Sphere Texture on page 125. Ball Texture | ||
|
| |||
|
|
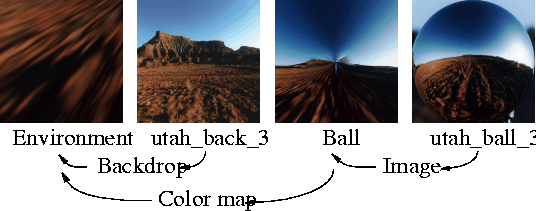
The Ball texture uses an image (or series of images) of a highly reflective chrome ball in an environment (real world or computer generated) to re-create that environment. This is possible because the reflections in the chrome ball provide a (nearly) 360 degree view of the environment.
A Ball texture background renders faster than a procedural texture background or a background modeled with surfaces. You can therefore replace a complex background with a Ball texture (by rendering an image of a chrome ball in that environment) to reduce rendering times. In order to use the Ball environment texture, you must map the texture's Image parameter with the image of a reflective chrome ball in the environment you want to re-create. You should also map the environment's Backdrop parameter with the image of the environment without the chrome ball.
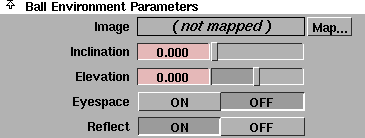
To create an image of a chrome ball, first place a highly reflective chrome ball (sphere) in the environment (real world or computer generated) that you want to re-create. Place the ball at the exact location (in the original environment) where you want your model to appear (in the re-created environment), and take note of the ball's distance from any floor/walls/ceiling or large objects. Photograph (or render) the ball using a telephoto lens, and take note of the camera's elevation (the angle between the camera's view and the environment's ground plane), and the camera's inclination (the angle between the camera's view and the environment's YZ plane). The photo essentially contains a compressed sample of the entire environment, except for the area directly behind the ball. The highest resolution is in the direction of the camera, so the image provides the best data compression for that point of view. A Ball texture that uses a single photograph of a ball has two limitations: the missing area directly behind the ball, and the decreasing resolution toward the edges of the ball. You can overcome these limitations by taking a series of photographs of the ball (up to a maximum of 32). The photographs must be taken on the horizontal plane of the ball (that is, not above or below the ball), at a constant distance from the ball, and at equal intervals around the ball. The Ball texture will automatically select the best image for any particular view (that is, no missing area and maximum resolution). Name the image files <filename>.1 through <filename>.n, where the files represent a sequence going clockwise around the ball when viewed from above. Remove the ball from the environment, and photograph (or render) the environment again using the same camera position, elevation, and inclination, but a wider angle lens (for example, 24mm to 50mm). The Ball texture can best re-create environments that have no objects in their center (that is, near the chrome ball). For example, rooms and interiors should not contain furniture, and outdoor scenes should not have trees or cars near the chrome ball. (In general, outdoor scenes can contain buildings). If you are using a single image of a chrome ball, map a File texture to the Ball texture's Image parameter, and then map the image file of the ball in the environment to the File texture's Image parameter. If you are using a series of images of a chrome ball, map a Volume texture to the Ball texture's Image parameter, and then map one of the image files to the Volume texture's Pix Sequence parameter. Set the Volume texture's From and To parameters to the extensions of the first and last image files in the sequence (1 and n). Map the image of the environment without the chrome ball to the environment's Backdrop parameter. Set the Ball texture's Inclination and Elevation parameters to the inclination and elevation of the camera used to photograph the ball. For accurate reflections of the re-created environment on your model, set the Ball texture's Projection Geometry parameters to values corresponding to the distance between any floor/walls/ceiling or large objects and the chrome sphere when it was photographed. To simplify the positioning of the environment's Backdrop image, set the Ball texture's Eyespace toggle ON. To model background geometry (for example, so you can add shadows, lighting effects, or fog to your scene), set the Ball texture's Reflect toggle OFF. Ball Environment Parameters
Image
Inclination
Elevation
Eyespace
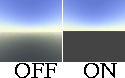
Reflect
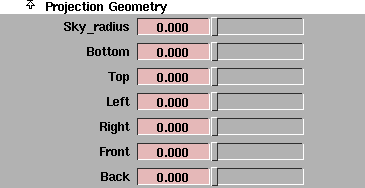
Projection Geometry
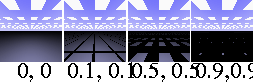
The Projection Geometry parameters define the location of the sky and/or room walls of the original environment so that the system can calculate reflections on surfaces in the re-created environment. For example, if the original environment consisted of a ground plane and a sky, then you would set the Sky_radius value to the radius of the sky, and the Bottom value to the distance between the ground plane and the reflective ball. If the original environment consisted of a room, then you would set the Bottom, Top, Left, Right, Front, and Back values to the distance between each wall and the reflective ball. In some cases you may want to use values different than the original environment. For example, instead of using the Bottom, Top, Left, Right, Front, and Back values to define the walls of a room, you may simply use the Sky_radius parameter. Because Sky_radius defines a sphere, reflections on surfaces in the simulated environment will be smoother and less likely to become blurred. You can also combine Sky_radius with Bottom, Top, Left, Right, Front, and/or Back. Sky_radius
Bottom, Top, Left, Right, Front, Back
Chrome Texture | ||
|
| |||
|
|
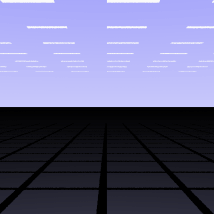
The Chrome texture simulates a showroom environment. The texture consists of a ground plane and a sky plane (with fluorescent style light rectangles), and provides a simple but effective environment to simulate reflections off chrome surfaces.
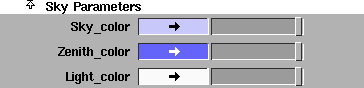
Sky Parameters
Sky_color
Zenith_color
Light_color
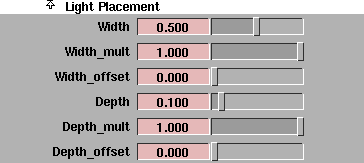
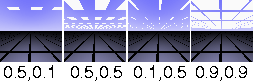
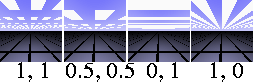
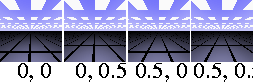
Light Placement
The Light Placement parameters control the size and placement of the simulated fluorescent lights in the environment. These "lights" produce reflections in surfaces, but they do not actually illuminate surfaces. | ||
|
|
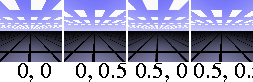
Width, Depth
| ||
|
|
Width_mult, Depth_mult
| ||
|
|
Width_offset, Depth_offset
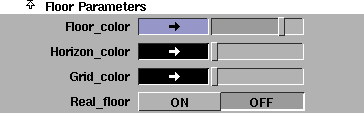
Floor Parameters
The Floor Parameters control the appearance of the environment's floor. Floor_color, Horizon_color, Grid_color
| ||
|
|
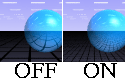
Real_floor
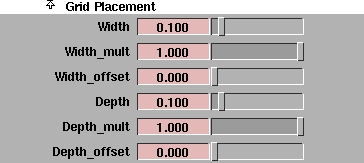
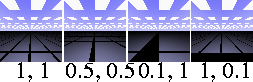
Grid Placement
The Grid Placement parameters control the size and placement of the floor's grid. | ||
|
|
Width, Depth
| ||
|
|
Width_mult, Depth_mult
| ||
|
|
Width_offset, Depth_offset
Cube Texture | ||
|
| |||
|
|
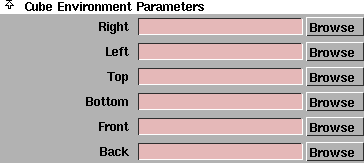
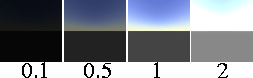
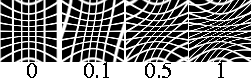
The cube environment texture simulates an environment by mapping six image files onto the inner surfaces of an infinite cube. One of the advantages of the cube environment texture is that you can blur it without increasing rendering time. Use Bluroffset to de-focus reflections when using the cube environment texture as a reflection map to simulate unpolished surfaces. The advantage to Cubic environment maps is that they can be blurred by an arbitrarily large amount without any additional cost. When generating a background from an environment map, the amount of blurring required to prevent aliasing increases with the field of view. In practice, a 5122 texture images and a field of view less than 90\xb0 , will result in very little blurring. For reflection mapped surfaces however, the amount of blurring will depend on the surface curvature and the distance from the eye point. This cannot be computed automatically. Using the Blur_offset slider in the Blur window lets you de-focus the reflections by a desired amount (see Common Surface Texture Parameters for more information). In fact, soft focus reflections can be used to simulate less than perfectly polished surfaces. Cube Environment Parameters
Right, Left, Top, Bottom, Front, Back
Sky Texture | ||
|
| |||
|
|
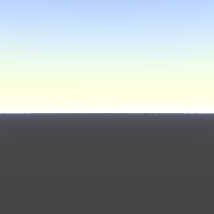
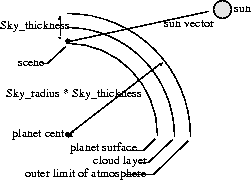
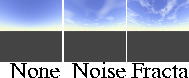
The Sky texture simulates a planetary environment viewed from the surface of a planet.
Sky Environment Parameters
| ||
|
|
Total_bright.
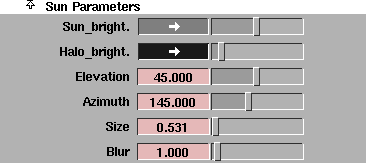
Sun Parameters
| ||
|
|
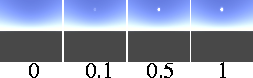
Sun_bright.
| ||
|
|
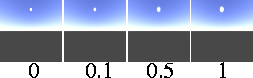
Halo_bright.
| ||
|
|
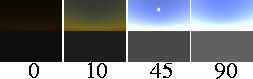
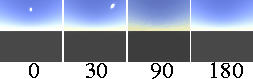
Elevation
| ||
|
|
Azimuth
| ||
|
|
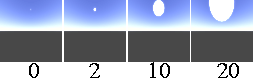
Size
| ||
|
|
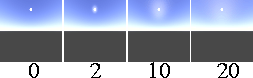
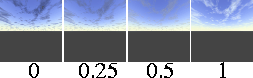
Blur
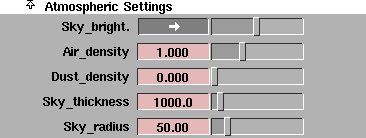
Atmospheric Settings
| ||
|
|
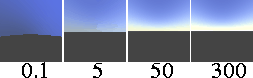
Sky_bright.
| ||
|
|
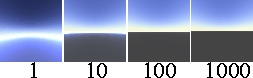
Air_density
| ||
|
|
Dust_density
| ||
|
|
Sky_thickness
| ||
|
|
Sky_radius
Floor Parameters
The Floor Parameters control the appearance of the environment's planet surface. | ||
|
|
Has_floor
| ||
|
|
Floor_texture
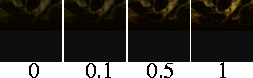
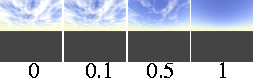
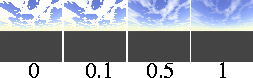
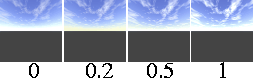
Cloud Parameters
| ||
|
|
Cloud texture
| ||
|
|
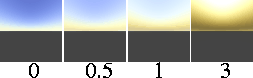
Cloud_bright.
| ||
|
|
Sunset_bright.
| ||
|
|
Density
| ||
|
|
Threshold
| ||
|
|
Power
| ||
|
|
Altitude
| ||
|
|
Halo_Size
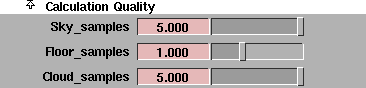
Calculation Quality
The calculations required for curved atmospheres are expensive. The Calculation Quality parameters do not greatly affect the appearance of the sky, but do affect the speed at which the calculations are computed. | ||
|
|
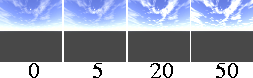
Sky_samples
| ||
|
|
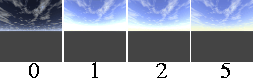
Floor_samples
| ||
|
|
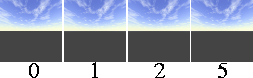
Cloud_samples
Sphere Texture | ||
|
| |||
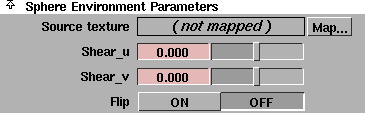
The Sphere texture simulates an environment by mapping a texture or image file directly onto the inner surface of an infinite sphere. The best way to create a sphere environment is to use a ramp texture and paint objects onto it, being sure to avoid the poles and edges. Sphere Environment Parameters
| |||
|
|
Source texture
| ||
|
|
Shear_u
| ||
|
|
Shear_v
| ||
|
|
Flip
|
| Copyright © 1998, Alias|Wavefront, a division of Silicon Graphics Limited. All rights reserved. | Please send questions or comments regarding the documentation to: [email protected] |