Step 5... Making a pattern from your freezer paper drawing.

First a History lesson: How I learned about freezer paper piecing (FPP). 
Get a cuppa tea and take a break!

Way back in the  80's Georgia Bonesteel has a PBS series on TV for quilting lessons. Watching that is basically where I learned to quilt.  In one of her series from the book "New Ideas for Lap Quilting" Georgia began to make intricate quilts using a freezer paper pattern and cutting the pattern apart, ironing the freezer paper to fabric and then cutting it out 1/4" away from the freezer paper. She would then sew the pattern back together using the edge of the freezer paper as her guide.  Now, I don't really know why you still don't hear much about this technique and why it hasn't "taken off" like foundation piecing.  But I took off on it like a rocket to the moon!  She revolutionized my quilting life with this freezer paper technique!  I developed a way to make Mariner's compass quilts with it, used it to make one block from traditional patterns so I didn't have to make plastic templates, and even learned later to appliqué using freezer paper. Elsie Vredenburg has a free cardinal freezer paper piecing pattern on her WWW site if you would like to try this on another type of project. Check out her lighthouse patterns too!

 I have  been using and teaching this method of  "freezer paper   piecing" for over 10 years, teaching it as a Mariner's Compass class first,  but easily adapted for any pattern.  I won't do a  Mariner's Compass quilt any other way... not even foundation piecing. I love it! If you can't do  a pattern by foundation piecing, or strip piecing, then  freezer paper piecing it your best bet. Judy Mathieson even incorporated FPP (freezer paper piecing)  in her book, Mariner's Compass Quilts, New Directions. I was introduced to it by a local gal from Pittsburgh at a retreat way back in 1981. It in not "new"... just re-developed over and over again!

 Now imagine...  print out a pattern from Electric Quilt  or BlockBase onto freezer paper.  Draft  the pattern yourself if you don't have one of those computer  programs or a handy dandy drawing  program of some sort.  Just code your pattern, cut it all apart just like we did here, and sew it back  together along the edge of the freezer paper.  It  doesn't matter what the pattern is.   Once you learn how to do set-in seams, it will  break  your foundation piecing pattern limits, while still giving  you great accuracy.   If you cut a pattern  apart on the lines and sew it all  back together on the lines, I don't see much reason  why it won't come out perfect and flat no matter what pattern is.  (okay, I did say *much reason*, but you never know!)

Okay, back to the drawing board... just thought we would take a break with a little of the development of FPP.

1:  MAB thinks: Okay, I cut the three sections apart!  Now we can touch FABRIC?

Okay, I think that I will sew these three together just as they are here. I will sew the top two triangles together first, then *set-in* the lower one.
 

2: 
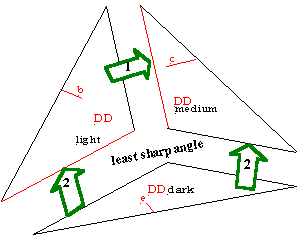
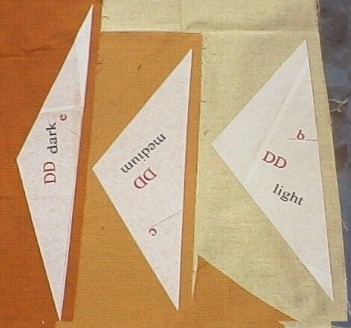
I cut out one of my triangles.  I decided to start with the yellow triangle.  I figured that I wanted a warm yellow to red in the center, and wanted to start with that. 

I don't think it will matter that much which triangle you start with, as long as you pin them onto your master drawing after you sew so you will always know where they go.

Only cut one triangle apart at a time, so you don't get confused.. 

3:  PAT sez: Analyze the triangle,  the center has three angles. The one with the least Sharp, or the Most Flat triangle will be the 'set in' one. (Sew the shortest seam first, is also a good rule here)  Therefore pick  up the OTHER TWO to sew together first...


4: Okay, I did that.  Those are three different fabrics. I ironed my triangles to the wrong side of the fabrics.

What's next???  What's next???  Can we cut now?
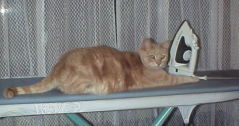
5: Shoo the cat off the ironing board...   You iron the the shiny side of the freezer paper against the fabric... it SHOULD stick. 

THEN  you will press the LIGHT triangle on to THE BACK of the LIGHT fabric,  MEDIUM triangle on to the BACK  of the MEDIUM fabric.. 
DARK triangle on to the BACK of the dark fabric. 

Unless I pre marked the grain (yes, sometimes I do that!) I usually align one OUTER edge of the triangle with the straight grain of the fabric.  You will have less stretching that way. Although the freezer paper does control the stretching in this method.
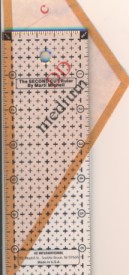
 

6: 

Now, using a 1/4 " marking on your ruler, trim the fabric for your triangles 1/4" away from the freezer paper on all sides of the triangle.

This will be your seam allowance.  Trim carefully!

Next step 6: Sewing set in seams
Introduction.... getting started STEP 1: Drawing your initial pattern Drawing options
Pre-Frenzy Tips
STEP 2: Determining your light source and labeling the triangles
STEP 3: Making freezer paper templates from your triangles and sub-dividing the triangles. Step 4: Sub-dividing your triangles Step 5: How to use freezer paper for a quilt pattern Step 6: How to set in seams
Step 7: More how to set in seams Step 8: Sewing it all together Step 9 More sewing it together with more pictures Back to the Main One Day Quilt Frenzy Page


Hosted by www.Geocities.ws

1