


Day Four: Let's Play with Bondo.
Preparation :
Not much preparation needed yet again, just wheeled the car out and found our tools needed for the day, then we began day four.
The Work :
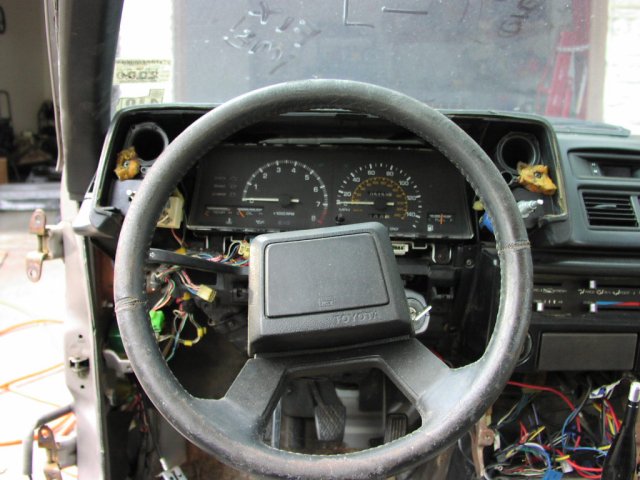
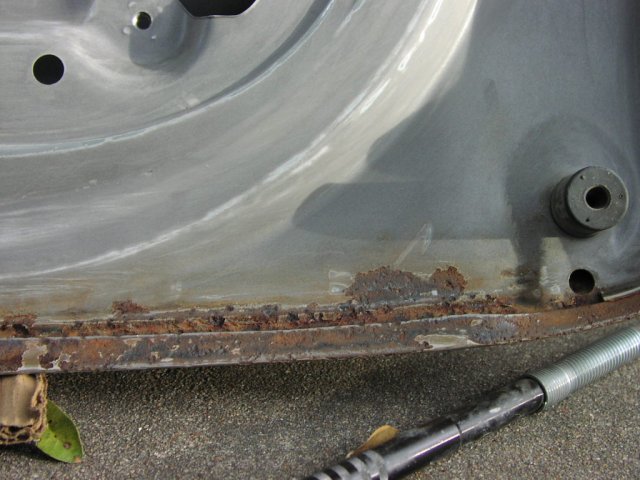
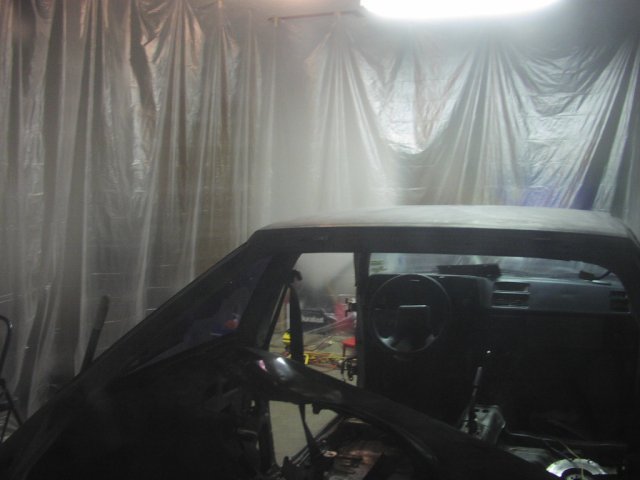
Day four consisted of finishing the sanding, patching up the many dents with Bondo, removing rust from the hatch area, and finally, preparing the garage for the painting that is to be done on day five. Oh, we also removed the plastic trimming around the instrument panel, and also the front air dam and all the other little trimmings around the front bumper. We started the day off by finalizing the sanding process. We took a walk around the car and hunted for spots in which we haven't sanded yet. To our surprise, there were quite a few parts that were still unsanded. We had totally forgotten about the door jams on the body and the door itself, on day three. We went back in the morning and finished sanding those off, then took another walk around the car. After that, the car seemed to be well sanded in every area possible. Rust removal came next. A large amount of rust covered the bottom half of the hatch (look at the pictures at the end of this article to see what I'm talking about). Taking out the Dremel, we slowly began to scrape the away the rust bit by bit. After the large portions of the rust were removed, we went back with a 120 grit sandpaper and sanded the area down to where it would be level with the rest of the hatch. We then grabbed the 180 grit just to touch it up a bit. We spent a good couple hours doing that, then took a break for lunch. Returning to work with a full stomach is never such a bad thing. Then we headed onto repairing the dents around the car. There were quite a large sum of dents, ranging from the front & rear fenders, to the doors and roof. We sanded down the areas where the dents were down to metal, using a semi coarse sandpaper such as 120 grit. Remember to use your sanding block here, just to make sure everything is level. My brother then proceeded onto mixing up the Bondo and testing it on our front left fender, in which we didn't need due to the humongous dent & rust on it. In our little experiment with the Bondo, we learned that once you mix that stuff up and paste it, it dries insanely fast. My brother had to work with it for quite some time before he got the hang of it. After the tests, we began to apply the Bondo onto the car. First, we patched up the roof, then we headed to the left rear fender, then to the right front fender, and finally onto the doors. We let the Bondo set for a bit, (around 30 minutes) and then we went back with some 120 grit sandpaper and sanded the areas of Bondo, until they were level with the areas around it. After that we used some 220 grit sandpaper just to smooth things out. Once again, remember to use your sanding block here, so everything is flat and on the same level. Another hour went by after even more sanding. While I was inside the garage cleaning things up and setting things aside to prepare our garage for tomorrow's painting, my brother removed the plastic trimming around the instrument panel. Then he went onto removing the front air dam, and all the little trimmings around the front bumper. I swept out all the leaves and dust out while he was doing this, and created a huge area for the car to sit in. The we both took out the 'Painter's Plastic' and masked off the area where we were going to paint. We also covered most of the floor with this stuff, so we wouldn't get the floor all dirty with primer and paint. We made a nice big rectangle out of the Painter's Plastic and then rolled the car back in, ready for Day Five.