
The Christmas Card
| I decided to make my own Christmas cards one year and use a place that was special to us and familiar to family & friends. I used camp and also the Nichols Homestead but I will only show you camp examples. This picture of camp was captured with a standard camera, when the film was processed I asked for them to be put on a floppy. |
|
|
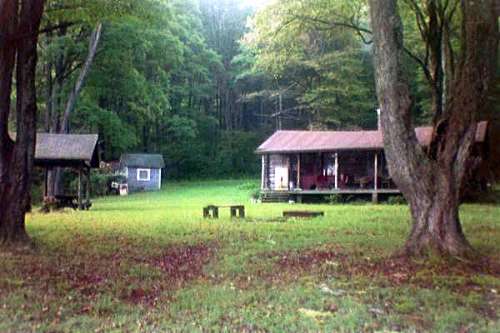
The initial picture. |
|
Photo by Lila Nikon Potter County, Pa. Floppy Disk / Photo Lab June, 1998 |
|
|
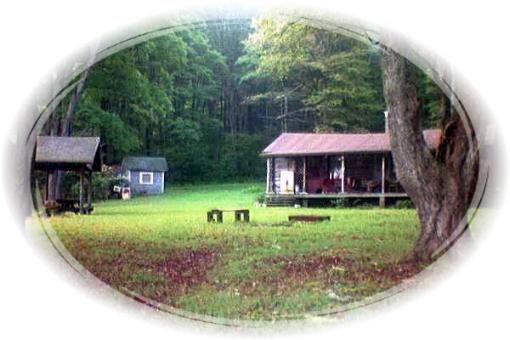
#2) Created by using a "mask", I selected a shape and drag it until I get all the portions of picture I want in the selection area. The photo program I used for this gives me some particularly fancy options for the masks, most programs will give you a choice of basic shapes, oval, circle, square. After I created the mask I copied it to clipboard and pasted it as an image with a new name. |
|
|
|
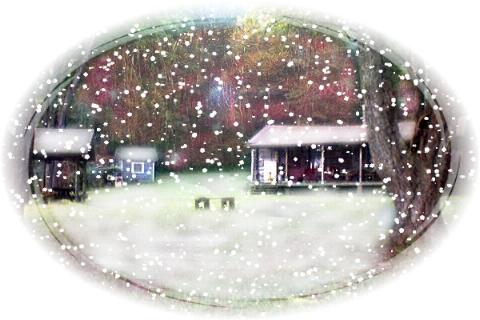
#3 |
|
#3) So now I need some snow 'cuz it's Christmas and I used a painting tool (I used a paintbrush for this) to create a snow effect on the ground and buildings. To get rid of the green foliage in background, I found a close-up picture of a lit Christmas tree, I resized it to match proportions of camp image and lightened it up so it was washed out. Then I cloned some lights to cover the foliage. I choose a very transparent touch. Next I selected an artistic enhancement for the whole picture, I used oil painting at the lightest level. This helped to blend in my snow and lights with photo to look like a real painting. And finally I wanted snow falling so I used a special effect (*Particle Effects) that applies snow, I can control the amount of snow and even the placement of flakes. *Particle Effects are effects that add objects (particles) to your image in a realistic way, fire, rain, snow, fog. |
|
The Card |
|
|
|
#4 |
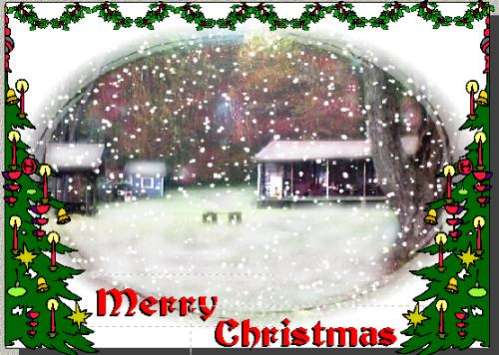
| #4) I took the picture into a graphics program and added some clip art
and text. Then I used sculptured
scissors to cut the bottom edge of the front of card and tipped it in gold.
I even hand painted the stars and candle light on Christmas
trees with a light spot of gold paint, I used model car paint and a very
fine artist brush. If you don't want to paint, you can also
find a fine tipped marker pen in silver and gold. I think a little glue
and glitter might also be a nice touch. Be sure your card is completely
dry if you're printing cards on an inkjet printer and use the glue or
paint sparingly, too much liquid and your ink will bleed. It was a lot of
work but I was very happy with the results. This image was captured from
my saved card in my graphics program so when you click on the bigger
image you will see text box frames, they did not show up on my printed
card, of course.
Postscript: When I explained to someone all I did to create this card they commented that I must have too much time on my hands. :) I really don't, I just get carried away with a project, sometimes! |