|
Join Us!
|
One of the most popular function of adobe photoshop is its ability to remove blemishes or to improve the
face or skin of people to make them look good. Another one of its very important function is its ability to do
image restoration. Now, we will take a look to the tools that make these effects possible!
Lesson 2-1: Alteration tools!
Today we'll be studying these tools:
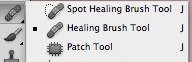
| First part of alteration tools: |
|
Spot Healing brush tool
The Spot Healing Brush was first introduced in Photoshop CS2 and, like the other two healing tools
(the standard Healing Brush and the Patch Tool), it's essentially a texture replacement tool, meaning
that it tries to create a seamless repair by replacing damaged or unwanted texture from one area in an image
with good texture from another area, without changing the problem area's original color or brightness values.
he Spot Healing Brush Tool automatically samples pixels to correct a spot with one step.
To manually set the source, use the Healing Brush Tool.
| 
|
Healing Brush Tool
The Healing Brush tool allows you to fix image imperfections such as scratches, blemishes, etc.
By sampling the surrounding area or using a predefined pattern you can blend the
imperfections into the rest of the image. To select the source, click alt on your keyboard and a crosshair will appear.
When this happens, click the pixel that you want to use as source. :)
| 
|
Patch tool
The Patch Tool retouches image using sampled pixels or pattern.
It works as a combination of the Healing Brush with the Lasso Tool.
To use this tool, you must study the "pattern" and "destination" options
that can be found in the options toolbar.
| 
|
Now go and start the activities!
|
