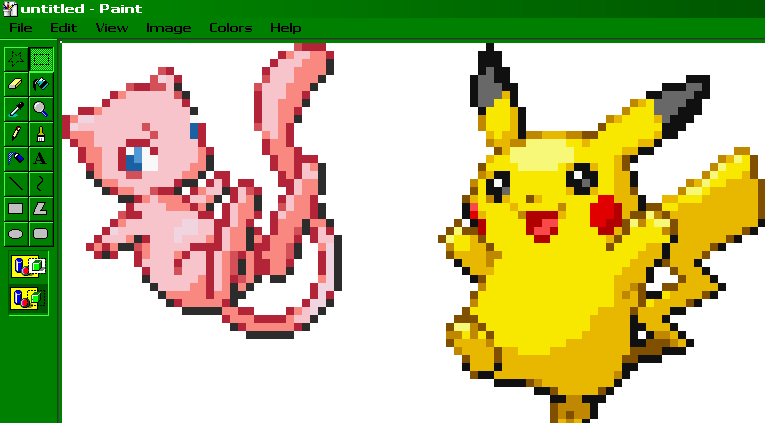
Now, Make the new and old color guides with our base pokemons colors (mew) as the old and the pikachus as the new.

Using the selection tool move the guides out of the way and the sprites away from the edge so we have some working room.
Now it is time to look at what parts we are going to put on the mew. If we look at the 2 sprites we can see that the ears and tails have something in common.
Notice how the pikachu is facing the left and the mew is facing right
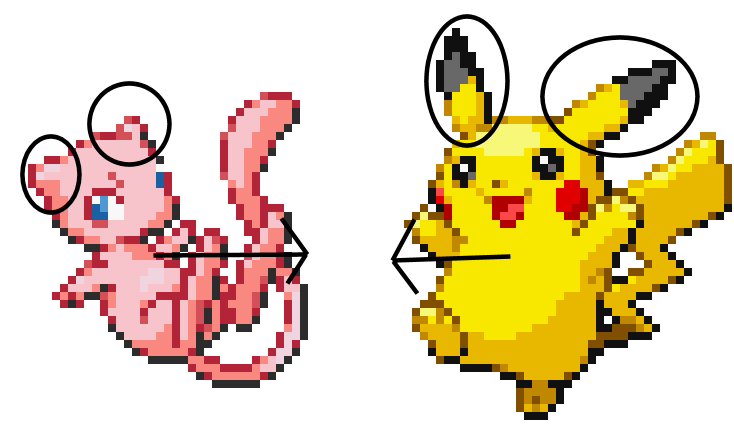
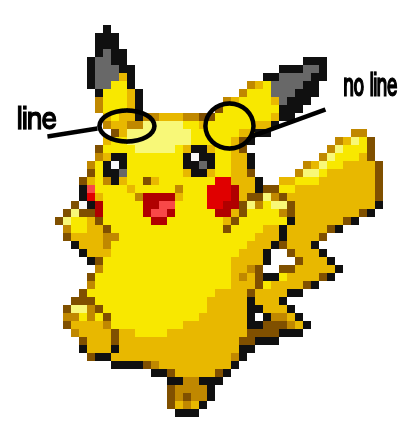
When you look at the sprites in a 3d perspective the 2 ears closest to you are the same and the other 2 are the same. (You can also tell by the size, and how the ones closer to you don't have the line of the head and the other does.
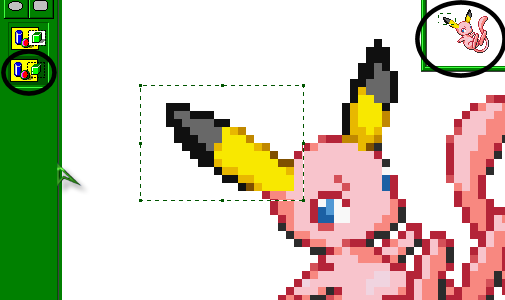
Using the selection tool cut off the ears and put the pikachu aside for now.
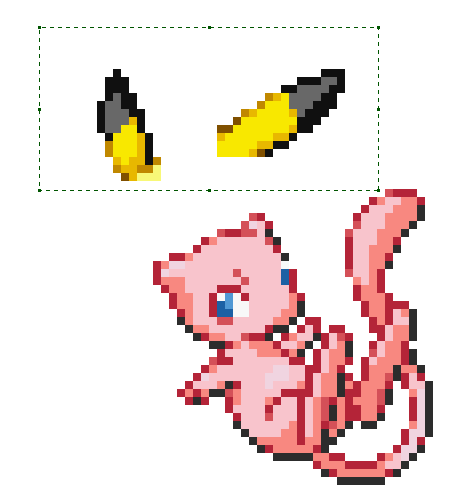
In order for the ears to fit we have to make them face to the right instead of the left. To do this select them, left click, choose flip/rotate and choose flip horizontal.
Now, select each ear and make sure you have the 'color only' on (this is very important, otherwise when you select things you'll have a big white box around your sprite when you move it around) and place the ears over the mews old ears. Also, make sure you have the thumbnail on, it makes it a bit easier.
Take tail off of the pikachu and move it over to the mew. You might have already noticed that part of the pikachu is covering the tail. Using the pencil tool erases the part of the pikachu covering the tail (erase with the pencil by right clicking).
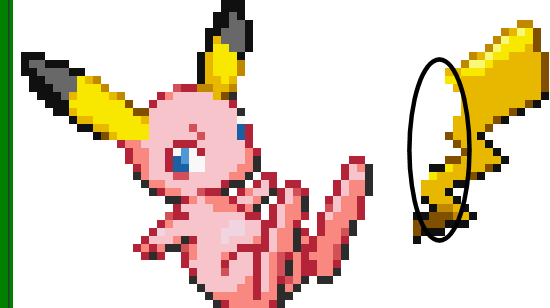
Now, using the dropper tool and the pencil tool, try your best to remake the lost parts of the tail. It's not that hard.
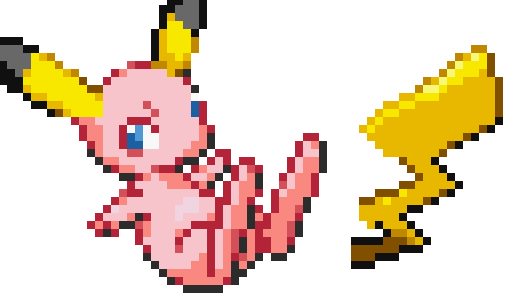
Now that you have the tail made, select the mew and connect it to the tail.
We are now able to recolor it. Bring the guides that you set aside back over to the mew sprite and recolor the sprite.
Clean up the area and resize it and do any touchups as needed.
Here is our final result-
This concludes the basic splice tutorial.