--Contents--
1. Introduction
2. The basics of recoloring
3. A more complex recolor
4. The basics of splicing
6. Transparency using Irfan view
7. Trainer sprites
8. Tips/Tricks
9. Downloads
10. Animated Sprites
11. Comics
12. Contact/Coming soon
3. A more complex recolor
Now that you have learned the basics on recoloring you will now learn how to recolor multiple colors on the same sprite, and choose your own colors.
Let's start off by putting a Minun into paint. Unlike ditto, Minun has more than one color on its body. Let's call these colors 'color sectors'. Minun has 2 color sectors (blue and a tan/white color)
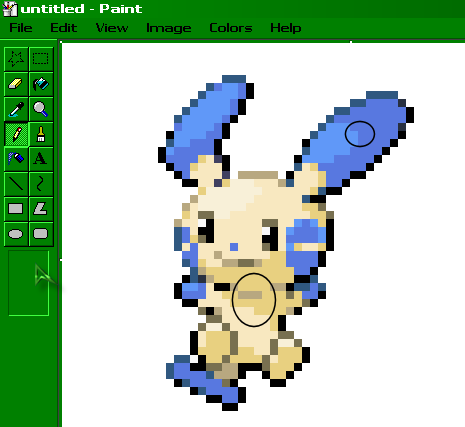
Let's start out by making the old guides for the two colors. Remember not to put them on top of each other but instead put them next to each other as shown below.

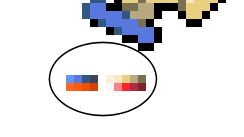
We are now going to choose the new colors. I have picked out red for the body (sector 1) and orange for the ears (sector 2). We are going to take the colors off of the groudon sprite are place them under the white/tan old guide making our first new guide.

*remember to save every once in a while for just incase.
Next we are going to manually pick our own orange colors to replace the blue. To do this, double click on one of the orange colors on the bottom and choose 'define custom colors'.

Now you should have the color chooser open and have it set on the orange. Using the arrow on the right pick a light orange that would replace the light blue well. Once you have picked out the color press ok and place that color under the old guide. Now do the same thing again but picking a darker shade of orange each time until you have a full new guide.
You should now have both new guides.
We are now ready to start recoloring. I suggest you start with the body and then do the blue.
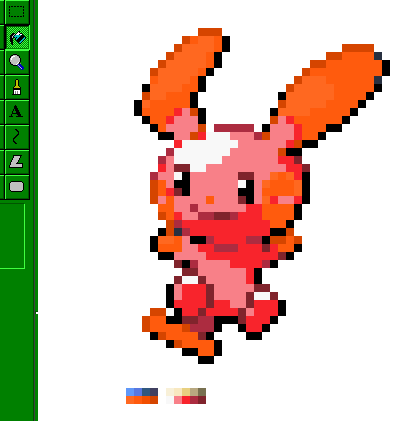
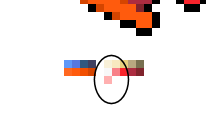
Now that we have recolored the minun we should zoom out and take a look at what it looks like and do any touchups as needed. As you can see the big white circle on its head doesn't really fit with the other colors. So, what we are going to do is pick out a really light shade of red to replace it.
After you have taken care of that touchup get rid of the extra pictures and guides you may have up and resize the image down to fit the sprite.
Here is our final result-
since we both picked our own colors, yours might look a bit different from mine.
this concludes the recoloring tutorials. Now that you know how to choose your own colors, take colors from other sprites and totally recolor a sprite and all of its color sectors you are ready to move on to a basic splice.
Tutorial copyright (C) 2005 Nick Barrett
Pokemon copyright (C) Nintendo