jane and katie's room
Ever since I found out that Katie was
a girl (I guess she still is a girl...), I've been wanting to redo their room with something more girly
and pretty. Right now, it's cute - but gender neutral and a
little dark. The top of the wall is the same color as the rest of
our house (kind of an off-white/grey/taupe color), the bottom is a dark
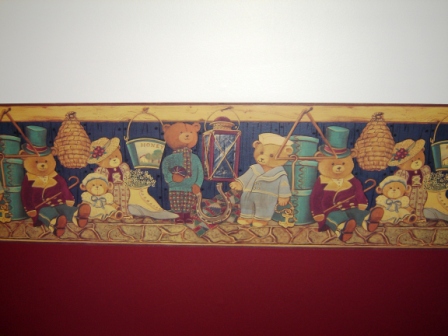
burgundy and there is an antique style teddy bear border around the
middle. Here's a before picture. I was going to tidy the
room before I took a picture, but that wouldn't have been realistic.
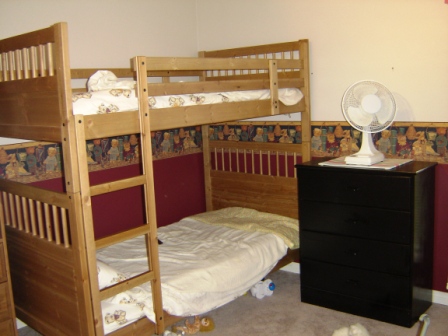
I have big plans for this space.
Here's my to-do list:
-
strip the border
-
paint the upper portion of the
wall green
-
install beadboard wainscoting on
the bottom
-
install a chairrail
-
paint the chairrail, beadboard,
baseboards and all existing trim a creamy white
-
paint the door and closet door
the same white
-
change the light switches and
outlet covers to white (they're that weird beige color that was so popular
in the 80's)
-
paint Katie's dresser (the black
one) white
-
maybe replace the track lighting
to something with more lights. There are two lights on it now,
and I think the room needs a little more brightness, especially on
our grey Vancouver winter days
This is going to take me some time,
especially because I'm a procrastinator and I don't get much time to do
extras. I plan on keeping somewhat of a journal to mark my
progress.
May 18, 2005
I decided to strip the border today.
It turned out to be a little easier than expected. I got some
stripping gunk at Rona and soaked the paper in sections and then pealed
it off, and where necessary, used a spackling tool to scrape the bits
off. In all, I think it took me about 2 hours, and that included
all the time I spent trying to move all that crazy furniture away from
the wall and then putting it back. I kind of felt a little sad
taking it down because it made me think of the first time we viewed this
condo and how the "kid's" room was very inspirational to me to get on
Ian's case about getting some babies to put in it. I think I'm
turning into a sentimental old fool (I am turning 30 this year after
all!)
May 28, 2005
Today was the big painting day.
I got the paint and rollers at Home Depot last night. I intended
to get an early start, but somehow procrastinated until 2:00 in the
afternoon. I took down all the pictures, removed the nails and
screws from the wall, and took down the roman and Venetian blinds.
I then filled all the holes with caulking and washed the walls with TSP
and warm water. I decided to prime the top of the dark burgundy
that I would be painting green, just to make sure there wasn't a line.
It was quick to do because I really didn't have to be careful and it was
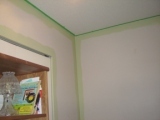
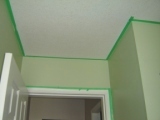
quite a small area. Then I taped around the window, doors and
ceiling. I always tape because I find it hard to control the
roller, especially around the ceiling - probably because I'm short and
have to really reach. I then cut in all the corners and edges.
This always takes so long...I hate it. The rolling was next, and
went quite quickly. I finished everything by 8:30, but I stopped
for dinner and visiting with the fam during that time. I think
probably took me about 5 hours of actual work. After I
finished, I stepped back to admire my handiwork and was horrified...the
color was TERRIBLE. It looked so minty and gross. Ian had to
remind me a few times to step away from the room, take a break and look
again after it dried. I looked at it again before going to bed and
still hated it.
May 29, 2005
The color was only slightly better
this morning after a good night's sleep. I decided to do another
coat, just to make sure I gave it a fair chance before going back to
Home Depot. After the second coat, it looked very minty again, but
I walked away from it and came back a couple hours later. It
looked better. I decided to take down the green painters tape at
that time too. What a difference! Once I got rid of the
tape, the walls were the color I expected them to be. I think the
tape was casting a crazy glow on the walls...or maybe I'm just getting
used to the color. Also, there is still burgundy on the bottom of
the wall, and I'm sure that's affecting the tone of the green.
Anyway, I think the color will be just fine (too bad you can't really
see the color in the pictures - it looks really bright on the computer,
but it's actually kind of muted). I rehung the roman blind and
moved all the furniture back into the room. I'm going to try to do
the beadboard and chairrail one day this week. I've already got
Georgia booked to assist.
June 23, 2005
So, it only took me a month to get my
butt off the couch and continue with my project. I went with my
brother Luke on Tuesday to get the bead board, chair rail and misc
supplies needed (I needed his truck to get the longer lengths of trim
home). I pre-measured the room and figured out the specific
lengths I would need for each wall, and got Luke to cut them at Home
Depot so that I'd end up with less waste. The next day, after much
deliberation, I decided that I should also put casings around the window
and closet - I thought that they might look unfinished without trim.
I went to Home Depot and picked some nice "Colonial" style trim.
Then I had to wait for Ian to have a day off so that I could get down to
business. He finally didn't work today so it was my big day.
I decided to do the window first because it was the trickiest. It
went pretty well, until I hit a small snag. The trim was wider
than the space on the right hand side of the window, so I ended up
trimming a 1/2 inch off the entire length. This wouldn't be too
difficult if I had a table saw, but it proved to be quite a challenge
for me with the jig saw. Oh well, I guess that's what caulking is
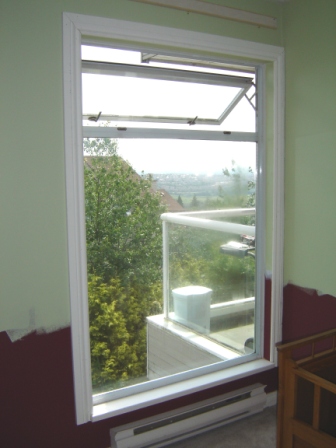
for. All in all, the trim is really nice and adds a lot of
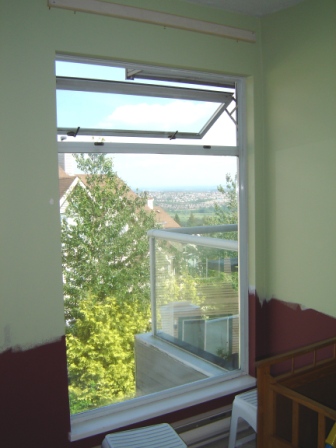
character to the window and the closet. Here's a before and after
picture of the window (I forgot to take one of the closet)
June 25, 2005
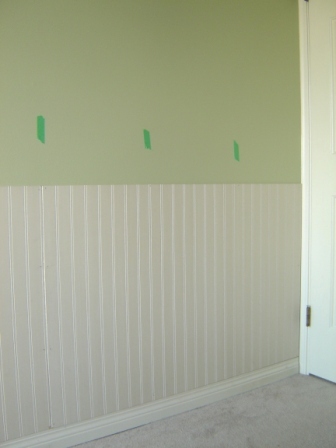
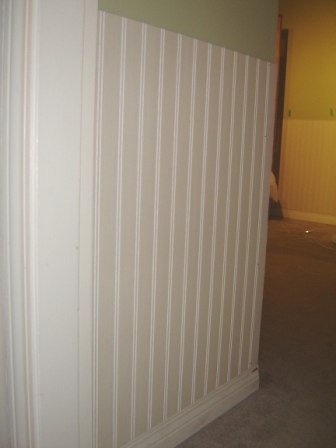
I started on the wainscoting this
morning. It was easy to put up. First, I marked all the
studs around the walls with painters tape, then started installing it.
I put adhesive on the back of the panel, held it in place for a couple
minutes, and then nailed it along the studs. The most time
consuming thing was cutting the holes for the electrical outlets and
cable and telephone boxes. I really wanted to finish the chair
rail today, but ran out of time because we had company, and Jane really
wanted to sleep in her room, so I had to move the bed back for her.
Oh well, there's always tomorrow right? Covering the burgundy
really brightens up the room and makes it look so pretty. I can't
wait to put up the chair rail and paint it and be finished with it!
Oh ya, one more thing. I was at
the fabric store the other day (looking for material for our bridesmaid
dresses for Brenda's wedding) and I saw the most incredible fabric.
It's called Minky, and it is the softest thing you'll ever feel.
I'm starting to think that I'm going to sew duvet covers. I'm just
looking around now for some inspiration in regards to patterns.
The Minky comes in lots of colors that would coordinate quite nicely in
their room, so I just need to come up with a design. I'm so
excited, because I've been looking at bedding for them, and haven't
found anything that I really like. Everything is Dora or Elmo or
just plain ugly.
Oct 7, 2005
I finally got around to
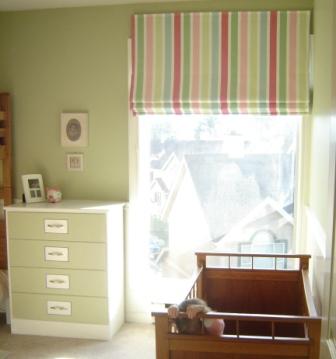
painting the wainscoting and trim. The cream color I chose
(Vermont Cream from Behr) wasn't quite as "creamy" as I had
envisioned - I think I would pick a more antique white if I were to do
it again. It looks nice enough though. The room has a whole
different feel to it. It's pretty and bright and much more suited
to two little girls.
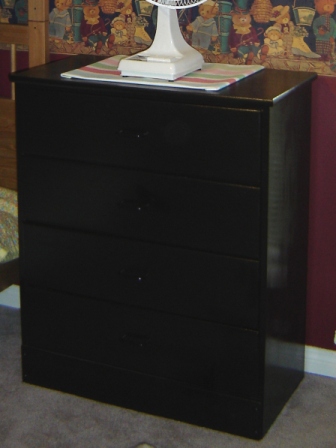
I also painted
Katie's dresser. Here are the before and after shots:
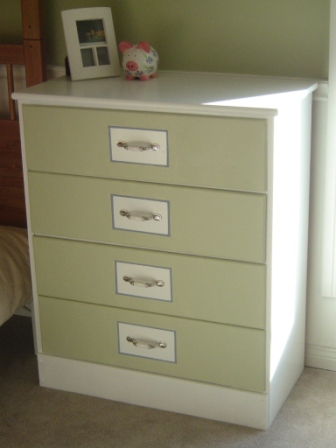
I'm almost finished my original to-do list
- I only need to replace the outlet covers and light switches...however,
I've added a new project. As we speak, my dad is building a window
seat. When it arrives, I'll just have to sew a cushion for it and
install some curtains around it. I can't wait - I think the girls
will really enjoy it!

