 |
|
|
|
|
|
|
|
|
|
|
|
|
|
|
|
|
|
|
|
|
|
|
|
|
|
|
|
|
|
|
|
|
|
|
|
Final shaping of the neck and headstock. keith gregg - first time guitar builder |
|
|
|
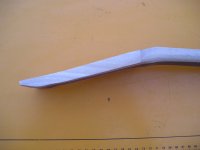
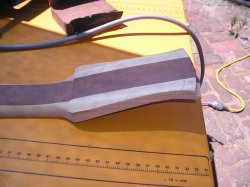
A bit more work with the spokeshave brought the neck to a rounded shape that would be right after more sanding to smooth it off. |
|
|
|
 |
|
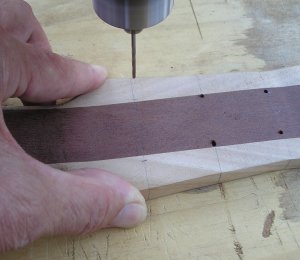
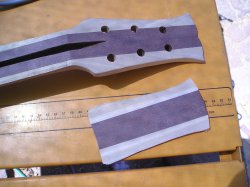
| Part of the same process was to drill the holes for the tuning machines. This was done by drilling pilot holes with a small drill, with only one wrongly positioned hole (Mistake #8!). When making the final large holes, this misalignment was corrected by forcing the larger drill to NOT follow the pilot hole. A firm hold on the wood and a very slow approach to the final drilling is essential for this. |
|
|
|
|
|
 |
|
|
|
|
|
|
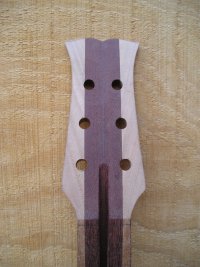
despite the misaligned pilot hole (lower middle above), the final drilling worked out okay. A reassurance for any readers who doubt their craftsmanship. with lots of patience and careful examination of how things came out, you can work out how to make them the way they should be. |
|
|
|
|
|
 |
|
|
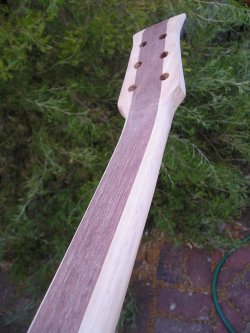
The final shaping of the neck with the spokeshave brought it down to a little thicker than final size, with the rest to be taken down with sandpaper. At this stage the sanded surface (150 grit) produced a matt finish that still didn't really show the shape well. The photograph shows the general shape, but |
|
|
|
|
|
not the curvature on the back of the neck. The plan is for the neck to be a plain rounded shape. After cutting a shallow groove for the string nut, and some final tidying up of the headstock, the neck will be ready for joining to the body.
When the neck blank was flattened, it became a bit too thin to make a full thickness headstock.
At the upper end it was too thin for the tuning machines to fit properly. The solution was to put a laminate onto the back. |
|
|
|
 |
|
|
|
|
|
|
|
|
|
 |
|
|
|
|
|
|
|
|
Fortunately, I still had some of the original neck offcuts, so it was possible to duplicate the three-layer structure. A piece of offcut was sanded to a thin wedge-shape and cut to match the lower part of the headstock. |
|
|
|
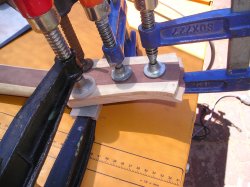
The picture on the right shows the new piece just placed onto the back of the headstock. The new piece was glued to the back of the headstock, to be trimmed and drilled later. This was glued and clamped to align the jarrah stripe |
|
|
|
 |
|
|
 |
|
|
|
|
|
|
|
|
|
|
as accurately as possible to the head.
The plan is to keep the rounded end on the head, but make the main structure thicker. After gluing, the back of the head will have to be sanded to make it the same thickness all over, except for the curved section.
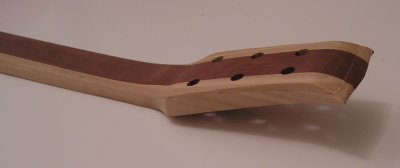
Redrilled and rough-sanded, it's getting close to finished. With a little smoothing off to do and minor reshaping of the top, the headstock is now uniform thickness with an unusual curve on the back. |
|
|
 |
|
|
|
|
|
|
 |
|
|
|
|
While waiting for the glue to set, I began making a device for routing a shallow rebate around the guitar body, for the binding. This was another idea from John Fisher, which I developed a little further. To avoid interrupting the story of the main construction project, this has been described on a separate page. |
|
|
|
|
|
| Index Back to page 1, 2, 3, 4, 5, 6. Gluing the neck to the body AT LAST! |
|