 |
|
|
|
|
|
|
|
|
|
|
|
|
|
|
|
|
|
|
|
|
|
|
|
|
|
|
|
|
|
|
|
|
Page 2: Gluing body parts - and other things...
A note about jarrah: Eucalyptus marginata is a hard, dense wood that is known for blunting tools, but looks great. When I searched for information on its qualities as a tonewood, I was disappointed to read that it is "accoustically dead" when tapped, and a bit unstable. But when I tapped this very old wood, the tone was clear and musical. I think this was because the resin was all dried out. I guess if it has to be 100 years old to be useful for guitar making, there won't be too many jarrah Les Pauls around. |
|
|
|
 |
|
|
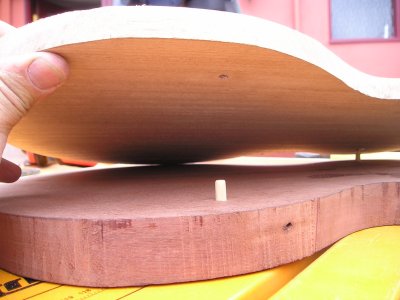
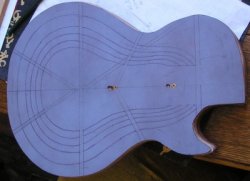
Before gluing the top to the body, I drilled holes through both sections at locations where the 3-way switch and one of the volume controls would be. Then a piece of dowel was inserted to allow the body and top to be aligned quickly and accurately, without risk of slippage during glueing.
The two surfaces were flattened by sanding and checking at regular intervals with a steel ruler, to get each as flat as possible, being sure to measure flatness in all directions. |
|
|
|
|
|
|
 |
|
|
|
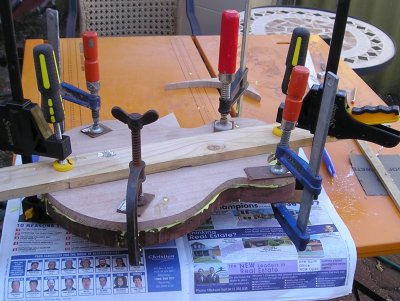
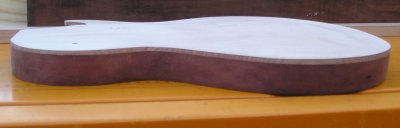
This part of the gluing was done with a locally made derivatised PVA glue, which is claimed to be very strong.
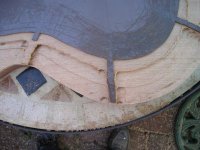
Mistake #3: Guess who forgot to route channels for wiring, before gluing the top to the body. The challenge would now be to find a way of connecting the various chambers, with a minimum of drilling.
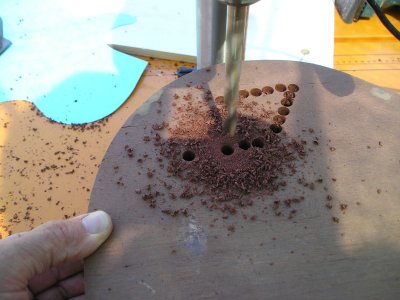
Next job was to drill the cavities for the 3-way switch and the pots. This was done with a regular drill first, then the waste chiselled out. |
|
|
|
|
|
 |
|
|
finally a router was used to smooth off the insides of the chambers. |
|
|
|
|
|
 |
|
|
|
|
|
The next step was to shape the top. Using a method described by John Fisher (work by Paul Fisher) I made a template that would define the lines for shaping, and leave "fins" to support the router. On a thin template, the lines were marked, with radial lines for the fins (picture at right). The template was screwed to the body at positions that would later be routed out to make pickup cavities. The fins were a bit fragile and tended to break off occasionally, but they worked okay, making the routing quite easy (below). The picture shows the first two levels routed, with the template cut away for routing of the third level. |
|
|
|
|
|
|
 |
|
|
|
|
 |
|
|
|
|
|
|
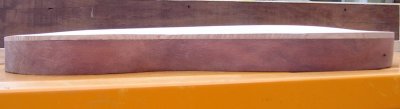
The slope where the neck was to be attached was calculated by making a scale drawing. Allowing for the centre of the fingerboard being 1/4 inch (6.3 mm) above the body, and the strings around 3/32" (2 mm) above that. The body was clamped at the calculated angle, and the router was passed over the body to make the slope at the neck end. |
|
|
|
 |
|
|
|
|
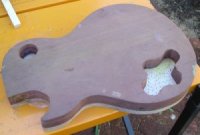
Finally, the top was smoothed by chiselling off the edges of the routed steps and sanding to get something close to the final shape (more sanding... oh great! But the results were okay) |
|
|
|
|
|
|
This was probably the most satisfying step so far, because these two pieces of wood were beginning to look like they could turn into a real guitar. The next step was probably the most difficult so far, because I had to plunge a large drill into this carefully shaped guitar body, to make cavities for the neck and pickups.
Index |
|
|
|
|
 |
|
|
|
|
|
Page 1. 3, 4, 5, 6, 7 |
|
|
|
Next: making holes etc.... |
|
|
|
|
|
|
|
|