 |
|
|
|
|
|
|
|
|
|
|
|
|
|
|
|
|
|
|
|
|
|
|
|
|
|
|
|
Page 4: Making the neck... Keith Gregg - first time guitar builder |
|
|
|
 |
|
|
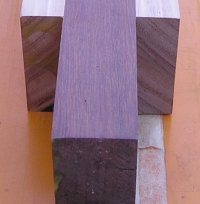
Being unsure of the resonanced of jarrah on its own, I decided to make a laminated neck, combining jarrah and Tasmanian oak. A strip of jarrah was left over from cutting out the body, and this was laminated between two pieces of Tas oak, after straightening, and flattening the three pieces. The jarrah was 1 1/4" thick and the oak was 3/4", giving a total thickness of 2 3/4" (6.9 mm) which was wide enough for the headstock I had designed.
The two pieces of Tas oak were cut from the same length and were placed back to back, with the jarrah between them so that their grain was in a "mirror image" pattern (see below). I thought this might allow each to counteract the other, if they tended to warp. |
|
|
|
|
|
|
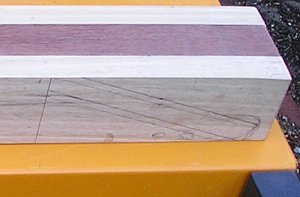
It's difficult to see in the picture, but the piece of jarrah was slab-cut. Turned sideways this gave the equivalent of a quarter-sawn section in the middle of the neck. I'm not sure if this really makes a difference to the stability of the neck, but I guessed that it couldn't do any harm.
The top of the laminate was chosen as the upper neck surface, and was planed to make it level. Sadly, my skill with a plane is not great. So the laminate finished up a bit thinner than intended. This meant that the lines marked for cutting the headstock (still present on the pic below) had to be redrawn. This did mean that the back edge of the headstock might need to be rounded rather than square. Alternatively, I could add a small piece of wood to the back to make up the little extra needed. |
|
|
|
|
 |
|
|
|
|
|
|
 |
|
|
|
|
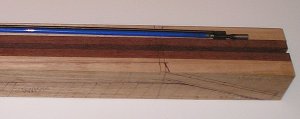
While the laminate was in its square form, I cut a groove for the truss-rod (18" double action from Ormsby Guitars). This was simple enough with two passes over my sawbench. Because of the vital need to get the groove dead centre, all measurements were made several times, as were the saw settings. Then a piece of spare wood was cut first to confirm the depth and accuracy of the cut. The groove turned out really well, with just a little sanding to allow the rod to sit snugly inside. The groove was 1/2" deep, to allow a fillet to be put over the rod, so that gluing the fingerboard to the neck would not result in a glued truss-rod. Details added at 1 Sept '05: The middle section of the groove was intended to be deepened a little, to provide space for the flexing of the rod. But 1/2" is deeper than needed and brought the groove close to the back of the neck. So the ends of the truss rod were raised to bring the rod level with the top of the neck, by inserting little blocks of jarrah under the solid ends of the rod. This left plenty of room for the centre of the rod to flex downwards. |
|
|
|
|
|
|
 |
|
|
|
|
|
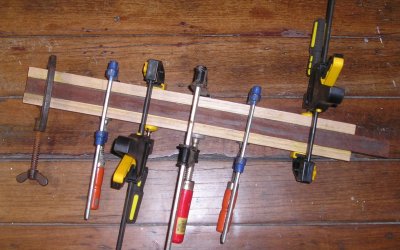
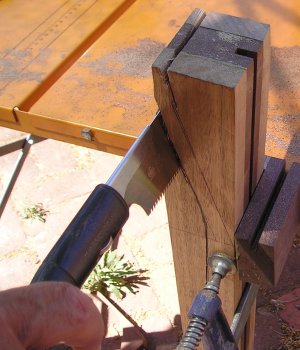
Once again, a bandsaw would have been very handy for the rough-cut of the neck, but I didn't have access to one, so I did the first (VERY) rough cut with a Japanese razor saw and a coping saw (left). At this stage it was just about the ugliest guitar neck I'd ever seen. |
|
|
 |
|
|
|
|
|
|
 |
|
|
|
|
|
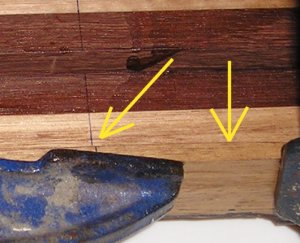
And worse... Mistake #5: I discovered that I had cut one side too close just in one short section, and after sanding etc it would leave a dent in the side of the neck. The obvious solution was to glue a short piece of wood from that side of the neck back on, then re-cut that part. This was done with hide-glue. The picture below shows the reglued section with the join arrowed.. |
|
|
|
|
|
 |
|
|
|
|
Next... joining the neck and body
page 1, 2, 3. 4, 5, 6, 7
Index |
|
|
|
|