Sierra Middle School
Riverside, California
(951) 788-7501
Mr. J. Myers
Art Teacher
[email protected]
http://www.rusd.k12.ca.us/ourschools/sms/
7th Grade
Date assigned:
Date Due:
| Home |
| Parent Letter and Information |
| Classroom Rules |
| Grading |
| Extra Credit |
| Links of Special Interest |
| 7th Grade |
| 8th Grade |
Metamorphic Tree
Goal:
The student
will demonstrate the ability to show all values from 100% black to 0% black
using a standard wooden pencil in the production of a tree-like figure
composed from many animals representing 4 or more animal classes. The
picture will be made from student provided detailed photos of animals.
Pencil lines are NOT to show in the finished picture!
Materials:
8 ½” X 11” white paper pencil scrap paper (to shape
the pencil’s point)
. . and a willingness to follow directions
Steps:
1. HOMEWORK: Bring in a minimum of 10 photos, not artwork, of 4 different classes of animals. homework is due on: ( Fill in the blank ) You were assigned this last week!!!
The classes of animals that one is likely to find are:
Reptiles Mammals Insects Birds
Fish Mollusks Amphibians and so on.
· Remember that the demonstration shows how to shade using only the pencil.
· At no time during this assignment is anything but the pencil used to smear the marks.
2. Decide which animal you will use for the “root” of the tree. The “root” could be one, two or even three different animals, but you are to draw only one at a time! Draw your first animal’s outline lightly and then proceed to shade it in taking 30 or more minutes to do so. Carefully tug the animal and push it to fit an area that looks like a tree root.
 See how this would make a good start on a "tree"?
3. Continue adding animals from different classes as you build up your tree. Whichever animal you decide to use spend about 30 minutes or MORE on each separate photo/drawing. Carefully tug the animal and push it to fit each area, each time making it tree-like.
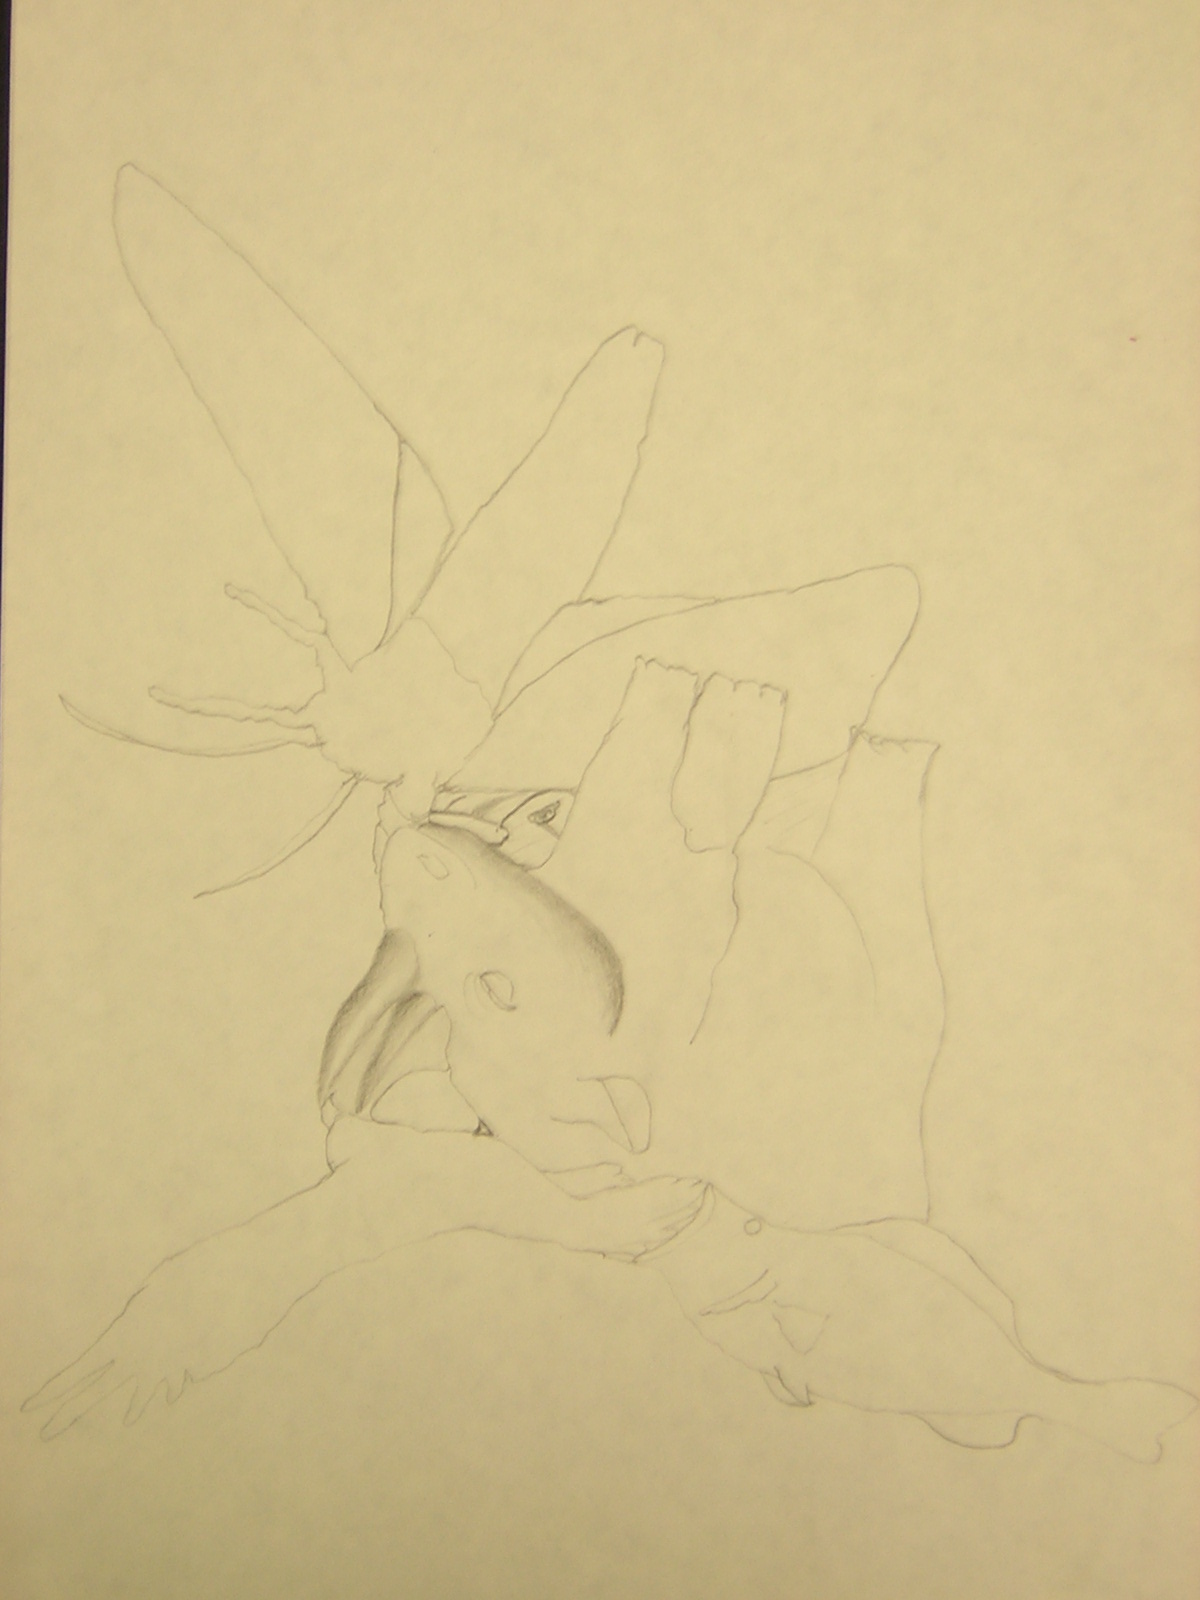
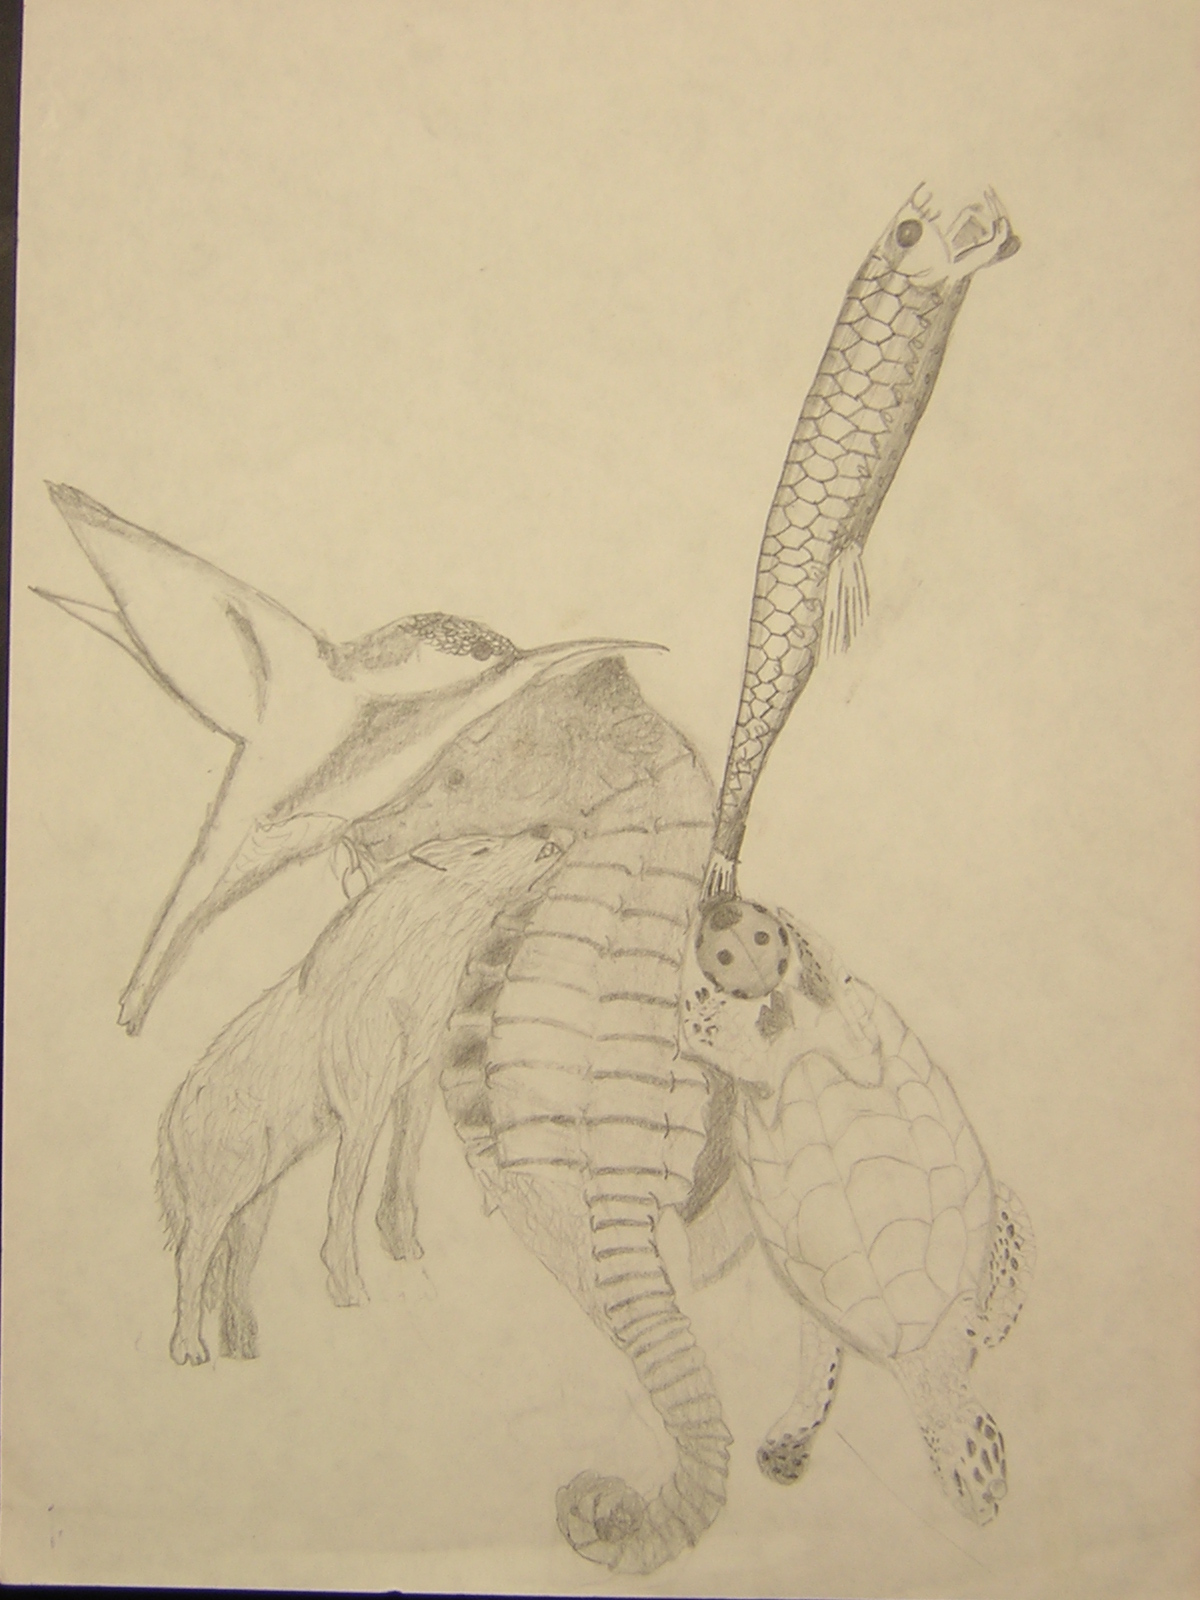 Try to avoid a giant pile of animals with no purpose, as seen here.
If only the artist had made the hummingbird flow above the seahorse's head
and against the deeps sea fish all would have been much better.
Try to avoid a giant pile of animals with no purpose, as seen here.
If only the artist had made the hummingbird flow above the seahorse's head
and against the deeps sea fish all would have been much better.
4. You should work on each drawing until you are about 75% finished. You do this so that when you have several animals done you can go back and finish them to about 85%. As you work the “tree” you add first one, then another, always revising the work as a whole as you go.
Here are some samples of "nice work", but I
am sure yours will be even better!
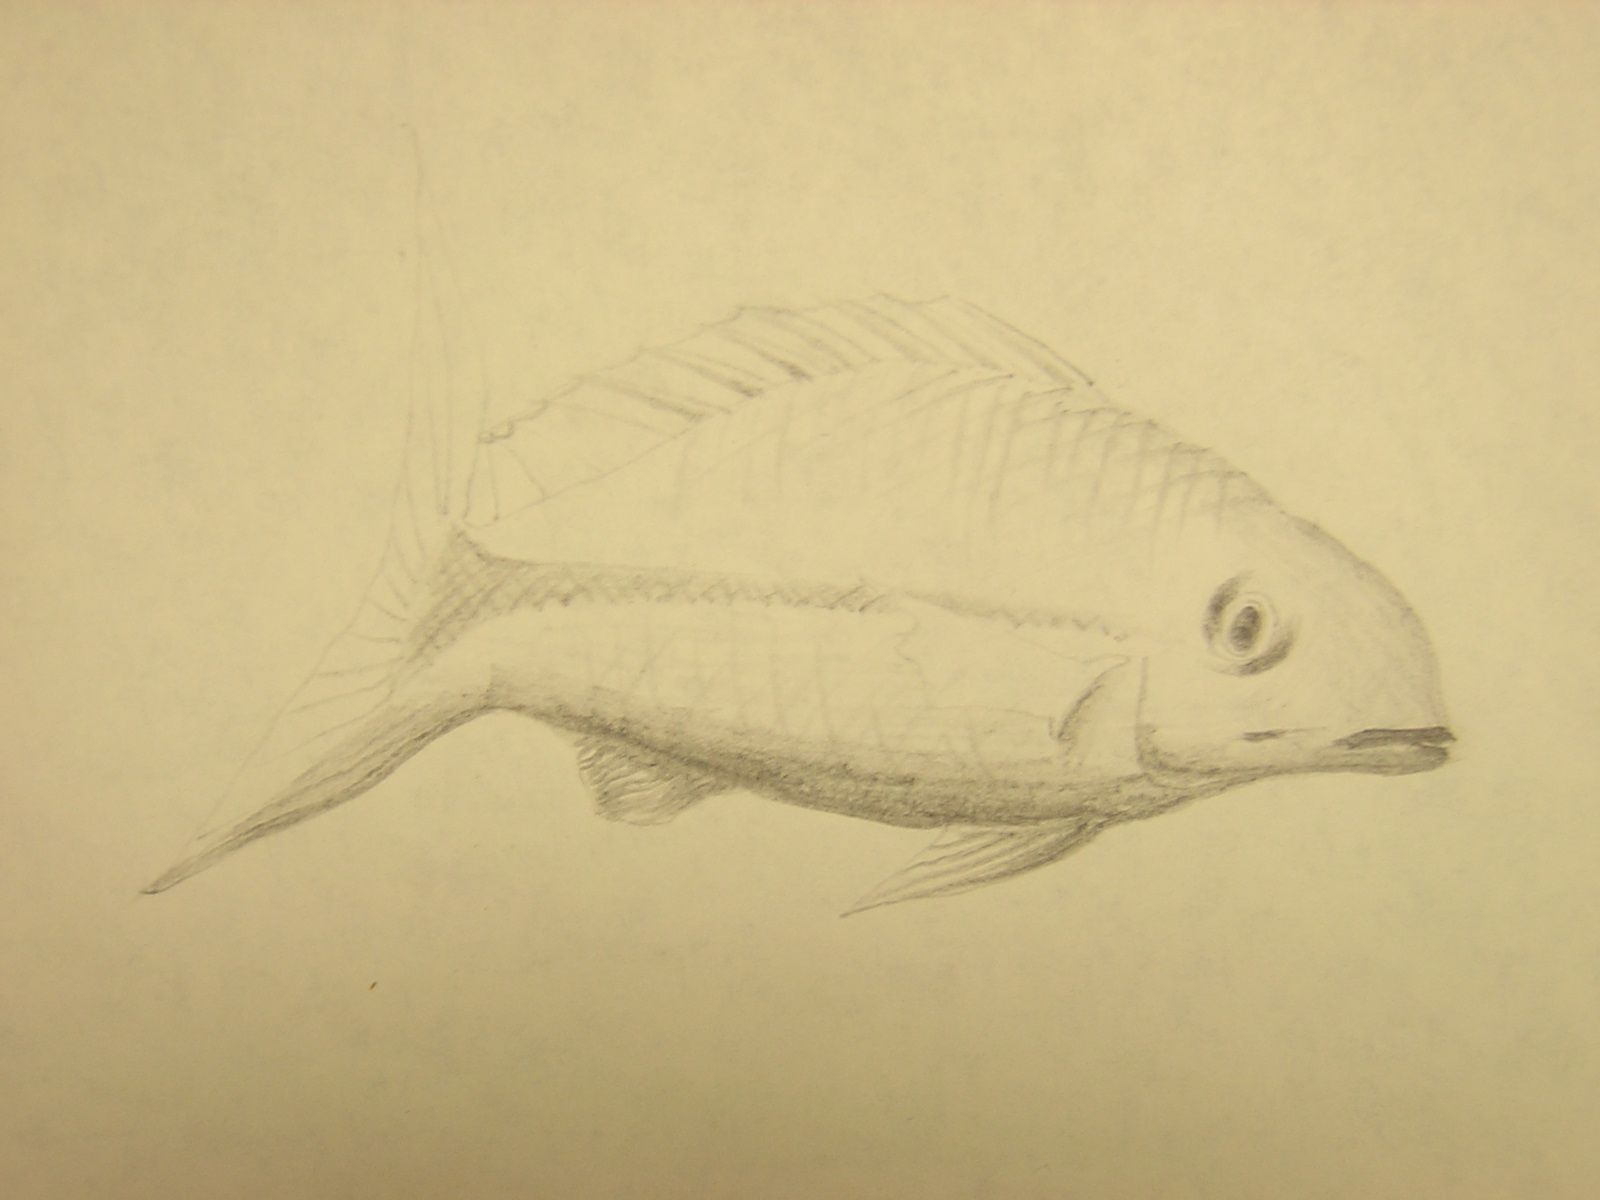
The photo source at left and mine at right... notice how I use the lighting
in the source to copy onto my paper? Why not check out the spots??
You will find that I changed them very little when I copied them. The
larger version of this is further below on this page.
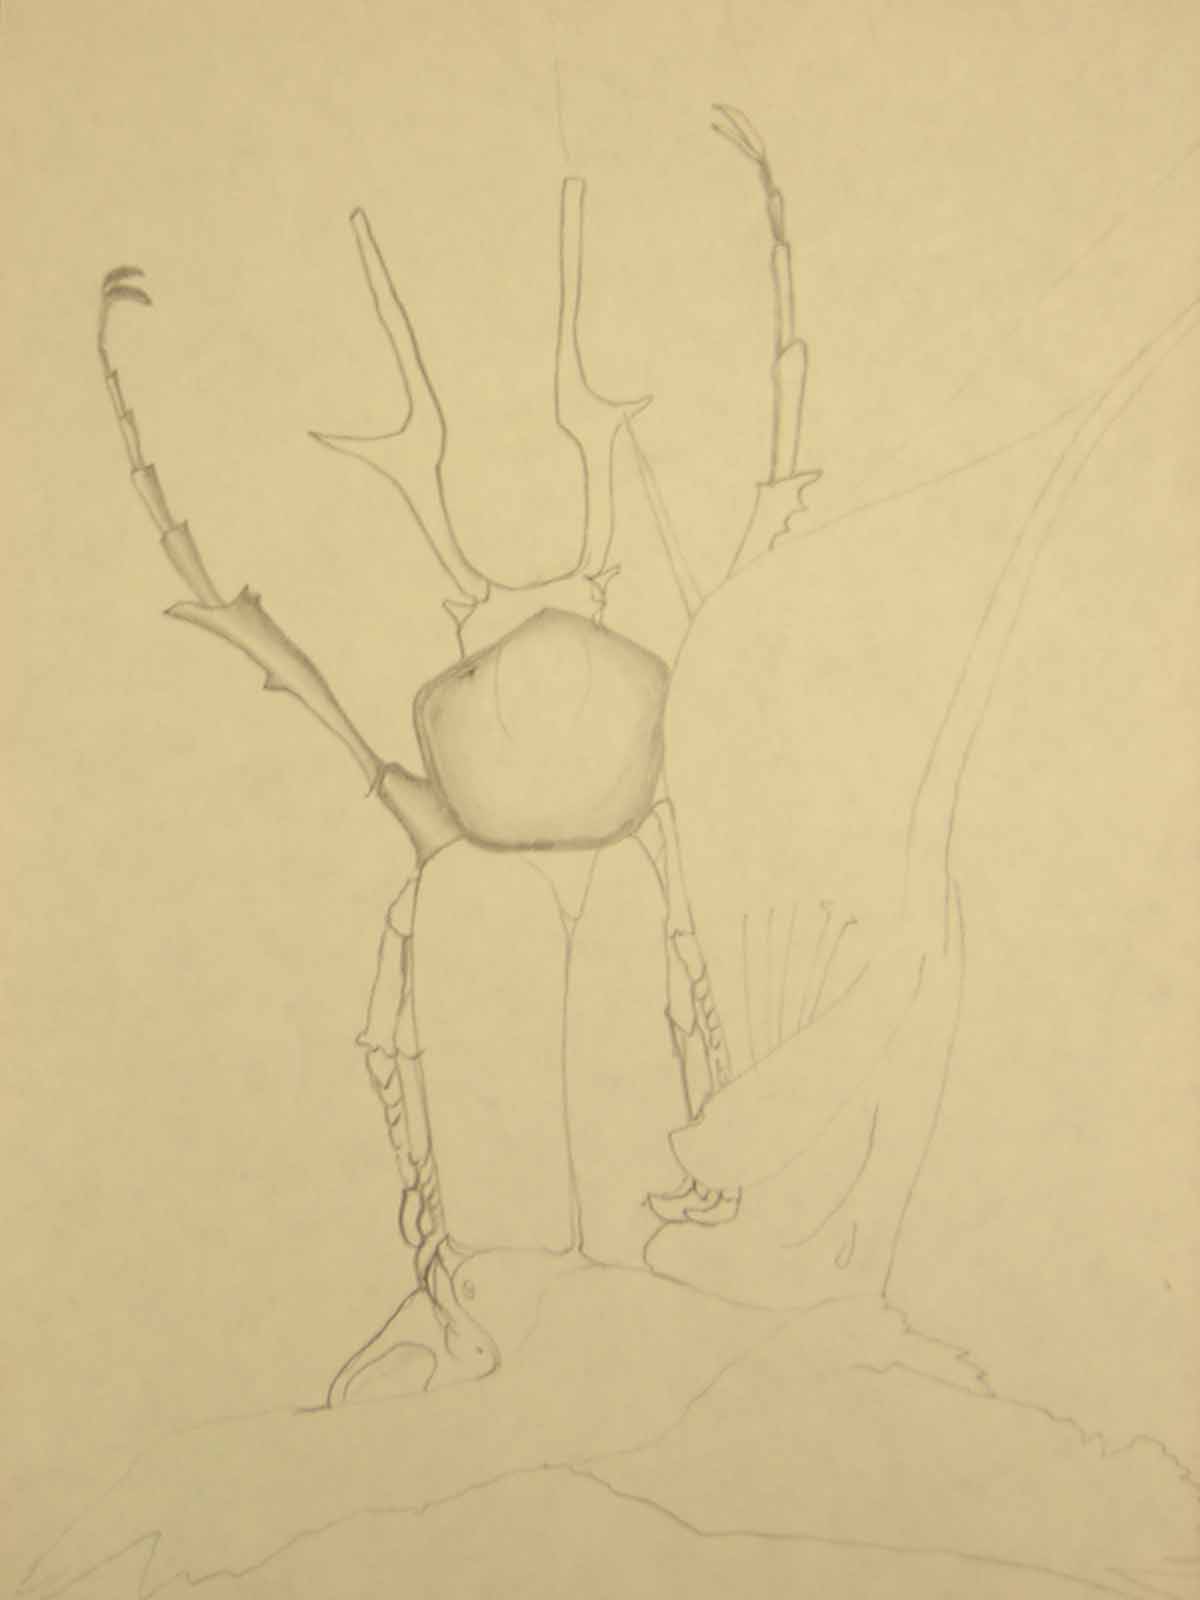
This one
doesn't really look like a tree, but it does show animals that are drawn
together. Notice that there is a good value range. Blacks and
whites are there with no negative spaces. I think that another animal
needs to be added to the bottom left to make the "root" area look more
tree-like. Then another animal can be added for a "branch" at the
upper left. Better care in fitting the animals should have been doe to
shape the "trunk". If you learn from this one's mistakes then you are
the better for it! Good luck.
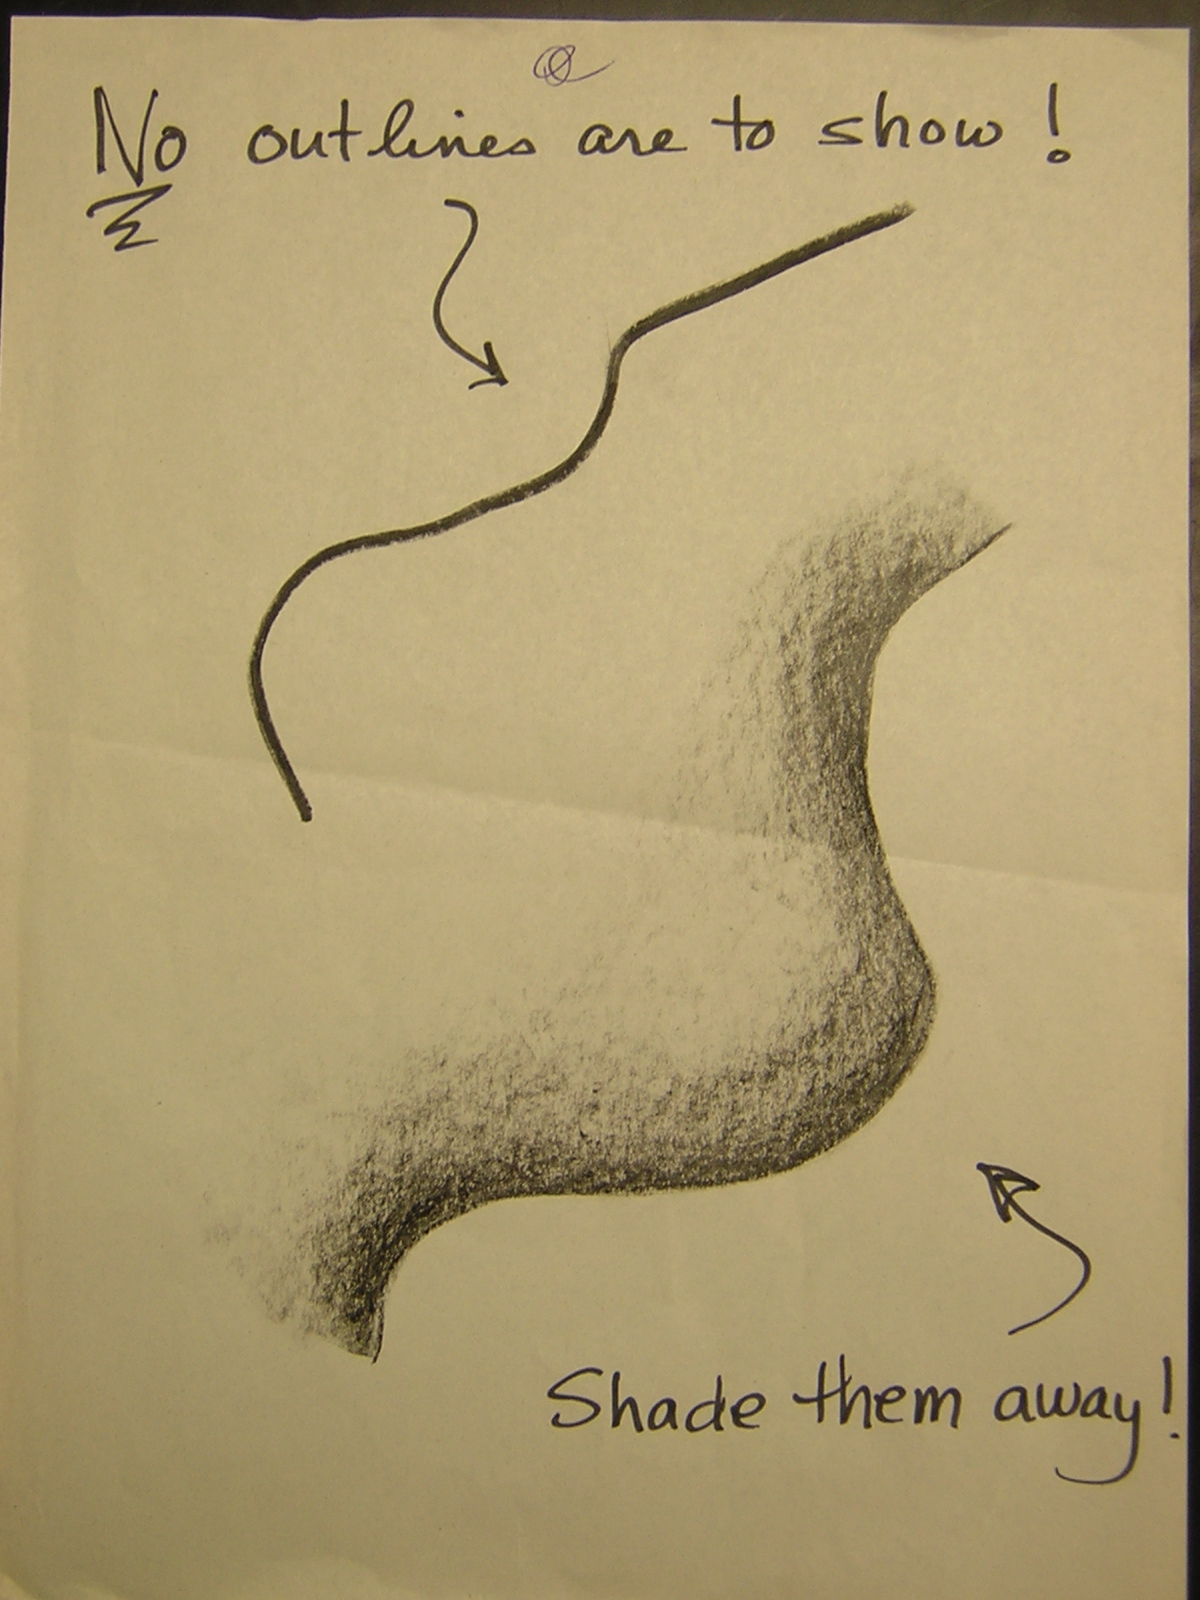
See
how one can shade? Don't show any outlines! Check out my work
below:
5. This type of assignment will NEVER be ”finished” because of the extreme amount of detail that needs to be represented. BUT you can continue for only so long before you go nuts, SO work on an animal for the above time and then move on! After a new animal is started you might want to go back to see what now needs to be done.
See
the amount of detail that a regular pencil will give if you also know how to
shade? "
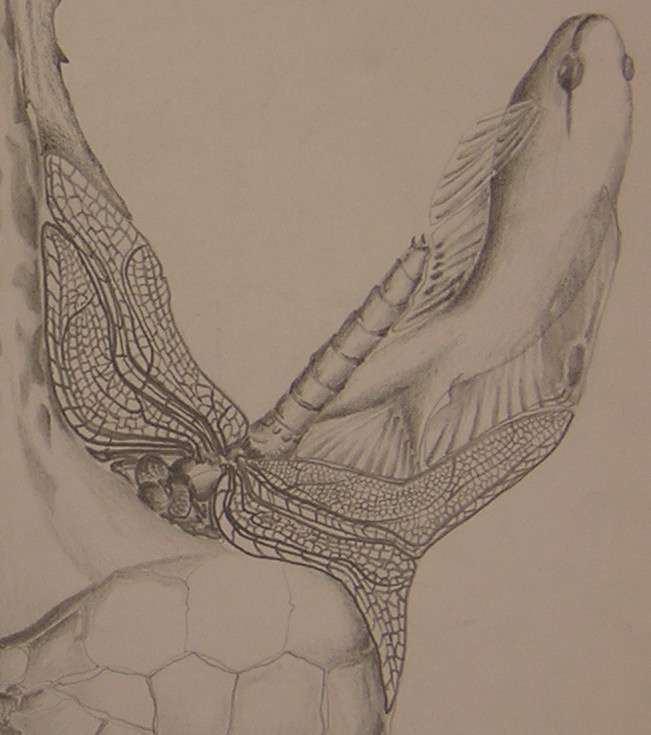
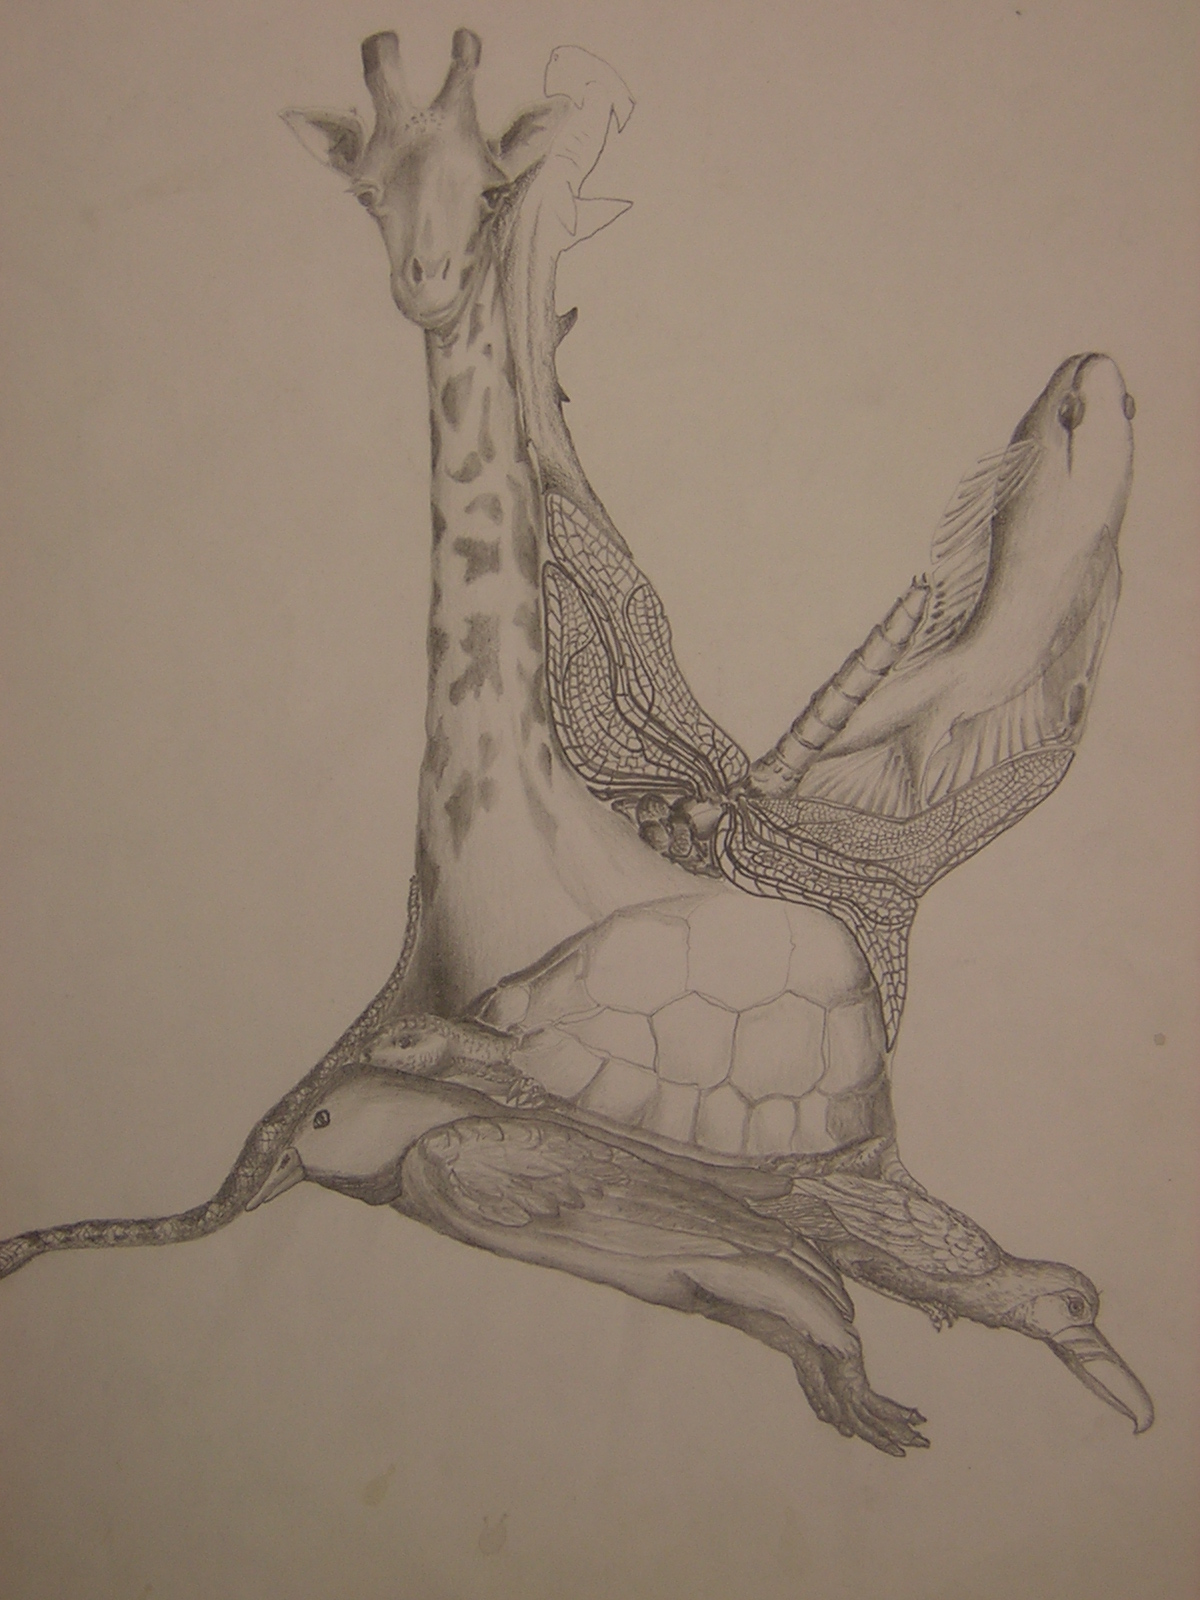
Notice how there is NO NEGATIVE SPACE between animals? This is what
you want to strive to do.
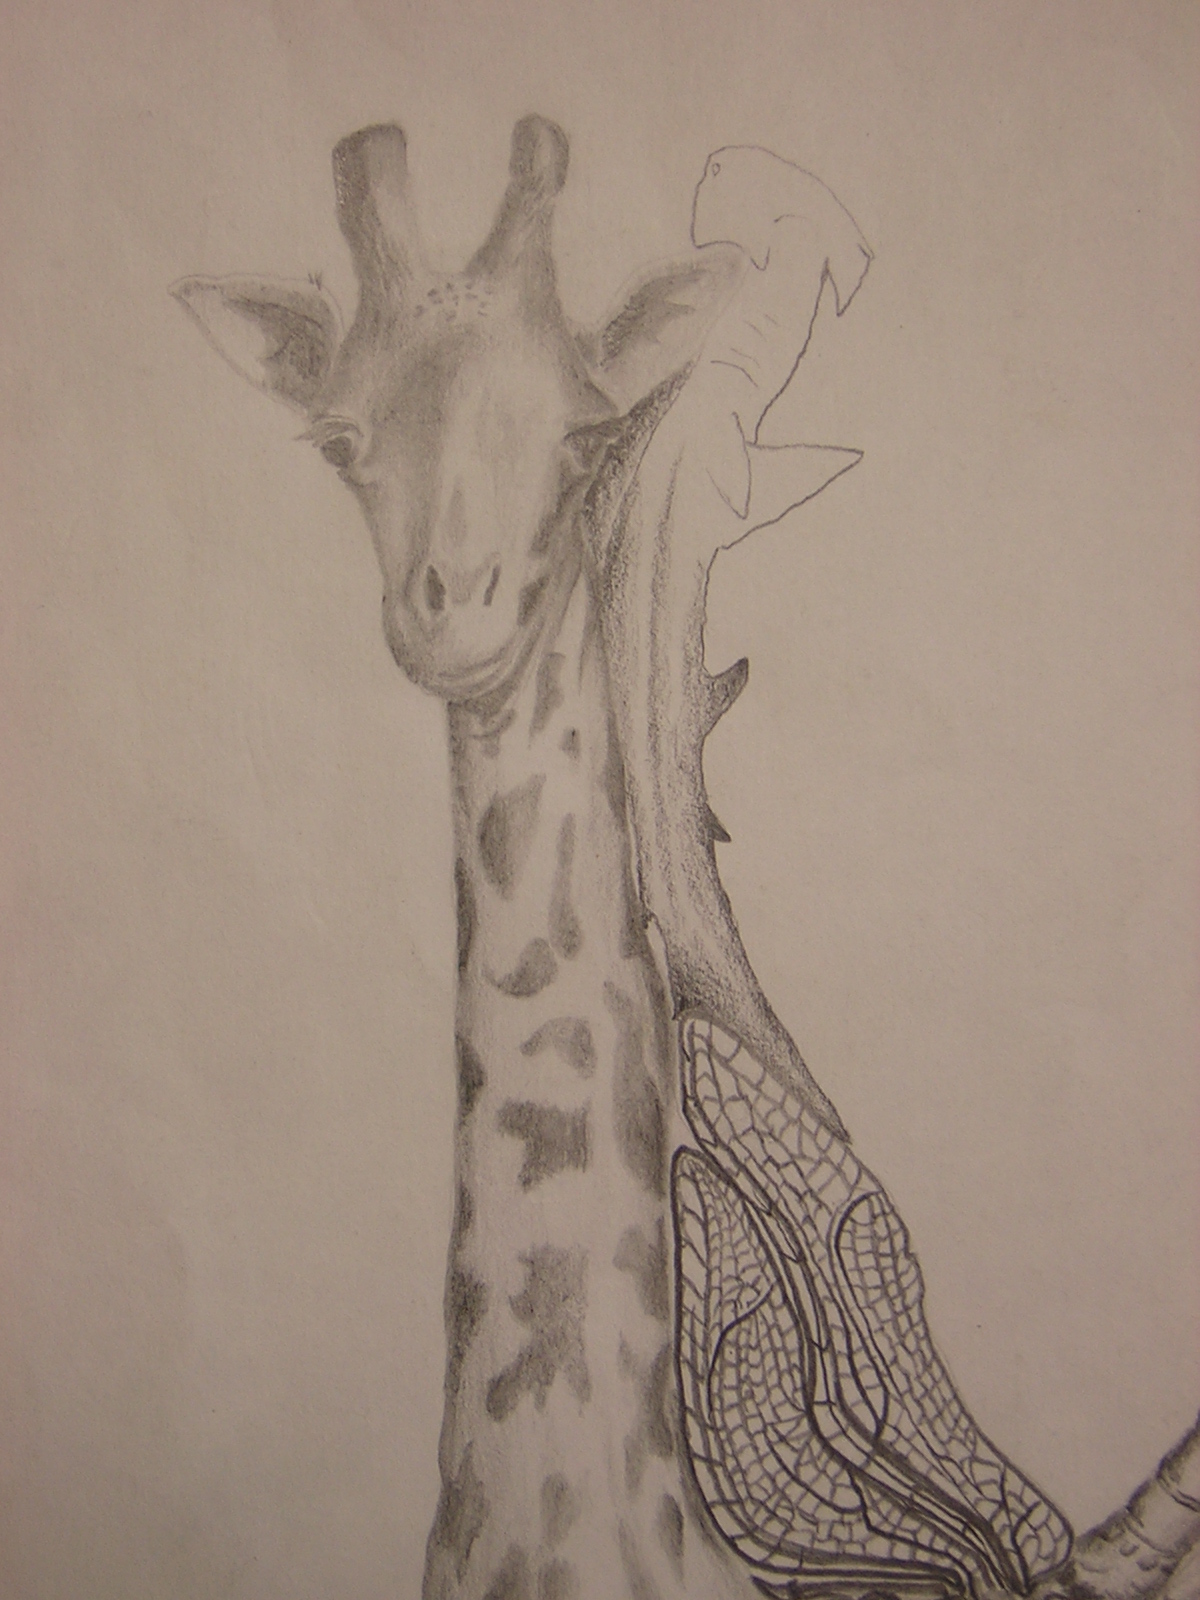
You can also tell where one animal starts and the other begins because you
have selected a different classification of animal. The insect
(dragonfly) is above a reptile (tortoise) as well as below a fish (to the
upper right) and beside a mammal (giraffe) to the left.
Mrs. Myers once told me,
"Practice
makes Progress"
so that is why I always tell you that!
Things to ponder:
have fun following the samples take your time to be correct NO Erasing!
keep the pencil tip dull and FLAT no erasing values means darkness
Shade away the outlines!! Don’t show any pencil shading lines Slow down!
proudly share what you do take your time have 100% black TO 0% black no lines
contrast the animal’s skin types don’t erase take plenty of time to do it correctly!
you are graded on neatness and a full range of values be creative "fat and flat pencil"
gently shade take your time to be neat enjoy your work!
include all the photo’s details ask for help from your neighbor proudly share what you know
use 20-45 minutes to draw one animal! no erasing
Grading Rubric
A All the work shown has a
crisp sense to it with no smudges and fuzzy areas. The work is original and
carefully done with the animals being pretty well copied from photos. There
needn’t be many animals, only ones done well; quality is the goal, not
quantity.
B As above but an area or two
may feel rushed. The entire work is an example of concentrated effort on
the part of the artist.
C Some animals do not look
very realistic due to being rapidly drawn. Details may be distorted or
lacking. Average work for students this age who don’t seem to put in 100%
effort. An acceptable grade, but NOT one to be proud of by and large.
D Poor quality work
because of a lack of attention to detail. The demo was not followed very
well and the suggestions by the teacher were not followed. Probably due to
too much talking and an “I’m looking for a photo” type of response when told
to get to work or drawing too many animals with little care.
FAIL Too much of the attitude of “who cares!” and “I forgot my pencil”. Probably no homework done, though given plenty of time to do so. The paper shows a lack of commitment. Shading is not done properly and suggestions by the teacher, web site, handouts and posted work went unheeded. Usually shows that the student is afraid to try out of fear of failing. When a student tries to do something by listening to the help of others their work gets better. Remember, “Practice makes progress”. The traits of listening and practicing are not found on a FAILING paper.
Last updated on 5 November 2008