Sierra Middle School
Riverside, California
(951) 788-7501
Mr. J. Myers
Art Teacher
[email protected]
http://www.rusd.k12.ca.us/ourschools/sms/
7th Grade
Worksheet
Date assigned: 25 August 2008
Date Due: 1 September 2008
| Home |
| Parent Letter and Information |
| Classroom Rules |
| Grading |
| Extra Credit |
| Links of Special Interest |
| 7th Grade |
| 8th Grade |
| General Class Objectives | Syllabus | Worksheets | Work to Date |
|
Goal:
Materials:
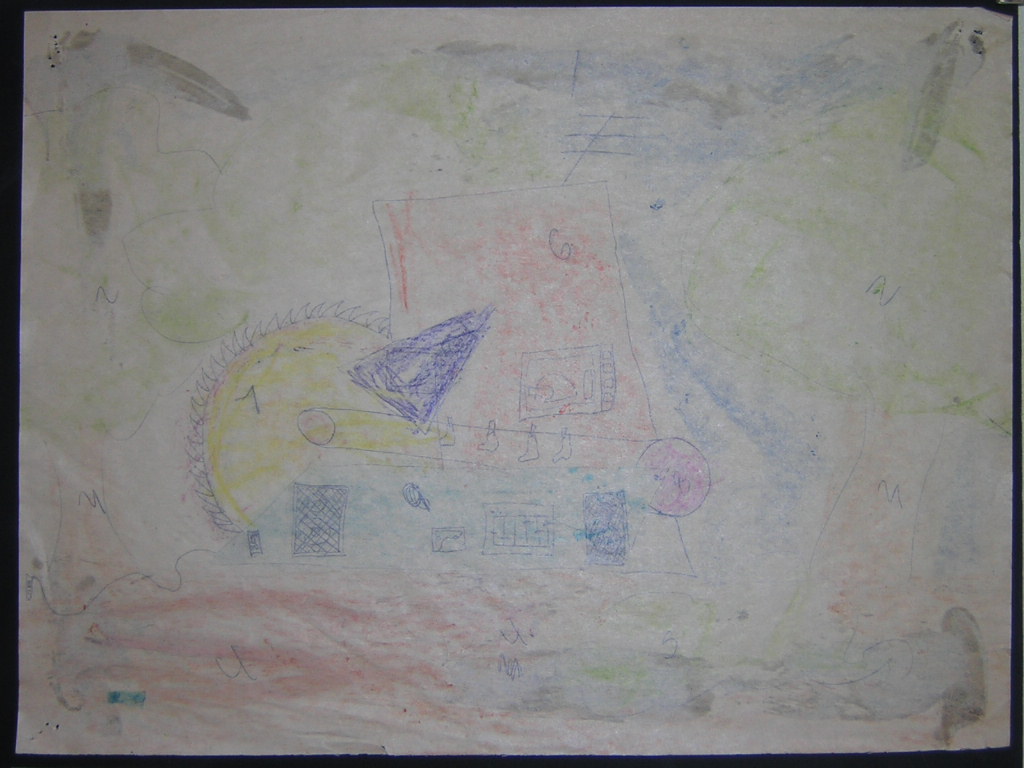
2.) Think of a room in your house . . ., now one machine in it. . . say, a blender. Now take only one mechanical detail from it and add it to your drawing. *Do this over and over until your sketch is done. 3.) Now the machine’s environment is needed to be added. OCEAN? MOUNTAINS? SPACE?? Desert? YOUR BEDROOM? 4.) Color your sketch with crayons. You don’t need to color within the lines or beautifully. Look at all the sketches below for an idea of how you need to do your work. They aren't really neat, but they DO tell you what the finished product should look like.
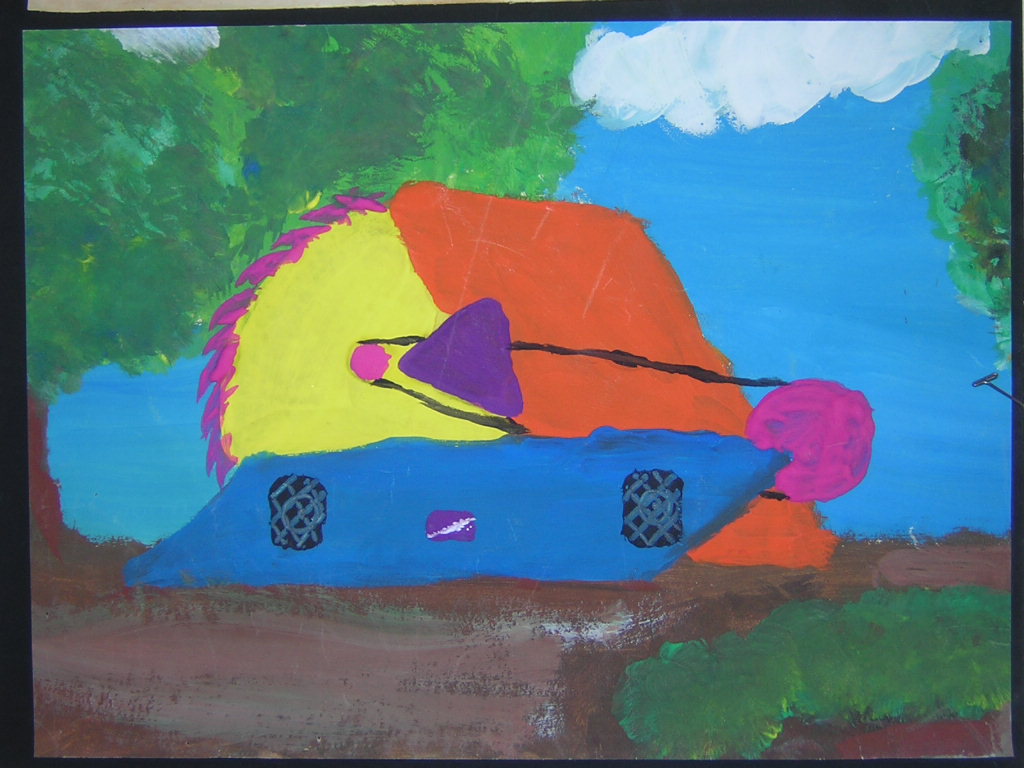
5.) Number the sketch as to the order that you will paint it. Remember the demonstration? Good, number (1) one goes for the farthest away object - this is usually the sky. Number (2) two is the mountains, or the next closest object. Number (3) three is next the wall, then socket, then floor, and then floorboard. Finally you get to paint the machine’s rectangle, then circular dial and blender base. Then the triangular add-on. This process goes on to the very closest object to the viewer.
6.) Get teacher
approval and paint the manila paper. Then begin painting from the
background to the foreground. DON’T CLEAN THE BRUSH EVER, EXCEPT AT THE PERIOD’S END! Remember these hints: * design well and save time * paint background to foreground * be original to enjoy it more * Don’t ever clean the brush while working * NO letters or numbers!! wonderful colors result when you follow this rule! Possible details to incorporate: bolts, nuts, screws, nails, rivets, hinges, welds, pulleys, belts, chains, doors, wheels, screens, gears, pistons, dials, lights, plugs, coils, levers, storage bins, and more!! NO letters or numbers! Grading Rubric: * Keep in mind that the grade criteria below is a guide to help you become a successful student. Remember that the absence of a sketch will cause one full grade to be deducted. A Both the sketch and Painting are turned in and complete. The paint colors show that mixing happened and edges are neat and crisp. Originality of design is apparent with many mechanical details present. An “A” is an excellent grade! This means that you understand the goals desired and have done them well. You have used your time wisely and understand the project so well that you can, and probably have already, help others to succeed too. B Any one area noted here cause an “A” work to become a “B”. The work turned in is correctly done but may be a bit sloppy on the edges and/or corners. The paint may not be neatly mixed, as some colors may show poor control in that their final hue is “muddy”. Only a few details are shown with little variety in the selection of color. A “B” is a good grade, but some few areas need additional work. You are probably able to help others to achieve “A” quality work even if you yourself have not. C The work shows not just ONE but several areas of concern as noted above. The general quality of the edges is very rough and/or is intermittent. (That last italicized word means “some is, and some isn’t”, it means that the edges or corners are inconsistent.) A “C” is an average grade, not great, but not poor either. Try to do better next time. You probably aren’t sure how to improve your work and will need to talk to others to see how it can be improved or may even have to try to talk to the teacher. D This grade means that the work does NOT show much control with the materials. This probably means that the edges are very poor, the paper isn’t covered 100% with paint, the pictured isn’t finished, or that the work is NOT original. Maybe even ALL of these areas are present in your work. A “D” is a below average grade and should not be earned by you! You haven’t done enough work on this, keep going, finish this as soon as you can. F This means that you have NOT done enough to pass; you have FAILED to do as asked. If you check the directions again and follow the steps in the order listed you will not earn this low grade. An “F” is a failing grade. You have earned NO CREDIT for this assignment. Come after school or to my room at lunch for additional assistance.
back to top
Last updated on 29 August 2007 |
|||

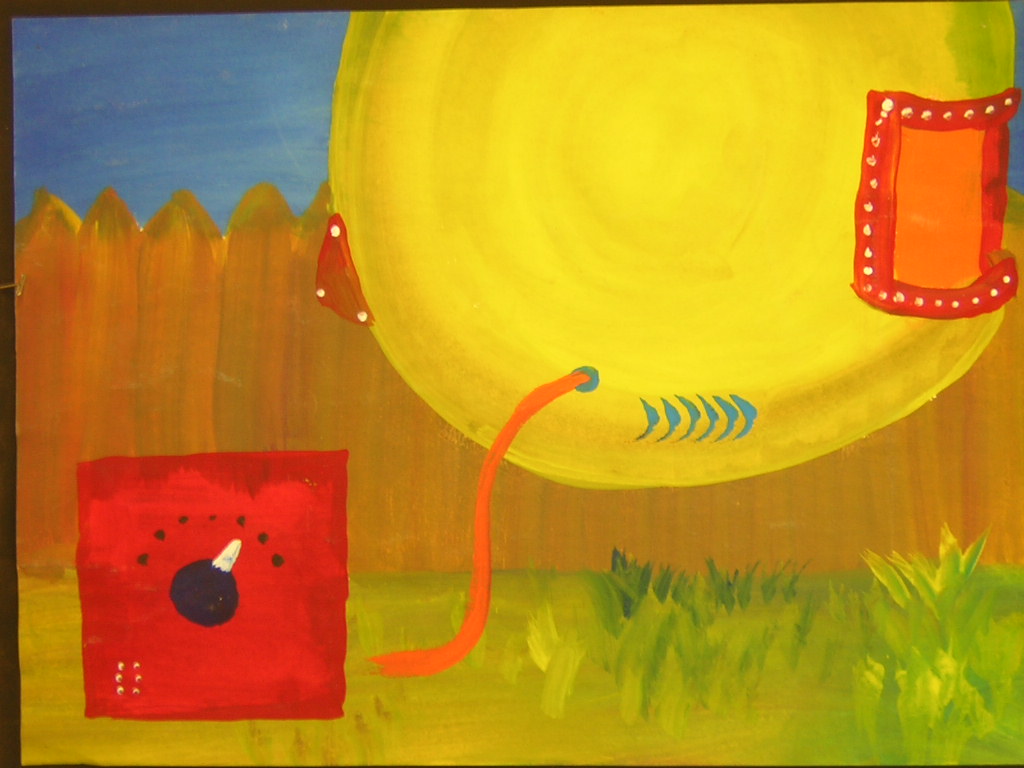
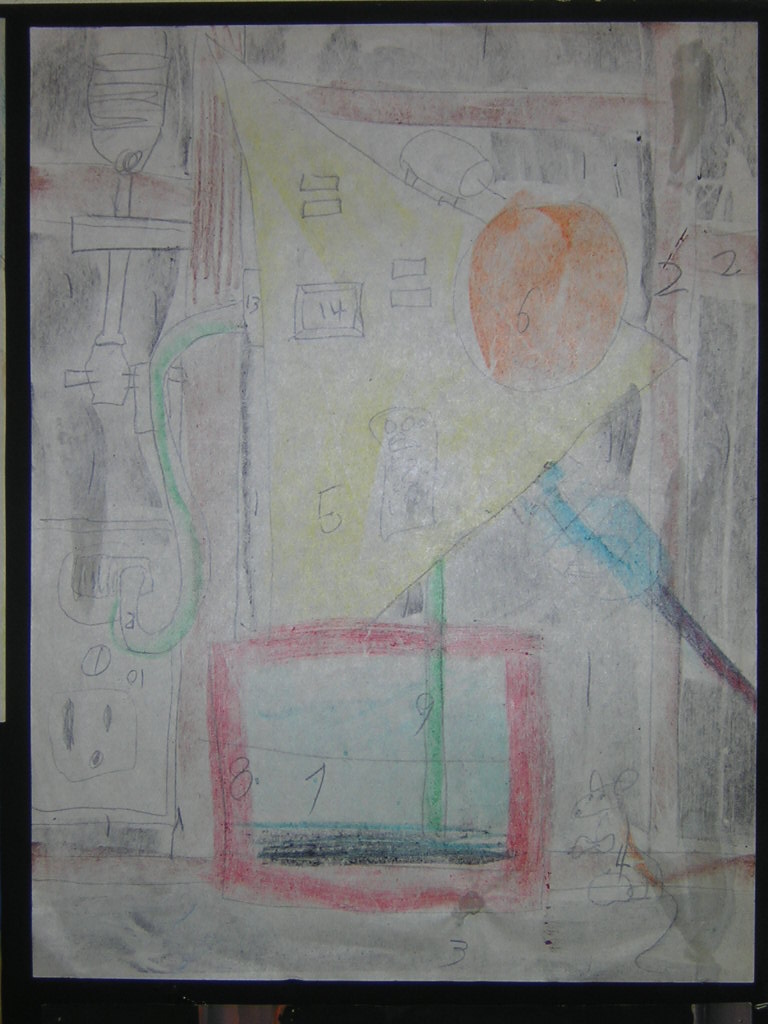
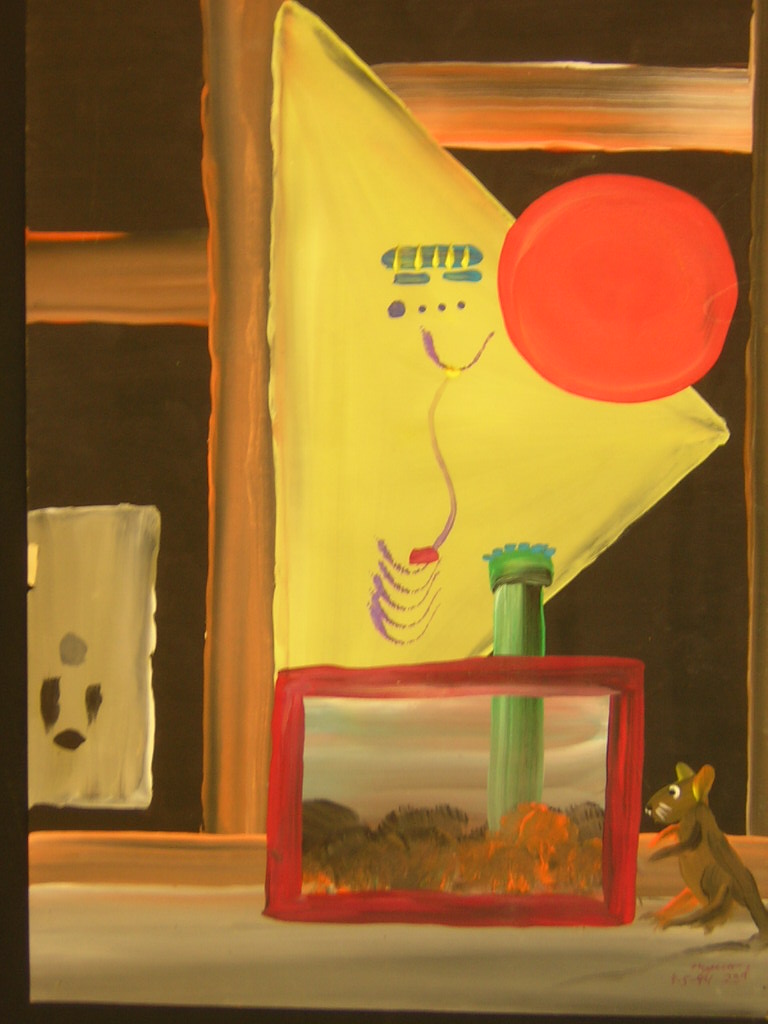 Notice how some of the finished works vary from the sketches? This
is "OK" to do a in small amounts... It is called Artistic
License.
Notice how some of the finished works vary from the sketches? This
is "OK" to do a in small amounts... It is called Artistic
License.