Sierra Middle School
Riverside, California
(951) 788-7501
Mr. J. Myers
Art Teacher
[email protected]
http://www.rusd.k12.ca.us/ourschools/sms/
Date assigned: 27 August 2007
Date Due: 4 September 2007
| Home |
| Parent Letter and Information |
| Classroom Rules |
| Grading |
| Extra Credit |
| Links of Special Interest |
| 7th Grade |
| 8th Grade |
| General Class Objectives | Syllabus | Worksheets | Work to Date |
|
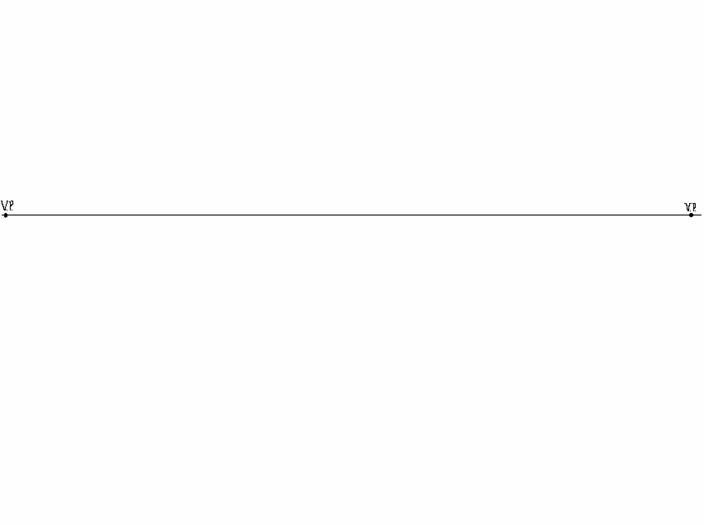
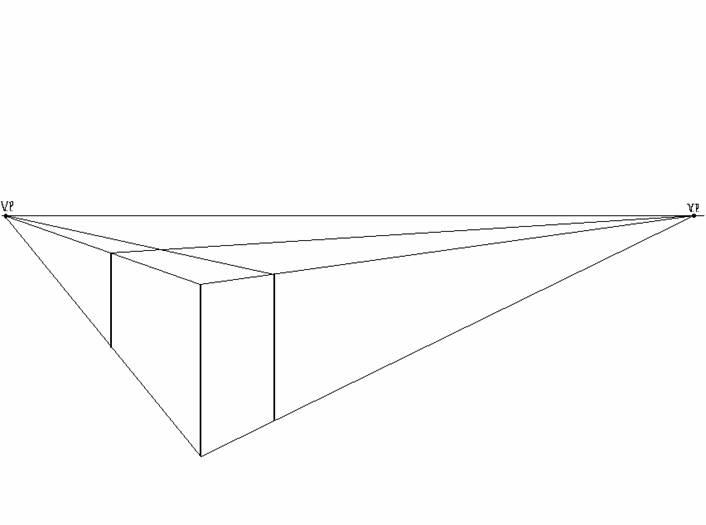
1. Draw two vanishing points, VPs, on a horizon line, HL, at the left
and right edges of the paper, but not at the middle vertically!
(It gets very boring when things are smack-dab in the middle of things)
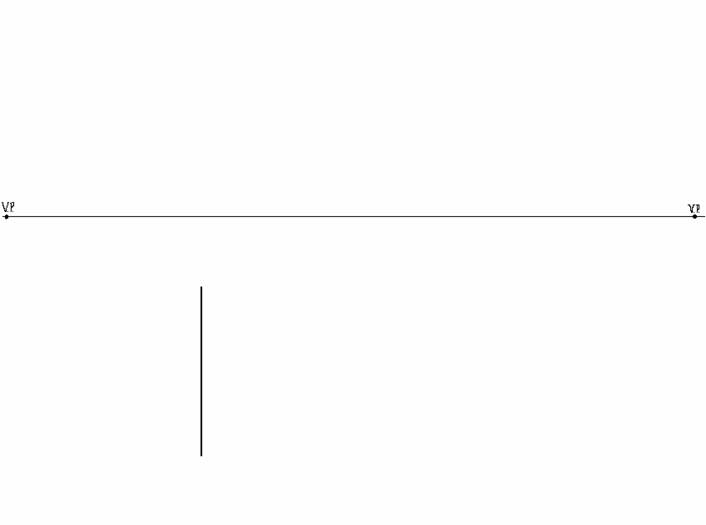
Get into the habit of always drawing as lightly as possible. The reason
for this is simple; why draw dark if you are only going to erase it
later? You will never know if you want to put something in front of
what you have just drawn. Also, erasing a light line is quick work,
little smearing, and a small amount of damage to the paper. Good habits
begin with thinking ahead!
2. Draw a rectangle vertical line,
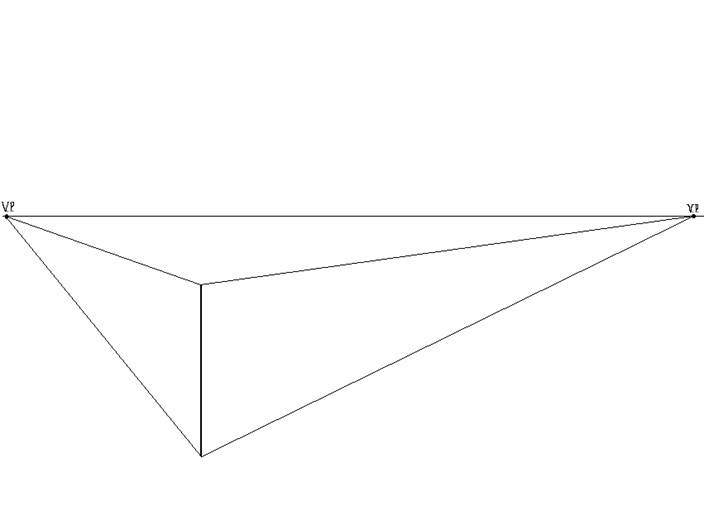
3. Connect the
5.
Connect this line to the other V.P. as in step 3 above.
6.
Repeat step 5 for the other side. This will give you a box that
is solid.
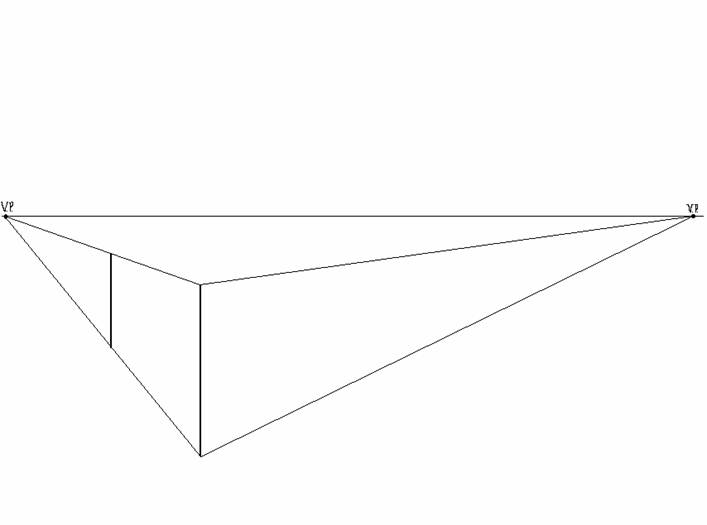
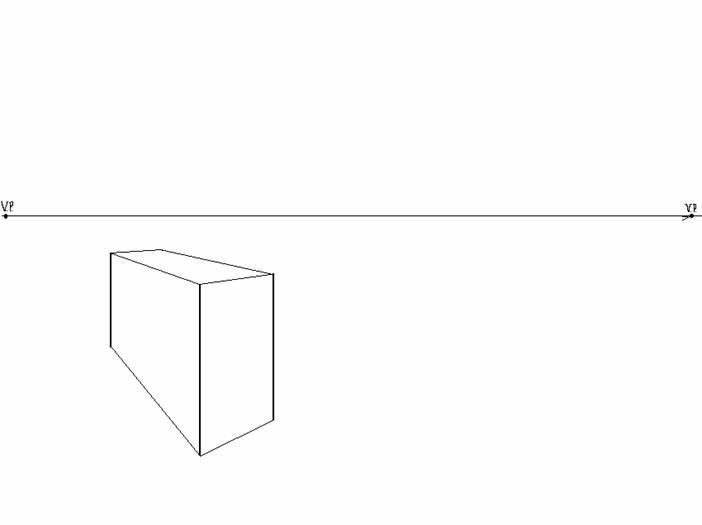
7.
Darken in the box’s edges. (This is shown here by erasing the
lines.)
8.
Continue to add boxes in this
above manner until you are happy. I usually “ assign” 25 boxes for a
drawing. Try to make none small than a half inch to an inch. The
smaller one goes, the harder it is to have correctly drawn lines. Put
boxes behind others and vary the size and shape. This will make for a
more interesting design.
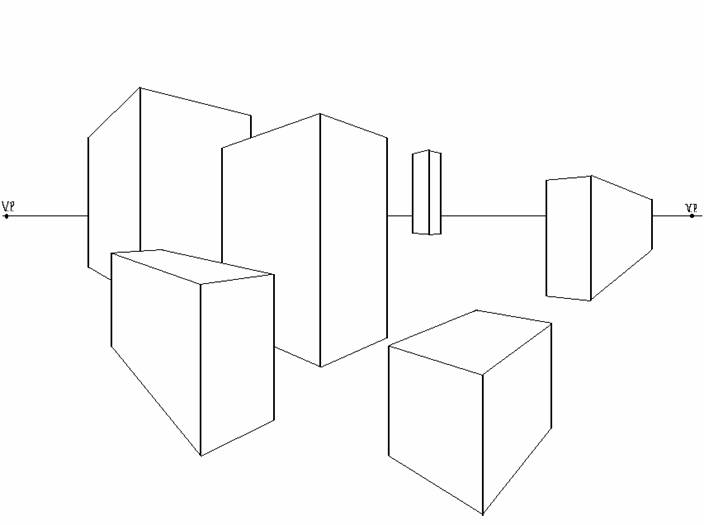
And remember that for every vertical line you will always hook it up to BOTH VPs! Draw in this manner and you won't go wrong!
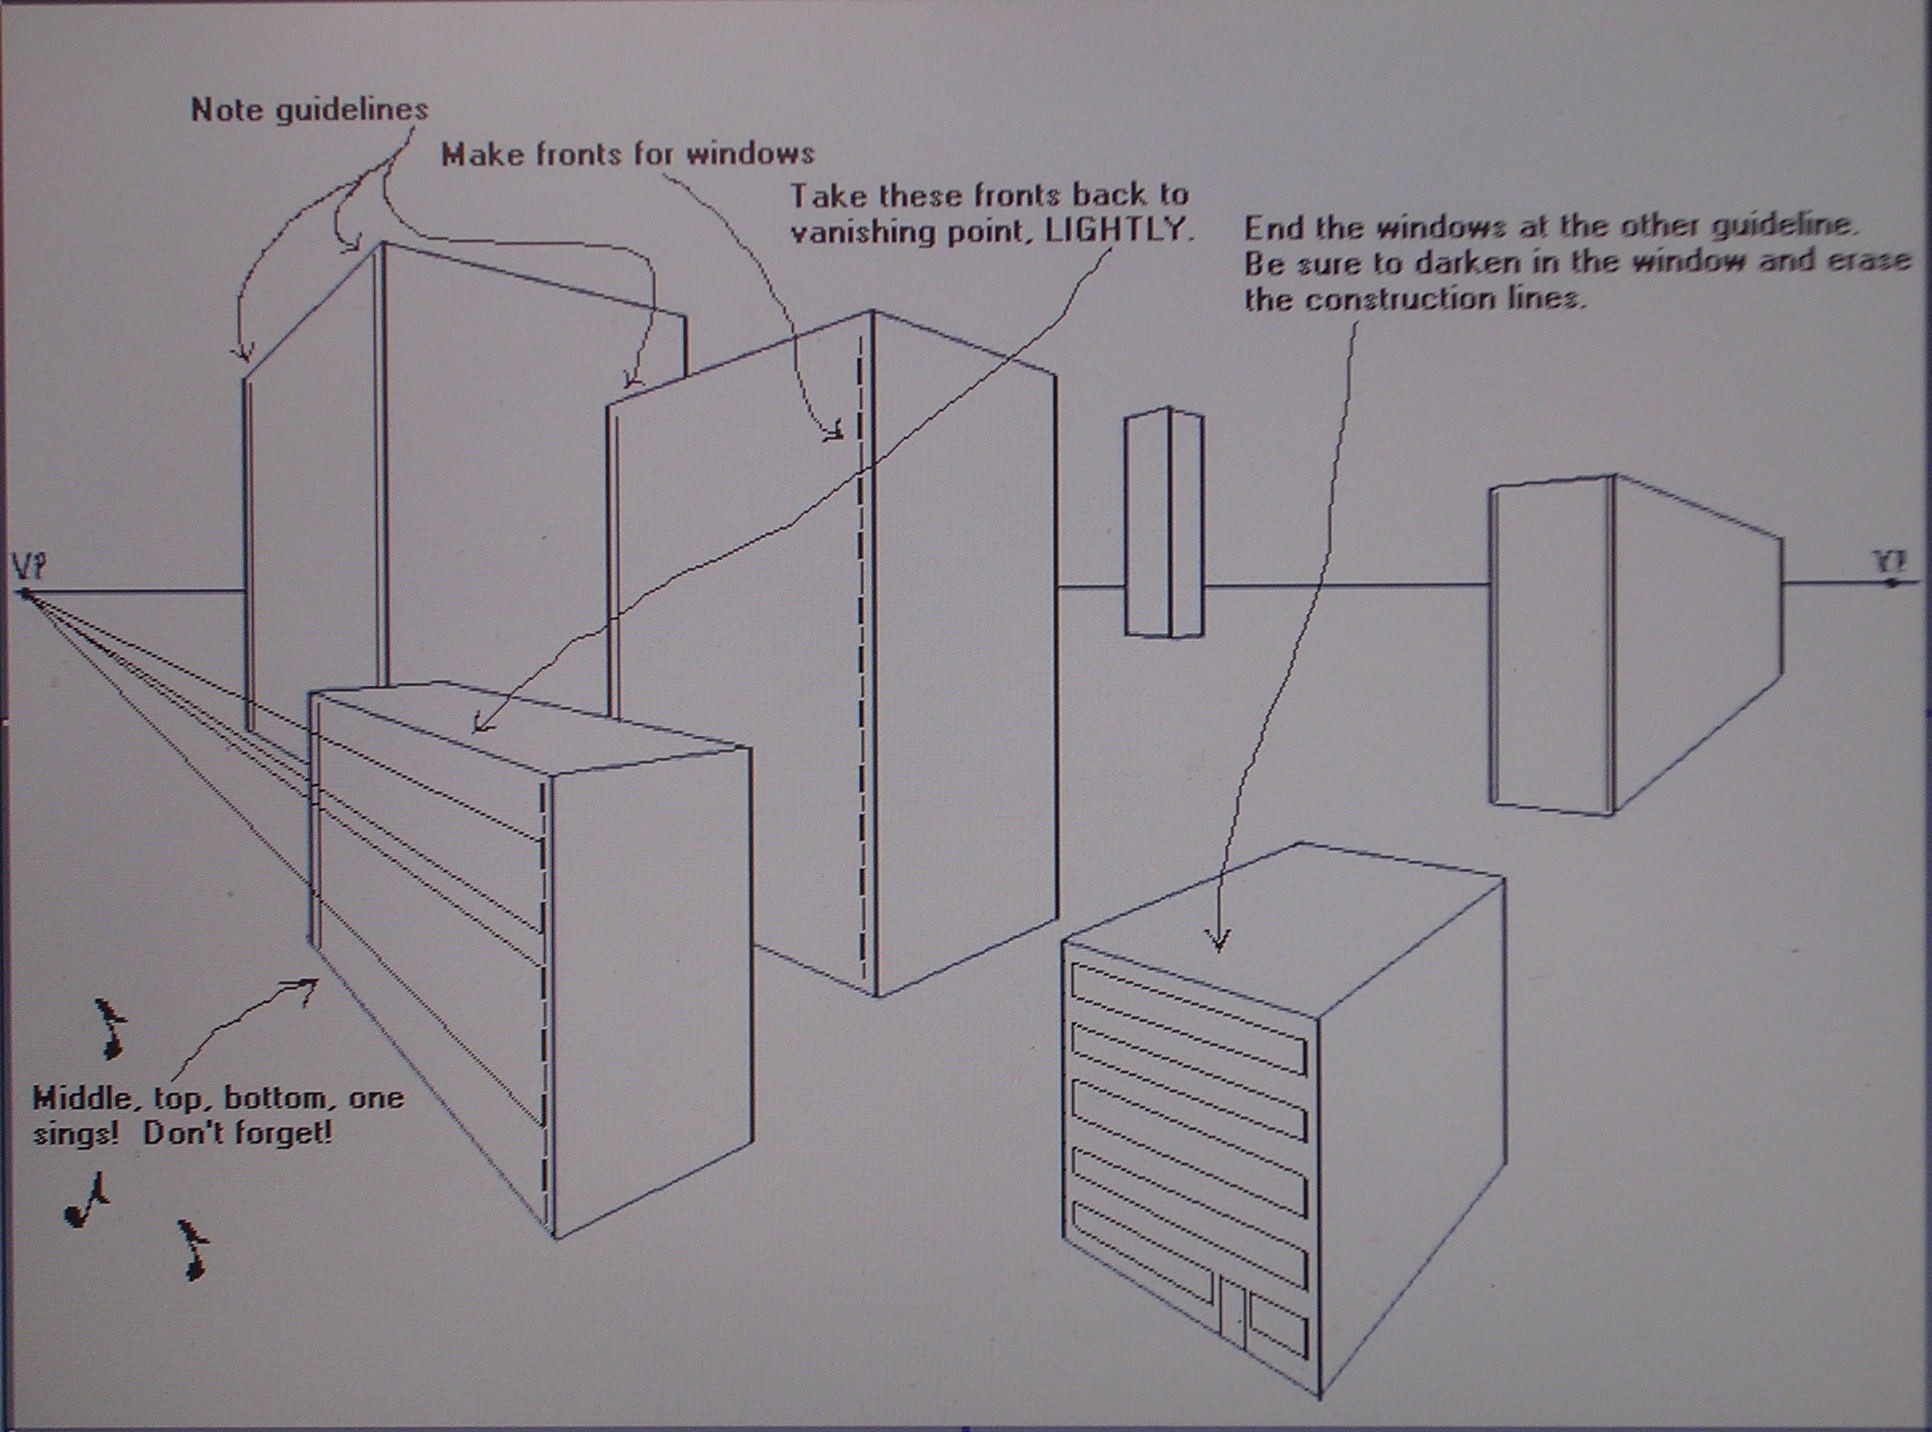
9. Add doors and windows to each building's sides, just as in 1-point perspective! All the time singing my little song; "Middle, Top, Bottom . . ." over and over until completed. Remember that in step 2 we kept all additional lines // to the paper's edges, this is a theme that is always repeated in perspective drawings. See how the left side of the building below goes to the left side's vanishing point. Also see that by the example on the lower right the construction lines are erased. Make neat work; be proud of your accomplishments! : )
10. Continue to add doors and windows to each building's sides, all the time singing my little song in your head; "Middle, Top, Bottom . . ." over and over until completed. Continue to keep all additional lines // to the paper's edges. How does the work below look to you? The close building shows a certain scale which is copied to the next in the method shown. "Walk" the door's size back to each building using the vanishing point in the direction needed. Remember that any item will shrink as it recedes!
11. Continue to add doors and windows. Continue to keep all additional lines // to the paper's edges. Continue to "walk" a door's size back to each building using the vanishing point in the direction needed. Remember an item will shrink as it recedes!
Last updated: 29 August 2007 back to top
|
|||