Various other Tips
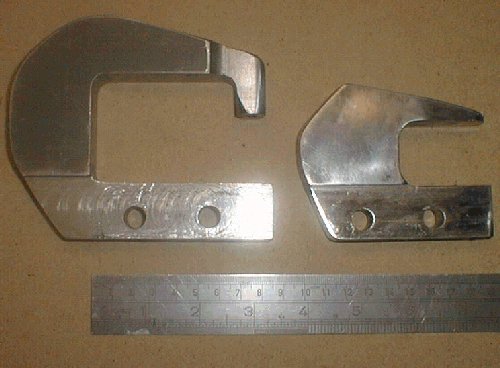
You can see at the bottom how I had to mill the size down to fit in the Avery squeezer.
I almost exclusively use the 'longeron' one as it has a nice reach, 3 inch, and is able to get around a lot of obstacles. I was afraid that the yoke would deflect too much as the radius on the inside corners is rather small but so far I have had no problems.
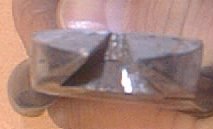
I found the smaller one, no-holer, to work great on squeezing rivets
along edges. It's flat perpendicular surface set nice tails without making
miniature golf sticks, if you know what I mean. (Sure y'all do)
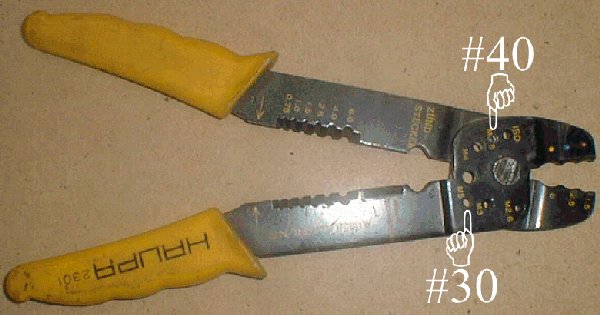
Being a cheapskate, must be my dutch genes, I couldn't quite justify
buying a rivet cutter.
I only needed one a few times so far. It struck me that if I could
cut small bolts with the wire crimper, I should be able to also cut rivets.
I drilled two holes, #30 and #40, and presto, a rivet cutter. Okay so I
do not have a fancy depth gauge, but I can do the measuring myself those
few times I really need it.
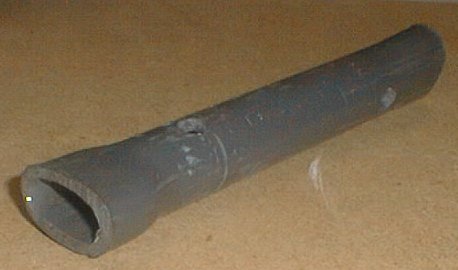
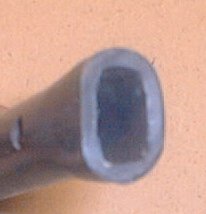
Talking about being cheap. I found a 1/2 pvc piece of pipe to be an excelent rod end turner. I heated the end of the PVC pipe till it got just soft enough to push over the rod-end in question. Then I let the pipe cool over the rod-end. Drilled two holes in the side to put a small turning bar through and now it's a perfect fit rod-end inserter. I used the other end for the bigger bottom rudder rod-end.
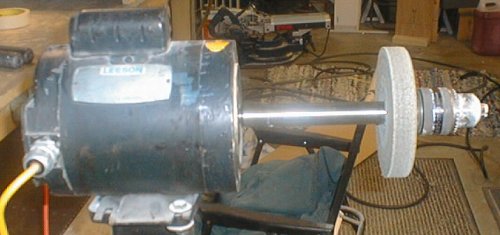
Now here is a usefull addition to my work shop. It probably started
life as a pool pump. I found the motor in good condition, the pump section
had cavitated itself to bits. It runs 3400 rpm
I made an extension shaft and mounted a deburring wheel on it.
Then, quite accidentally I found that an extra drill head I had laying
around had the same thread as the end of the shaft. Now, the drill head
is a very usefull extension. I use it to hold the 3M scotchbright pads
(3" version) or use it as a poor man's lathe to work on the various spacers
used in the wing sections. Just mark the alu. tubing, chuck it in and use
a hacksaw to cut perpendicular, then use a file to debur and chamfer.
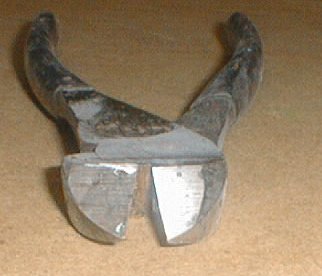
Here is one I found in the list also. I ground an old pair of cutters so that the cutting edge is flush with the bottom. Standard cutters have the cutting edge slightly 'inboard'. Look at some cutters and you will see what I mean. This modified cutter is great for grabbing rivet tails. (not that I ever needed it......)
When I started with the back baffle of the fueltank, I ran into a problem
where the temporarely rivets were not holding the back baffle in place.
I needed to pull the tank skin down enough so that it would match the leading
edge skin.
In doing this the baffle would bent to the point where the long row
of rivets ended up too close to the radius in the rear baffle.
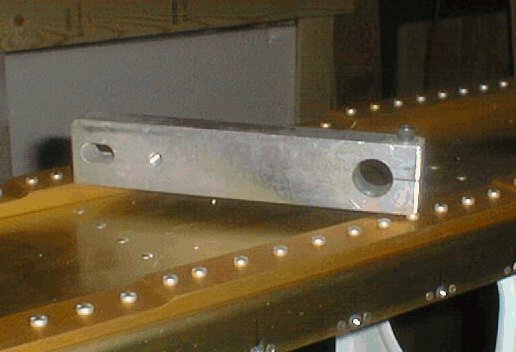
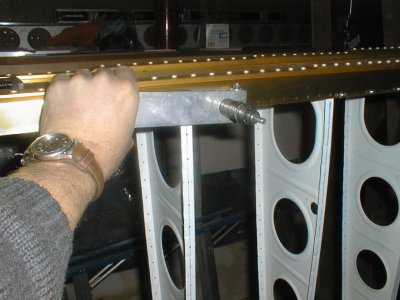
I got some barstock from the junkyard, where else ;-), and fabricated
some spacers to put on the spars. I marked the holes from the back baffle
and drilled #30 holes in the spacers off of the spar. Didn't want extra
holes..... Now the rear baffle stays straight (enough) when skinning the
tanks.
![]()
![]()
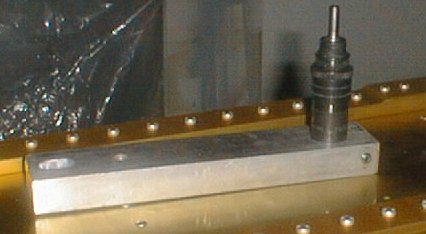
Another anoying problem I ran into was that the countersink would get 'router' tendencies when countersinking deep holes or thin material. Having some barstock left from the spacers mentioned above, I fashioned a holder for my c.s. cage. Now I can hold my c.s. straight and prevent walking/elongating the counterunk holes.
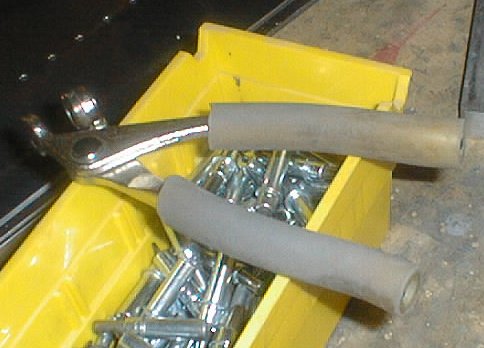
I found that a couple of soft surgical rubber hose pieces are an excelent
grip for my cleco pliers.
My hands and wrists would hurt after a long nite of inserting/removing
cleco's. I found that the handle would push rather hard on the center of
my hand which would num my fingers. I would then stop and wait till some
feeling returned to my hand. I do not have this problem with the pieces
of rubber over the handles.
Last but not least, here is a question I get frequently from visiting
newbees.
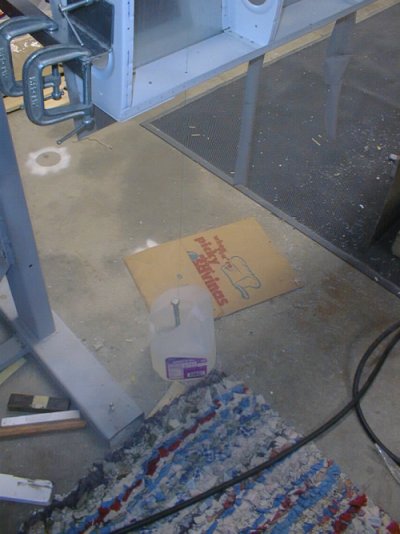
Why do I have the weight hanging at the bottom of the string in a jug
of water ??
Well, the string is used to align front and rear spar. Every time I
touched the assembly the weight would swing forever. Now, with the weight
in water, the swinging is dampened. It now only takes a few seconds and
the string is hanging dead still. Excessive?? maybe, but with a drafty
garage and two kids, oops I mean helpers, it saves a lof of time.
Well, there you have it, some of my special tools which got made so far during my RV8 project.
Pneumatic Dimpler
Various hints and tips
Rear seat throttle quadrant
Front seat, Tall man's option
ANDAIR fuel valve installation
Rudder pedal modification
Do-it-yourself anodizing