 |
|
|
|
|
|
|
|
|
|
|
|
|
|
|
|
|
|
|
|
|
|
|
|
|
|
|
|
|
|
|
|
|
|
|
|
|
|
|
|
|
|
|
|
|
|
|
|
|
|
|
|
|
|
|
|
|
|
|
|
 |
|
|
|
Previous Pages
#1 #2 #3 #4 #5 |
|
|
 |
|
|
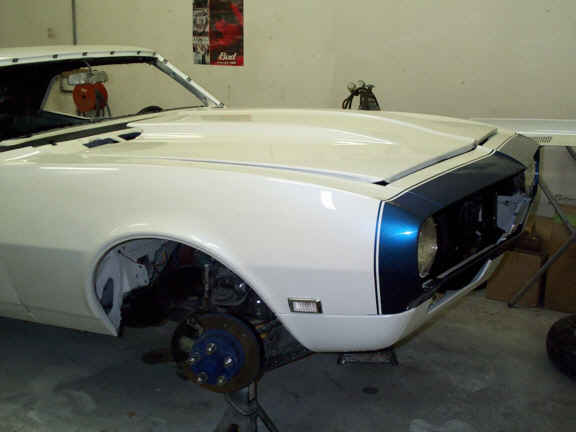
We started installing the sidemarkers, handles, etc. I pulled the front wheel to take off the heater box. When we hosed down the car we noticed it leaked a little water. After we pulled it we noticed it would need touched up. While I had the inside heater box out, I cleaned it, painted it and installed new seals. |
|
|
|
|
 |
|
|
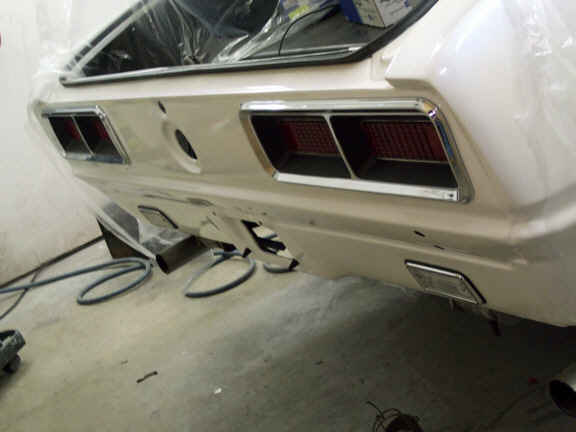
I started to install the tail lights and noticed the gaskets that came with the paint set looked pretty cheesy. I ordered a new set of reproductions of the originals. They worked and fit much better. Some how I managed to misplace the nuts though. I did find eight from my parts car. |
|
|
|
|
|
 |
|
|
Now I need the gas cap, back up lights and bumper. I will need to add new light sockets for the tail lights. The old ones were pretty rough. Where did I put those nuts? I'm sure I put them some place "safe."
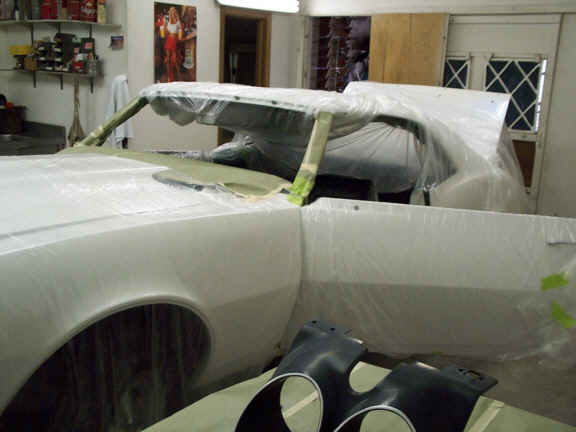
Next, we might as well paint the dash before we put in the windshield. |
|
|
|
|
 |
|
|
 |
|
|
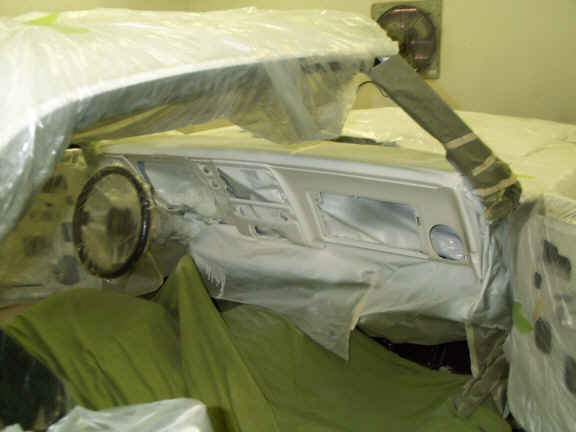
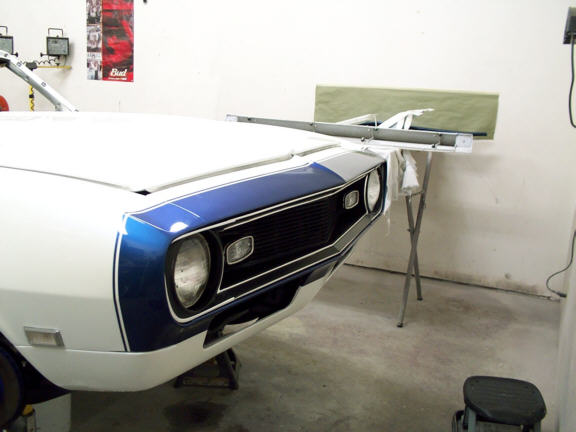
I took apart the dash and We wrapped the car to keep off overspray while we paint the dash. My heater control had a broken "de-ice" lever on the bottom. I bought a repair kit that is available since this is a common weak point in the control unit. Here is a page that shows how to install it. |
|
|
|
|
 |
|
|
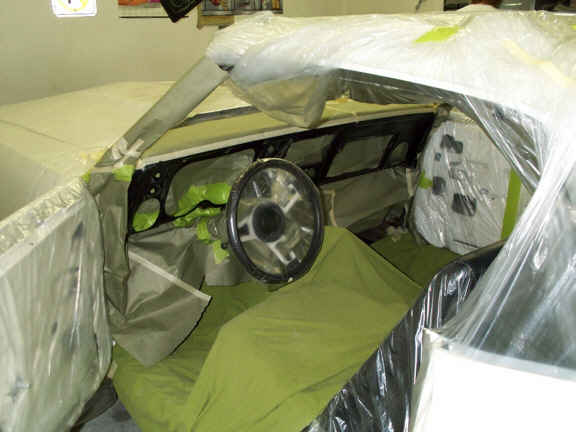
I sanded off the old finish on the dash, which was looking pretty rough next to the clean new paint job. |
|
|
|
|
|
 |
|
|
After that I masked the wiring and steering column. I have a tilt column to rebuild so I won't worry about the paint on this one. |
|
|
|
|
 |
|
|
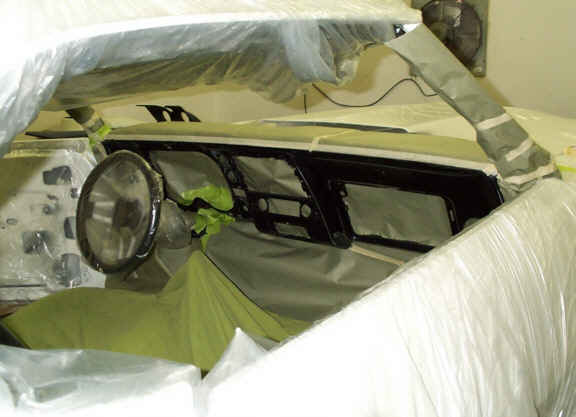
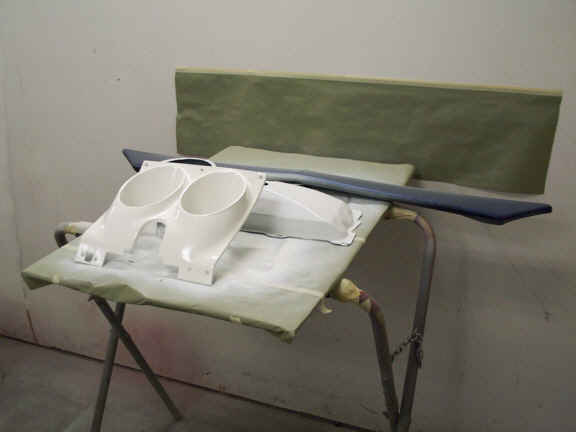
We shot adhesion promoter and sealer on the plastic parts. The outer heater box is getting repainted too. |
|
|
|
|
|
 |
|
|
Here is the dash with sealer shot on it. It showed some dents that a friend fixed. I know my knees hit it a couple of times. We decided to let the primer dry so we could sand it again before painting. |
|
|
|
|
 |
|
|
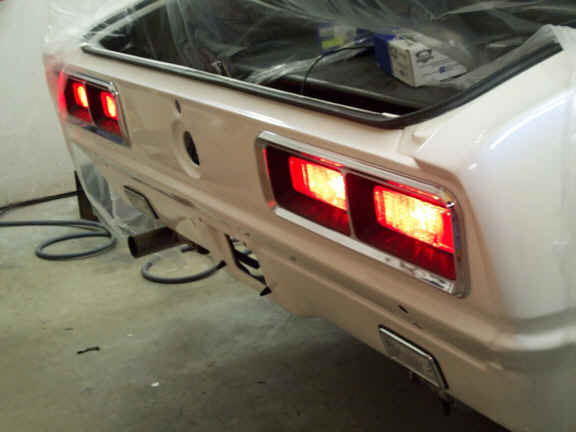
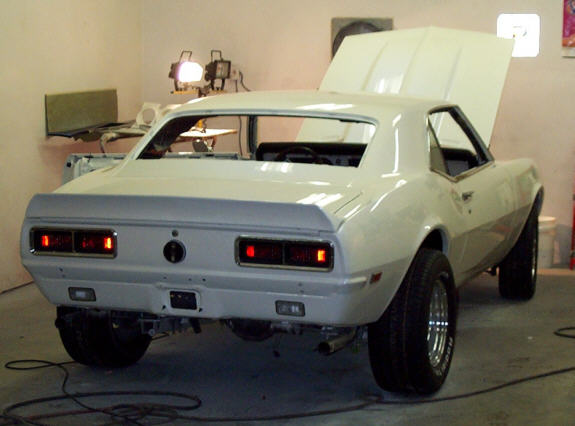
While painting I wired the brake lights and mounted the back up lights. |
|
|
|
|
|
 |
|
|
This is the first time the RS type tail lights have been lit on this car. I like the way they look better than the others. |
|
|
|
 |
|
|
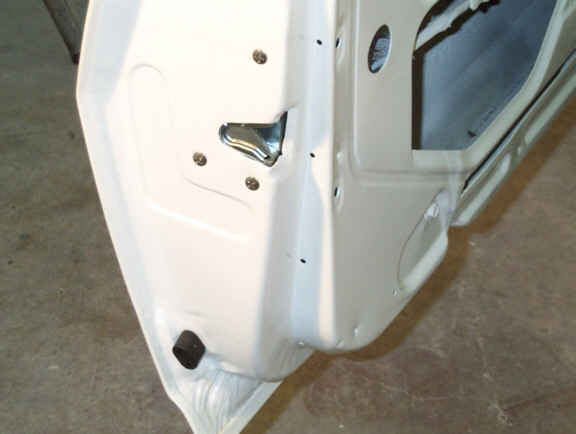
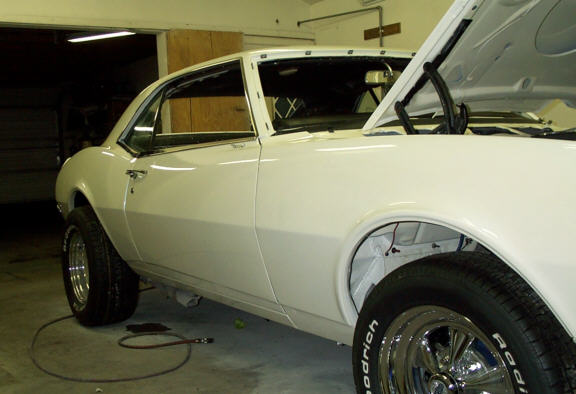
The drivers side door latch was pretty rough so I installed a new one. The door operates smoothly now. |
|
|
|
|
|
 |
|
|
We painted these dash parts and the front spoiler and heater box. |
|
|
|
|
 |
|
|
After we finished painting the dash, I pulled off the tape and paper. Then we polished it out. Now it is ready to go back together. |
|
|
|
|
|
 |
|
|
Here is the heater box re-installed. The pearl shows up if you look closely at this pic. |
|
|
|
|
 |
|
|
We polished out the car again to cleanup all of the overspray. The paint is looking better and better. |
|
|
|
|
|
 |
|
|
While we polished the dash, I installed the grille, door locks, drivers mirror and misc. other items. |
|
|
|
|
 |
|
|
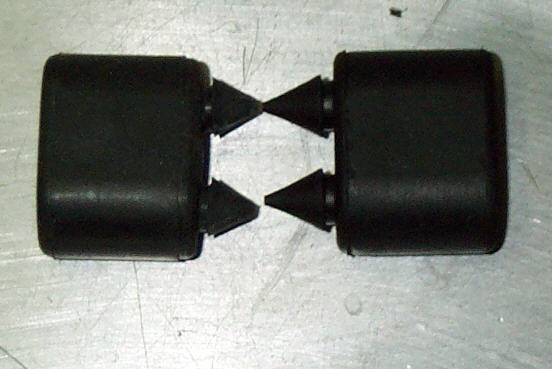
Here is a photo of a rubber door bumper I bought off of Ebay (left). Be careful about the deals you find on Ebay. When I installed these bumpers they kept falling off. I bought another set from Year One and they fit better. You can see the wider gaps and bigger retention posts on the Year One part (right). |
|
|
|
|
|
 |
|
|
We custom fit the drip rail molding and deluxe trim to the doors. The back deluxe trim pieces are some originals that I was able to polish out. A friend did some PDR to a couple of hail dings on one of them. The others are some GM resto. parts I picked up in Oklahoma City. |
|
|
|
|
 |
|
|
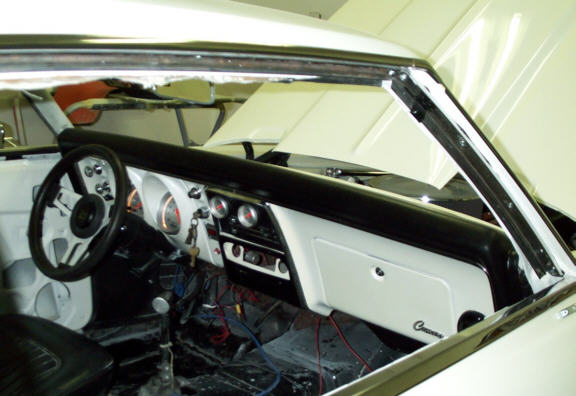
I mounted the rear spoiler, trunk locks and door locks and we have been working on the quarter glass while I work on the dash and gauges. Once I put the spoiler on we started polishing it too. As soon as I finish the dash, we can put in the windshield. Then it will be time for a quick cruise, you know, just to the parts store or something to get it on the road. |
|
|
|
|
|
 |
|
|
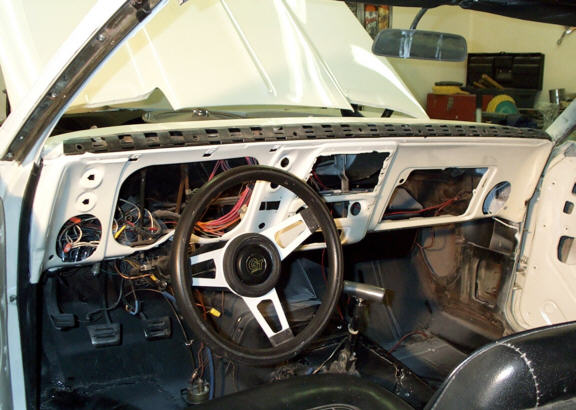
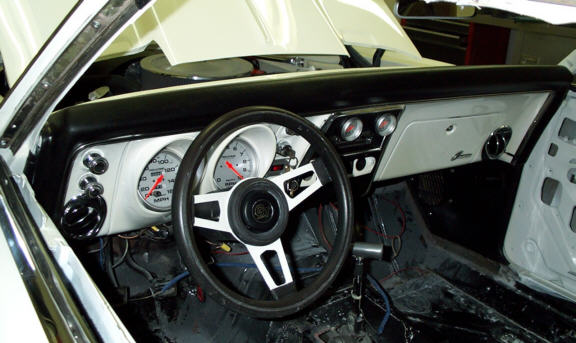
This weekend, I worked on the dash. I mounted the guages and wired some the lights for them. I also installed the right side kick panel and hood latch. I jacked up the rear axle to test the speedo since I haven't had it hooked up until now. It worked fine. The oil pressure guage reads 60 psi at idle. |
|
|
|
|
 |
|
|
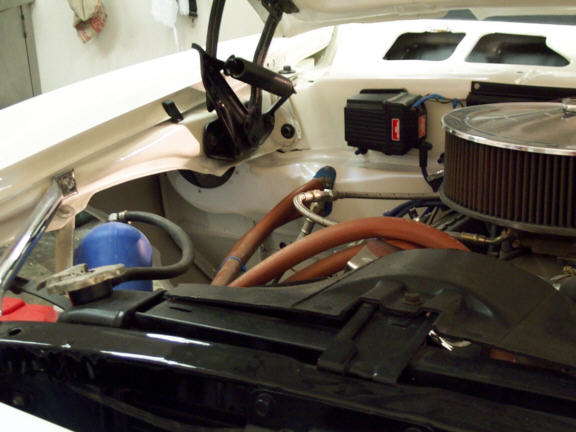
Still missing, is a new stereo. I might have to save up some bucks for the one I want. I found a pretty cool Kenwood that controls a CD changer and still fits the dash without cutting. I will have to think about it.
As you can see I still have a few wires I need to tie up that go to the line lock and fuel pump. I ordered some parts this week to help finish the dash, vent knob grommets, retention clips, etc. I also had to order a new windshield molding, mine was beat up pretty bad. |
|
|
|
|
|
 |
|
|
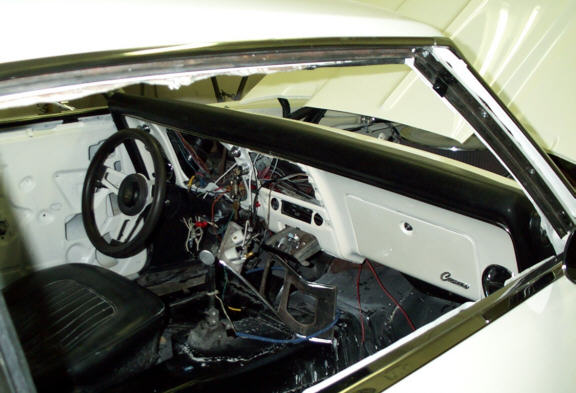
Here is the dash torn back apart. The dash pad trim broke. I used the original and the old metal gave up when I pulled the end into place. I wanted to add some turn signal indicators anyway. |
|
|
|
|
 |
|
|
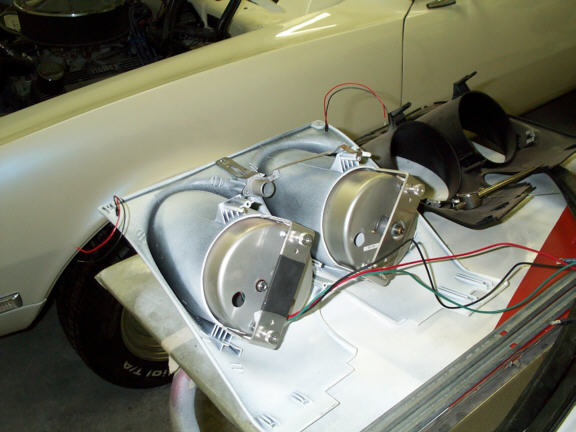
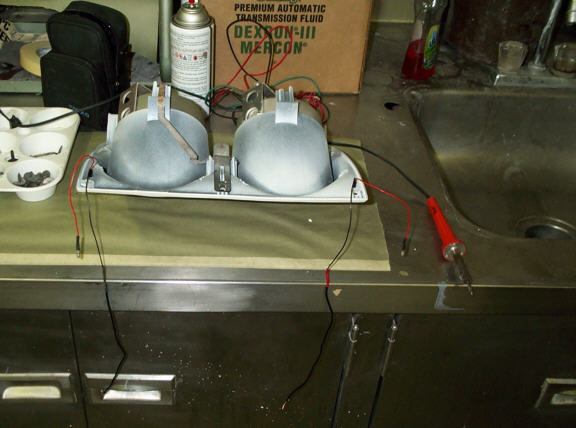
I received an email asking about how to install the ultralite gauges. I read about this in Hot Rod magazine. It's really pretty easy since the 5"gauges install right into the holes of the stock bezel. You have to cut off about a half inch from the back brackets and bend them slightly to catch the edge of the bezel. Just slide the gauges in from the front until they are tight and then install the brackets from the back. Dont forget you lose your idiot lights, fuel gauge and turn signals, so you will have to make provisions. |
|
|
|
|
|
 |
|
|
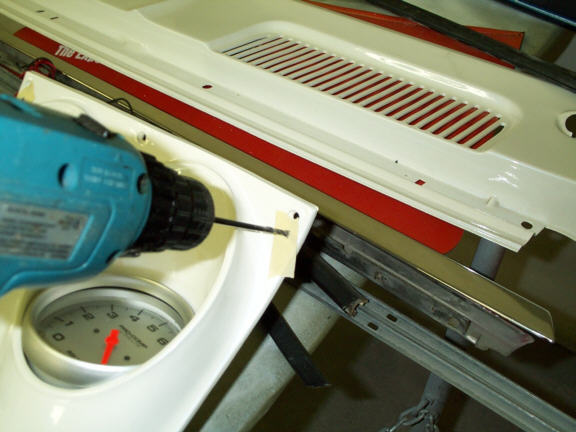
To replace the turn signal lights, I ordered some mini indicator lights from Jegs. Here I drilled the holes to install them. I used tape to help prevent damage to the paint. |
|
|
|
|
 |
|
|
After I inserted the lights, I added plug in connectors to make installation and removal easy. I traced out the turn signal wires from the factory plug and soldered connectors to them as well. I extended the ground wires to make sure I could reach a good ground. I like to solder connections instead of using crimp ons because I have had crimp on connections fail after weathering awhile. Shrink wrap is an easy way to protect connections and splices. |
|
|
|
|
|
 |
|
|
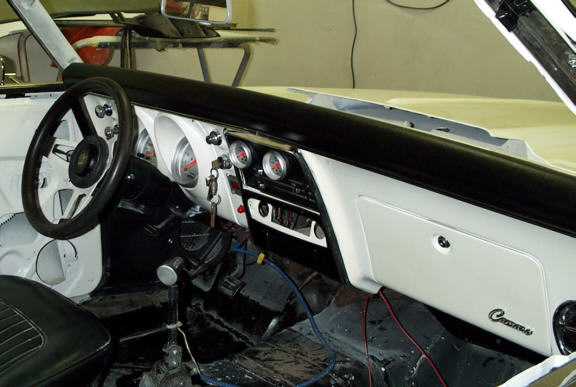
Here is the dash put back together with the new trim. It's starting to look good. I am waiting for a back ordered nut so that I can install an original type cigarette lighter that matches the headlight/washer knobs. |
|
|
|
|
 |
|
|
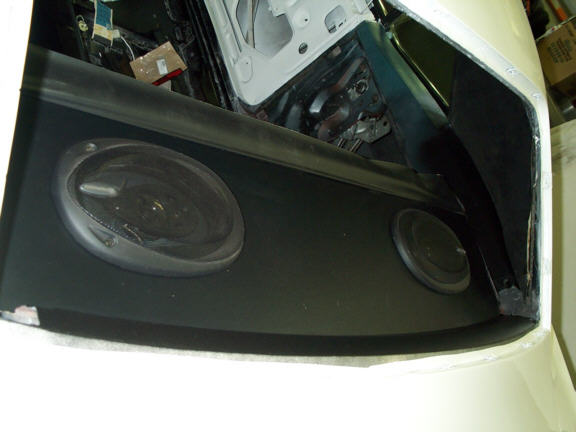
Here is the rear package tray with some pioneer speakers installed. They should sound great if I ever get a stereo. Click here for the next page. |
|
|
|
|
|
I took the car outside for some pics. Check them out here. |
|
|
|
|