
![]()

![]()


After "talking" with a few on the internet, we decided to use Liquid Nails on this project. I bought a gallon canand the decision was made to start the gluing with the littlest piece ~ the door. After it was glued and rolled out, we decided this ain't bad after all; let's do the sides!
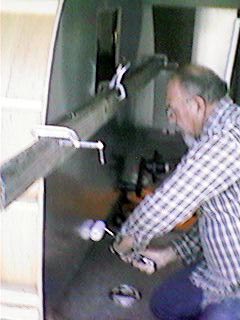
I put a board under the frame on these jacks that the skin could rest on. It lined up the skin with the wood really well. After the glue was on, and the skin clamped, I removed the boards so they wouldn't be glued onto the Tear!
This is just an example of the clamps and how they were attached. We put a little piece of wood under each side so we wouldn't dent the skin or the interior finish work.
. . .and so the glue spreading begins! I slopped it on with a putty knife, and Linda followed behind, spreading with a trowel! Great fun!
After the glue was spread and the skin placed over it, we immediately clamped a 2x4 across the center of the side. This held the skin in place while we placed clamps along the top of the area we were working on. After we had rolled the entire surface with a 3" paint roller, we removed the 2x4 and kept rolling.
. . .and my arms can vouch for the amount of rolling and pressure applied to same!
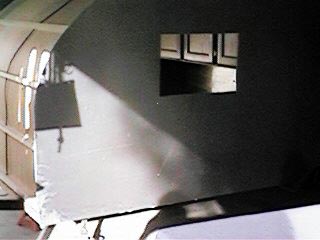
Next step, hatch lid, and top applied! Look for an update next week!
A great suggestion, from a great guy, encouraged me to put this section on each page of the restoration project!
 first page of project, January 1999
#1 updated 03 February 1999
#2 updated 13 February 1999
#3 updated 20 February 1999
#4 updated 28 February 1999
#5 updated 04 March 1999
#6 updated 08 April 1999
#7 updated 16 April 1999
#8 updated 12 May 1999
#9 updated 31 May 1999
#10 updated 15 June 1999
#12 updated 24 June 1999
#13 updated 14 July 1999
#14 and final updated 10 October 1999
Expenses involved in this restoration,
article that appeared in Mechanix Illustrated, January 1953
updated 14 March 1999
...and the credit goes to: updated 10 October 1999
This Teardrop Trailer Web Ring site owned by Jim's Teardrop Restoration Project | ||
 |
||
![]()


 To return to my F-100 page