Check out my newest award!!

and then there's . . . . .

A Classic Truck Shop Select Site

Update #12

It Ain't Cheap Restoring One of These! </head>

..It's finally coming together!!!

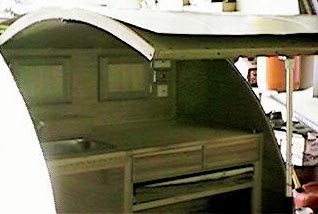
Michael - you remember him? The cabinet man? - came over to finish up the cabinets last week. He installed the two long drawer fronts and the spice rack. Isn't it cool?
The spice rack is long enough to handle a variety of supplies, salt, pepper, paper plates, matches, grandkids pictures, etc! But not spices! The only spices I know are salt and pepper!

Gary Brown did it! So I had to, too! I insulated the top, between the ribs with 1" strofoam insulation. Slick! I glued it into place just in the areas that curved! It seems to give the Tear a real solid feel, and according to Gary, is very effective!

Next step was to apply the skin to the hatch lid. I started at the top on one side and worked my way down; working side to side. This picture shows the work almost done - got about 1/4 more to go. After this was complete, I needed to have the side moldings riveted on, and
SKIP TO MY RESCUE!

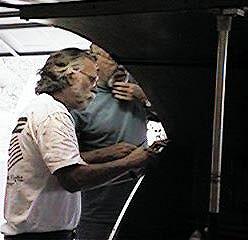
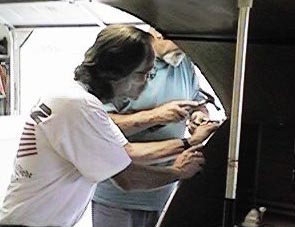
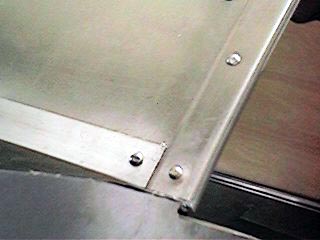
Well, the hatch had to be finished off, and my friend, Skip, came to my rescue! All I had to do was have Linda feed him! This is an action shot of Skip and me pondering the placement of the rivets on the hatch lid. You can tell how deep in thought I was by the way I'm pulling at my facial hair!!!

Now this is the true action shot! What's unusual about this particular shot, is that I was working! Skip did most of the work that evening, I learned!

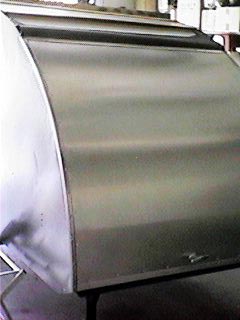
The hatch looks great, and adds a lot to the aesthics of my project! What a neat friend! !

This close-up shows how clean these rivets look. This is the bottom corner of the lid. I ran another piece of molding across the bottom to "clean it up."

And Voila! The finished hatch lid ~ 3 hours later! This fits so nice. It shuts and then just sort of clicks into place! Dumb luck on my part (that and a lot of frustration!)

The window installation was probably one of the easier parts of the assembly. . . . and it even looks sharp!

Next step is covering the insulation, getting ready for the skin on the top. I was going to use lauan like I used on the hatch lid, but it started to split when I screwed it onto the ribs. . . .so second choice was masonite. and it worked great.

I was dreading trying to put new moldings around the "doorway." It turned out to be a two man project - correct that one man and his help-mate! Linda held the molding in place while I screwed it in.

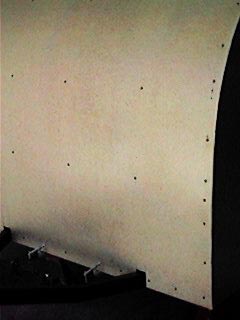
and even with her help, it still looks nice!

The "doorway" went so well, we decided to put the molding on the door - but only after dinner, and a glass of wine! Once again, Linda held the molding in place, while I drilled the holes and put in the screws. This picture (blurry as it may be) shows the long strip of molding that had to be bent as we worked, and then trimmed at the end.

Next step - hanging the door, applying the skin. Same time next week!

Updates

first page of project, January 1999
#1 updated 03 February 1999
#2 updated 13 February 1999
#3 updated 20 February 1999
#4 updated 28 February 1999
#5 updated 04 March 1999
#6 updated 08 April 1999
#7 updated 16 April 1999
#8 updated 12 May 1999
#9 updated 31 May 1999
#10 updated 15 June 1999
#11 updated 15 June 1999
#13 updated 14 July1999
#14 and final updated 10 October 1999
Expenses involved in this restoration,
article that appeared in Mechanix Illustrated, January 1953
updated 14 March 1999
...and the credit goes to: updated 10 October 1999

To return to my F-100 page

This Teardrop Trailer Web Ring site owned by Jim's Teardrop Restoration Project

Join The Teardrop Trailer Web Ring at 
www.teardroppers.com/tear_ring.htm

Join The Webring

[ Previous] [Home] [Random] [List] [Next]

1