|
|
Edit > New selection
handle
|
Creating Selection Handles
|
|
|
|
|
Adds a selection handle to a DAG node.
Selection handles are intended to make picking and manipulating objects or hierarchies of objects easier.
For more information, see:
-
1
-
Create an object.
-
2
-
Select the object or DAG node you want to create a selection handle on.
|
|

|
-
3
-
Select Edit > New selection handle.
-
A pale orange cross is displayed at the object's or node's
rotate pivot (the cross looks like the one in the picture at
the left). If the selection handle is inactive, the cross
becomes red.
|
Tip:
|
If you are having difficulty seeing the selection handle you
created, you can move it away from the object or node using
Xform > Local > Move selection handle.
|
Example
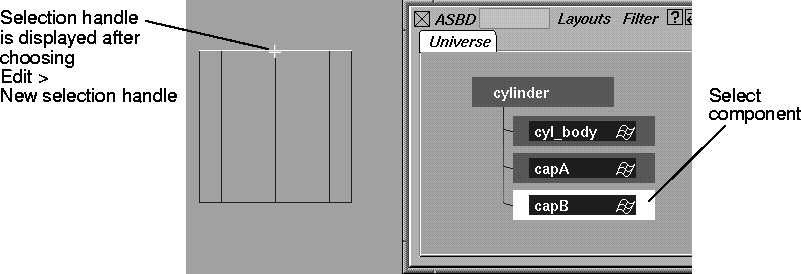
Using a cylinder as an example, you can place selection handles on the component nodes and use them to easily activate the separate parts or the cylinder as a whole. To add a selection handle:
-
1
-
Select the component in the ASBD window.
-
2
-
Select Edit > New selection handle. A new handle is displayed at the rotate pivot.
|
|
|
-
3
-
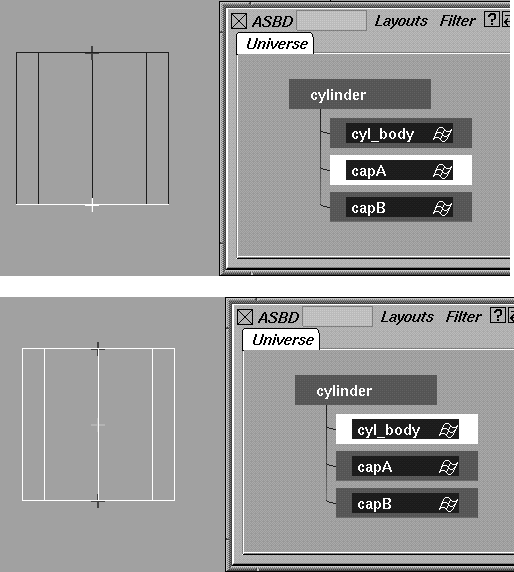
Continue to add new handles as you need them. In the following examples, two more selection handles are added to the cylinder.
-
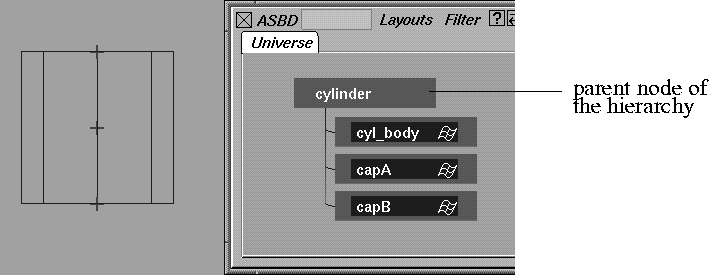
The following shows all three handles:
|
|
|
|
Tip:
|
Because the Xform tools are sensitive to the selection handle
pick mode, you can very easily transform just the
component, like capB or the whole cylinder.
|
|


