|
|
Cameras palette >
Local move camera
> Twist 
|
Tilting the Perspective View
|
|
|
|
|
Purpose
Turns the perspective view in the viewing plane as if you were watching the scene while tilting your head.
>
|
Note:
|
Twist can only be used in a Perspective window. It does not
apply to orthographic windows.
|
How to Use - Example
-
1
-
Place the cursor in the perspective window and click a mouse button to make the window active.
-
2
-
In the Tool Palette, select Twist from the Cameras > Local move camera
cascading menu, or click this icon.
-
3
-
Position the cursor in the perspective view and click-drag with the mouse.
Using Cursor keys
|
|
Pressing an arrow key once
moves the cursor one pixel
in the corresponding
direction, by default.
|
You can use the four keyboard arrow cursor keys (pointing up, down, left, and right) to twist incrementally. The distance moved depends on the arrow size set in the Interface Options box (Preferences > Interface > Interface options- ). ).
- To twist the view clockwise, press the Up or Right arrow keys.
- To twist the view counter-clockwise, press the Down or Left arrow keys.
>
|
Note:
|
When working with a large model, the speed at which the
screen is redrawn during a Twist
operation can be increased
by decreasing the Motion Precision in the Preferences >
Performance options window. See Setting Performance
Options on page 519 for details.
|
Using the Keyboard
You can also type the twist angle from the keyboard when the system prompts:
Enter twist angle (ABS/REL):
Type the angle and press Enter. The view is twisted by or to the angle given. A positive angle turns the view clockwise (by turning the camera counter-clockwise).
Twist Options
Select
Cameras palette > Local move camera > Twist- to display the Twist Options box.
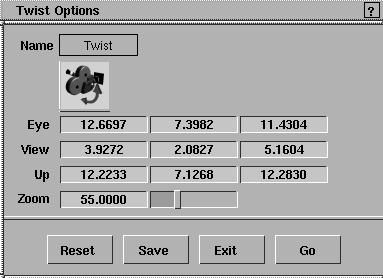
Eye/View/Up
-
- These sliders let you define a view by positioning the camera. The view is determined by the eye position, view point position, and up vector end point. These nine fields contain floating-point values. They represent, from left to right, the X, Y, and Z coordinates for each of the three camera parameters. To see the camera as you modify it, use DisplayTgls > Object Toggles > Camera.
Zoom
-
- The Zoom slider also takes a floating-point value which defines the extent of the camera's field of view. Values must be positive in the range of 0.2 to 179.
>
|
Note:
|
For windows other than the Perspective window
(orthographic), two of the three Eye and View values must
be the same, and two of the three Eye and Up values must be
the same. If they are all different, or are all the same, the
results are unpredictable. This is because viewing
operations on orthographic windows are performed on the
window itself rather than the camera of the window.
|
|
Cameras palette >
Local move camera
> Azimuth/elevation
|
Revolving the View Around a Center of Interest
|
|
|
|
|
Purpose
Revolves the camera about the center of interest in the perspective view.
How to Use
-
1
-
Place the cursor in the perspective window and click a mouse button to make the window active.
-
2
-
In the Tool Palette, select Azimuth/elevation
from the Cameras > Local move camera
cascading menu, or click its icon.
-
As the cursor is moved, the view rotates about the center
of interest (initially the origin).
Using the Mouse
- To rotate horizontally, click and drag the middle mouse button.
- To rotate vertically, click and drag the right mouse button.
- To rotate the view both horizontally and vertically, click and drag the left mouse button.
Release the mouse button when the desired angle is reached.
The view rotates about the center of interest, which is the viewpoint of the perspective camera. To position the camera's viewpoint select DisplayTgls > Object Toggles >Camera to display the perspective window camera. When you can see the camera, the viewpoint can be picked using Pick > Component, and then positioned by selecting Xform > Move.
|
|
When working with a large
model, the speed at which
the screen is redrawn during
an Azimuth/elevation
operation can be increased
by decreasing the Motion
Precision in the Preferences
> Performance options
window .
|
To identify a particular point as the center of interest, move the camera's view icon so that the target end is at that point of interest. Subsequent manipulation of the camera with Azimuth/elevation now keeps that point in the center of the view.
Using Cursor Keys
You can use the four cursor keys (arrows pointing up, down, left, and right on the keyboard) to rotate incrementally. The amount moved depends on the arrow size set in the Interface Options box (Preferences > Interface > Interface options-).
|
|
Pressing an arrow key once
moves the cursor one pixel
in the corresponding
direction, by default.
|
- To rotate the view horizontally about the up point of the camera (azimuth), press either the left or right arrows.
- To rotate the view vertically (elevation), press either the up or down arrow.
Using the Keyboard
You can type the azimuth and elevation angles from the keyboard when the system prompts:
Enter azimuth and elevation angles (REL):
Type the angle and press Enter.
- A positive azimuth moves the camera around to the left.
- A positive elevation moves the camera up under the scene.
Azimuth/Elevation Options
Select A
zimuth/elevation- to display the Azimuth/Elevation Options box.
Eye/View/Up
-
- These sliders let you define a view by positioning the camera. The view is determined by the eye position, view point position, and up vector end point. These nine fields contain floating-point values. They represent, from left to right, the X, Y, and Z coordinates for each of the three camera parameters. To see the camera as you modify it, use DisplayTgls > Object Toggles >Camera.
Zoom
-
- The Zoom slider takes a floating-point value which defines the extent of the camera's field of view. Values must be positive in the range of 0.2 to 179.
>
|
Note:
|
For windows other than the perspective window
(orthographic view), two of the three Eye and
View values
must be the same, and two of the three Eye and Up
values
must be the same. If they are all different, or are all the same,
the results are unpredictable. This is because viewing
operations on orthographic windows are performed on the
window rather than the camera of the window.
|
|
|
Azimuth/elevation is always relative.
|
|
Cameras > Local
move camera > Yaw/
pitch
|
Changing the Viewpoint of the Camera
|
|
|
|
|
Purpose
Changes the viewpoint of the camera (i.e. what the camera is looking at) in a perspective view.
>
|
Note:
|
Yaw/pitch can only be used in a Perspective window. It does
not apply to orthographic windows. Yaw/pitch is always
relative.
|
How to Use - Example
-
1
-
Position the cursor in the perspective window and click a mouse button to make the window active.
-
2
-
In the Tool Palette, select
Yaw/pitch
from the Cameras > Local move camera
cascading menu, or click this icon.
-
3
-
Click and drag the left mouse button. As the cursor is moved, the camera's view changes, that is the view and up points change, while the eyepoint remains fixed.
Using the Mouse
- To rotate the view horizontally, click and drag the middle mouse button.
- To rotate the view vertically, click and drag the right mouse button.
- To rotate the view horizontally and vertically, click and drag the left mouse button.
>
|
Note:
|
When working with a large model, the speed at which the
screen is redrawn during a Yaw/pitch
operation can be
increased by decreasing the Motion Precision in the
Preferences > Performance options window. See Setting
Performance Options on page 519 for details.
|
Using Cursor Keys
You can use the four arrow cursor keys (arrows pointing up, down, left, and right on the keyboard) to rotate incrementally. The amount moved depends on the arrow size set in the configuration options (Preferences > Interface > Interface options).
|
|
Pressing a cursor key once
moves the arrow one pixel in
the corresponding direction,
by default.
|
- To rotate the viewpoint left or right (yaw), press the left or right arrow key.
|
|
Be careful to keep the red
cursor positioned within the
window when using the
cursor keys.
|
- To rotate the view and up points (pitch), press the up or down arrow key.
Using the Keyboard
You can type the yaw and pitch angles from the keyboard when the system prompts:
Enter yaw and pitch angles (REL):
Type the angles separated by a space or comma, and press Enter.
Yaw/Pitch Options
Select Yaw/pitch- to display the Yaw/Pitch Options box..
Eye/Vew/Up
-
- These sliders let you define a view by positioning the camera. The view is determined by the eye position, view point position and up vector end point. These nine fields contain floating-point values. They represent, from left to right, the X, Y, and Z coordinates for each of the three camera parameters. To see the camera as you modify it, use DisplayTgls > Object Toggles > Camera.
Zoom
-
- The Zoom
slider also takes a floating-point value which defines the extent of the camera's field of view. Values must be positive in the range of 0.2 to 179.
>
|
Note:
|
For windows other than the Perspective window
(orthographic), two of the three Eye and View values must
be the same, and two of the three Eye and Up values must be
the same. If they are all different, or are all the same,
unpredictable results occur. This is because viewing
operations on orthographic windows are performed on the
window rather than the camera of the window.
|
|
|
Yaw/Pitch does not apply to orthographic windows and is
always relative.
|
|


