Using IrfanView
IrfanView
What is It
IrfanView is a small, fast and compact graphic viewer for Windows
9x/ME/NT/2000/XP/2003/Vista.
It is free for non-commercial use and can be downloaded from http://www.irfanview.com/.
Download and install IrfanView to your computer.
You
can also download and install the irfanview-plugins if you wish to explore all
the other features of this program.
Beside doing the basics of cropping, resizing and converting file formats one
to another, it has features such as slide show, thumbnails, batch conversions and much, much more.
The version of IrfanView shown is 4.10.
If you have another version the screenshots may be different.
Using IrfanView
Start IrfanView on your computer.
To open the photo/graphic you want to work on, click on File on
the Menu Bar of IrfanView, click Open and then navigate to where
the photo/graphic is on your computer.
In the rest of the article I will shorten any instructions to the format File | Open.

An alternative way to open a photo/graphic with IrfanView is by clicking on the the "yellow folder" graphic on the Tool Bar.

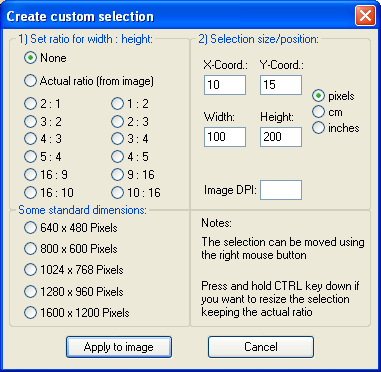
To Crop a Photo:
a) Click, hold and drag with the mouse over the photo the section
you wish to crop.
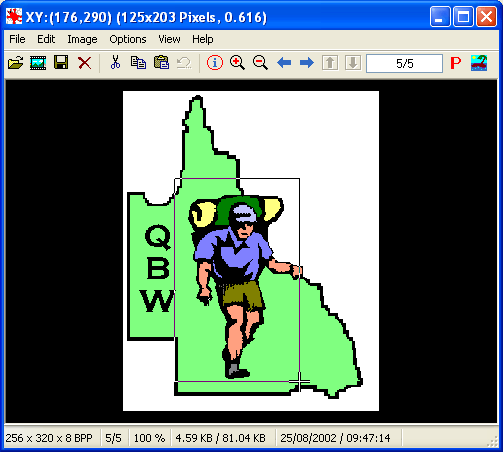
The area can be further adjusted by placing the mouse cursor over the selection lines and moving them either horizontally or vertically.
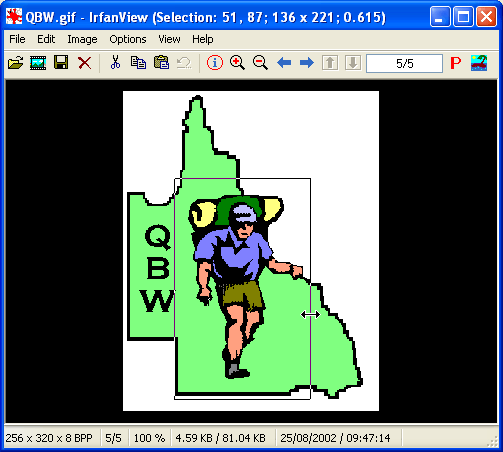
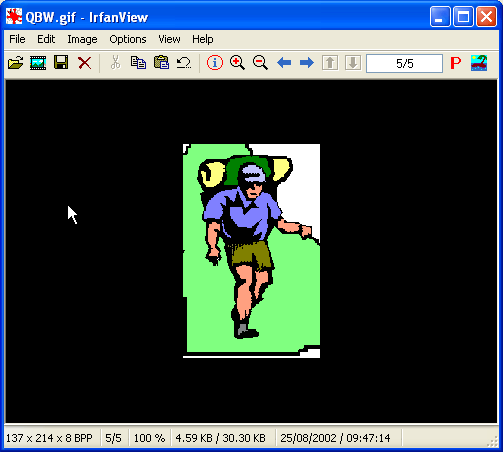
b) Click on Edit | Crop selection.

The area outside the outline will be deleted, only what is inside will be left.
Alternatively clicking on Edit | Create custom selection allows greater control over the cropping process.
To Enhance Colours:
Click on Image | Enhance colors and the Enhance colors
dialogue box will open.
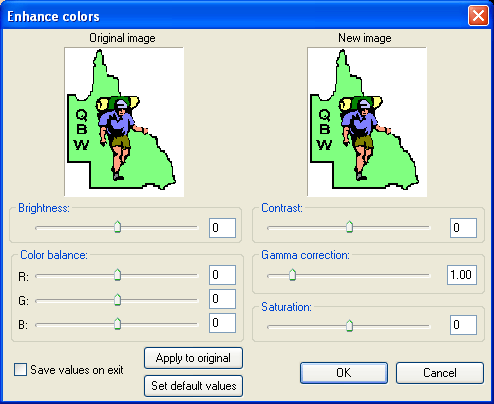
Here you can adjust the Brightness, Color Balance, Contrast, Gamma correction and
Saturation and instantly see what the changes do.
An alternative is to Click on Image | Auto adjust colors and let
IrfanView adjust the photo to what it thinks best.
To Change the Resolution:
Click on Image | Resize/Resample and the Resize/Resample
image dialogue box will open.
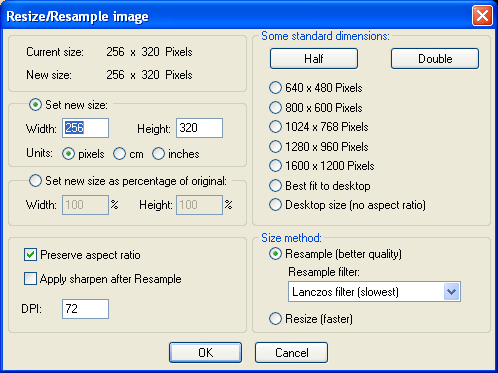
Set the DPI (Dots per Inch) to your desired
level.
A good quality picture to be printed needs at least 150 DPI.
A picture for the internet only requires about 75 DPI.
Guide for club members: No need to set the resolution if sending
photos by email.
Guide for Editors Assistants: If inserting a photo into the Newsletter,
set the Resolution to 150 Pixels/Inch.
To Resize a Photo:
Click on Image | Resize/Resample and the Resize/Resample
image dialogue box will open as above.
Resizing is mainly used to decrease a photo size.
You can decrease the number of pixels in an image but you can't always increase pixels without distortion or
pixelation.
Insert the values for Width
and Height. You have the choice of using pixels, cm or inches as the units.
When resizing, you need to take into consideration whether the photo
will be used on the internet or for printing.
For internet, more commonly the pixel size is adjusted.
For printing, more commonly the cm size is adjusted.
If for printing, adjust the Resolution first, as above, by
choosing the desired DPI before resizing the photo.
Reduce the photo to the required width and height. You can change the
size by either giving exact units or as a percentage.
Guide for club members: If sending photos by email, leave the units
in pixels. Anything over 1000 pixels wide is a good size.
The example above at 256 pixels wide would be too small for a normal
photo in the Newsletter.
Guide for Editors Assistants: If inserting a photo into the Newsletter,
set the Resolution to 150 DPI and the width to 8.5cm for a photo in a
half column or 17cm for a full page photo as on Page 1.
To Save a Photo:
Click on File | Save As and a Save Picture As ...
dialogue box will open plus usually a JPEG/GIF save options
dialogue box.
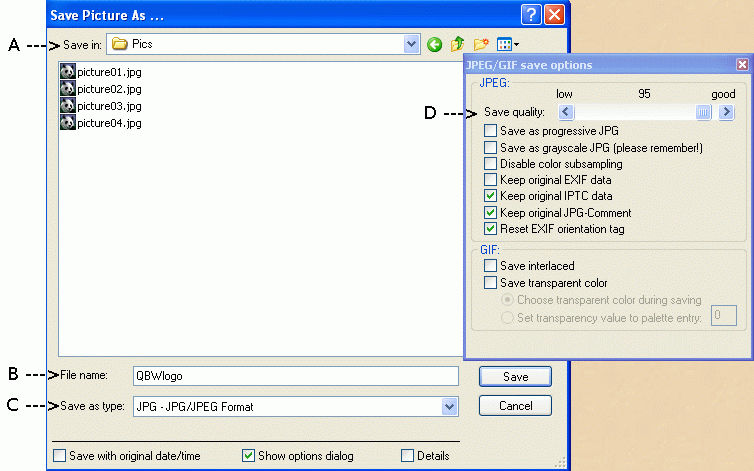
A) Choose the folder you wish to
save the photo in.
B) Choose a File name. If you choose the same folder as the
original photo, change the filename. By doing this you also retain the
original photo.
C) In the Save as type drop down menu box, pick a
graphics format. A common graphic format used is JPEG.
D) If using JPEG you can adjust the quality of the photo in the
associated JPEG/GIF save options dialogue box by moving the
slider. By decreasing the quality of a jpg photo you also decrease its
size in KB's.
Guide for club members: If sending photos by email, choose
the JPG - JPG/JPEG Format and adjust the quality to 95%.
Guide for Editors Assistants: If the photo is to be
inserted in the Newsletter, choose the JPG - JPG/JPEG Format and adjust the quality to 55%.
Click on Save
More information on IrfanView is available by clicking on Help | IrfanView Help.
For any feedback email me at [email protected]