Installing a Remote Mount Oil Filter
I have been wanting to get a larger filter on my car for some time, and installing a
3" down pipe gave me the perfect excuse. I have wanted a larger filter because every
time I change the oil it looks nasty. I have always changed
my oil every 3000 just like a good little mechanic. I am hoping the larger filter
will help keep it a little cleaner. I guess I'm a little paranoid, but I'd rather go
larger than try and find a smaller filter that will work. One list member said he got a
Miata filter to work with his 3" down pipe and has had no problems with it. But when
I considered the proximity of the downpipe to the filter, and the extra heat it may be
transferring into the filter, this was the only way to go for me. Overall I feel
this is an improvement to the system that more than warrants the effort and expense.
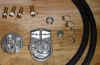
These are the parts you will need.
- Perma-Cool Oil Filter Relocation Kit P/N 10695
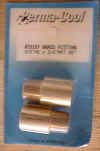
- (2) Perma-Cool 3/8" 90° fitting kits P/N 15157
- Teflon tape
- 21/64" drill bit
- (2) 8x25x1.25mm Bolts (dia x length x thread pitch)
- Any Ford 5.0 type oil filter - Except FRAM
NOTE: This project could also be done with AN fittings and Aeroquip type hose.
While this would look really cool I did not do it since
the Russell 3/8" NPT to -8AN 90° fittings were $25.00 each from Jegs or
Summit and I would
need four of them. Add in the cost of the -8AN hose and that turns this $60.00 project into a $190.00
project.
 When assembling this system make sure you put Teflon paste on all the pipe
fittings. You can use Teflon tape if want to fix leaks each time you change the
oil.
When assembling this system make sure you put Teflon paste on all the pipe
fittings. You can use Teflon tape if want to fix leaks each time you change the
oil.
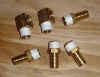
NOTE: Only two 90 Degree fittings are shown, four are required. As you can
see I started out with Teflon tape. Learn from my mistake, use the Teflon paste
instead of the tape.
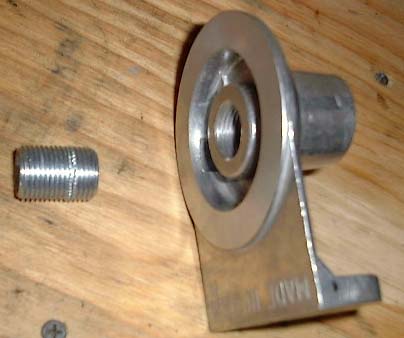
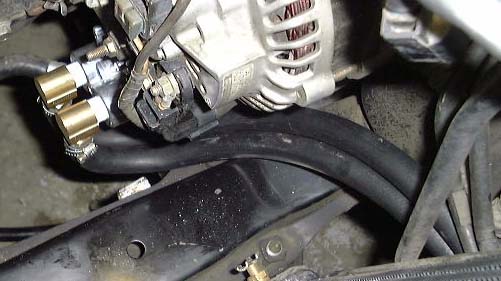
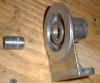
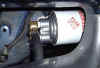
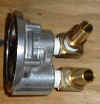 Install the o-ring and the blue adapter bushing as shown. Make sure you put a
light coat of oil on the o-ring just like you would when installing a new oil
filter. Next install both of the 90°
adapters without the nipples attached. The last part of this step is to install
the hose nipples.
Install the o-ring and the blue adapter bushing as shown. Make sure you put a
light coat of oil on the o-ring just like you would when installing a new oil
filter. Next install both of the 90°
adapters without the nipples attached. The last part of this step is to install
the hose nipples.
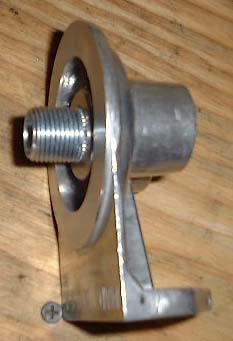
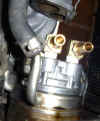 Install the adapter assembly the oil filter mount. Make sure it ends up with
both nipples pointing down. I got lucky with mine as it was pointing right where I wanted it on the first try.
Install the adapter assembly the oil filter mount. Make sure it ends up with
both nipples pointing down. I got lucky with mine as it was pointing right where I wanted it on the first try.
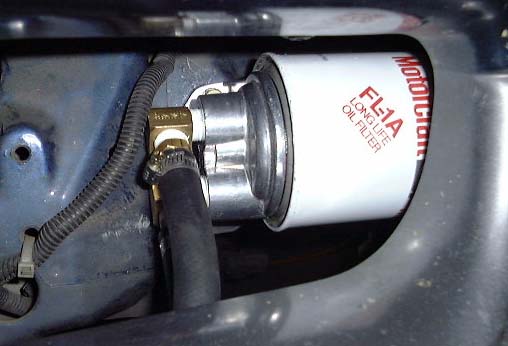
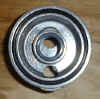
 Install the filter nipple in the remote filter base with the short end of the nipple going
into the base as shown. This does not have to be super tight, just snug.
Install the filter nipple in the remote filter base with the short end of the nipple going
into the base as shown. This does not have to be super tight, just snug.
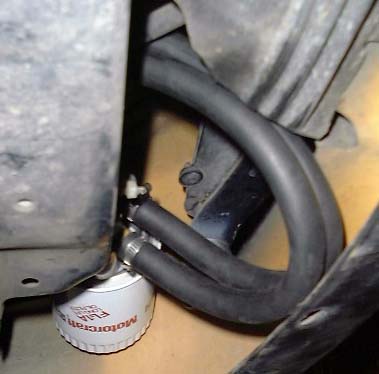
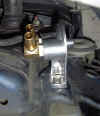 I installed the remote filter base in the drivers side front fender just behind the front bumper. The
holes on the filter base were drilled with a 21/64" drill bit to allow the use of
metric 8x1.25mm bolts. Once the filter base bolt holes were drilled the base lined up
*perfectly* with the stock fog light mounting nuts that are welded to the frame. Use
two 8x25x1.25mm bolts to bolt the remote filter base to the frame.
I installed the remote filter base in the drivers side front fender just behind the front bumper. The
holes on the filter base were drilled with a 21/64" drill bit to allow the use of
metric 8x1.25mm bolts. Once the filter base bolt holes were drilled the base lined up
*perfectly* with the stock fog light mounting nuts that are welded to the frame. Use
two 8x25x1.25mm bolts to bolt the remote filter base to the frame.
NOTE: The mounting hardware Perma-Cool supplies is a few standard sheet metal screws. I think
my mounting method is far more rugged than just drilling some holes into the sheet metal. If
you still have your fog lights installed this method may not work.

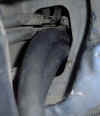
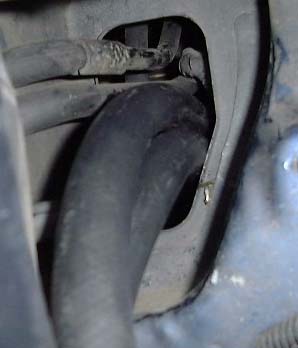
 Next connect the hose and cut to size. I made nice smooth loops to avoid any possible
kinking of the hoses. The factory hole was the perfect size to route the hoses through and
all of this was accomplished with minimal fuss.
Next connect the hose and cut to size. I made nice smooth loops to avoid any possible
kinking of the hoses. The factory hole was the perfect size to route the hoses through and
all of this was accomplished with minimal fuss.
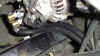
 Add about ½ quart of oil to the filter and spin it on. Check your oil level and add
oil as needed. Fire up the car and check for leaks. Check the oil level again after you
turn off the motor. All done!
Add about ½ quart of oil to the filter and spin it on. Check your oil level and add
oil as needed. Fire up the car and check for leaks. Check the oil level again after you
turn off the motor. All done!
NOTE: This install was done on a 1991 Talon TSi with a 3" down pipe and
the factory fog lights removed. |