|
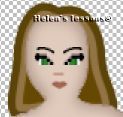
Doll
Hair
You
can paint the doll hair by different methods, changing tubes,
settings, effects and colors. Here I described a general idea,
the rest depends on your image and imagination... Sorry for pun
:)
1
variant
Save
often!
|
|

|
|
3.
Go to basebody layer. Choose Preset Shapes:
Ellipse
Antialias and Create as Vector checked
Line
width = 1
Foreground
and Background color -
the first color from the chart
4.
Magnify the image (3:1) and draw the ellipse behind the head (see
picture). The new vector layer will be created in Layer Palette
automatically. Move it below basebody
layer and rename hair1.
|
|

|
|
5.
With Object Selector tool edit you ellipse like this,
(right
click on the ellipse and choose Node Edit option from the
menu. Add some noddles if necessary).
|
|

|
|
6.
Layer/Convert to Raster Layer.
7.
Selections/Select All.
8.
Selections/Float.
9.
Selections/Modify/Contract by 5. Flood Fill with
the second color from the color chart.
10.
Selections/Modify/Contract by 5. Flood Fill with
the third color from the color chart.
|
|
|
|
11.
Selections/Select All.
12.
Selections/Float.
13.
Choose Retouch. Settings:
|
|

|
|
14.
Move the cursor in direction of hair (for example in direction
of the red arrows), shading the lines between colors.
|
|

|
|
15.
Go to head layer. Choose Preset Shapes (same
settings). Draw the ellipse and repeat steps 5-14.
|
|


|
|
2
variant
|
|
You,
of course, can use tubes (on separate layers). For example, dollhair1
or dollhair2.
You should only choose the scale of the tube and probably its
color. (Layer/Colorise
- change Hue and Saturation settings with your
choice).
|
|

|
|
3
variant
|
|
Here
I used Fur effect from Eye Candy
plugin.
|
|
Create
new layer. Move it below basebody layer. Choose Freehand Selection and
select the circle around the head like this:
|
|

|
|
Effects/Eye
Candy 4000/Fur :
|
|


|
|
Go
to head layer. Add new layer. Choose the
different areas and apply the Fur effect several times,
changing the options, until you get the required result. Good
luck!
|
|
Basebody
1 - 2 | Hair
| Face | Clothes
|
|

|
|
PSP
Tutorials
|
|
Home
|
|
Optimized
for resolution 800 х 600, Internet Explorer 5.0 Graphic
and Design Country
City © Copyright 2002
|
