|
|
|
|

|
|
|
|
There
are a lot of webpages with tutorials in the Web, concerning
drawing the cartoon dools. For example, Josie`s
Dolls, Xandorras Place,
etc. All these dolls are fun and nice but very small. So I
decided to write my own tutorial with my own version of
dolls`drawing (basebody, face, hair and clothes). In future I am
going to make the doolmaker or something like this "drag`n
drop" play. You will be able to make your own dolls for
your personal pages.
|
|
For
this tutorial you
will need:

(30
days trial version)
For
beginners: one basebody selection - paperdoll.zip
(save
in folder Paint Shop
Pro/Selections)
Fabric
samples (right click and Save as...) - you can use fabrics of
your choice of course
|
|
|
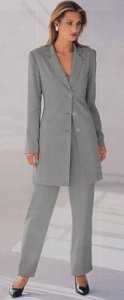
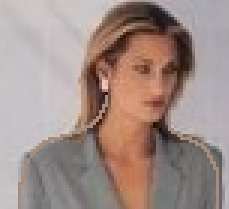
First
of all you need to find the photo, for example, like this, from
any fashion magazine or in the Web. The more
the photo size the better the lines will be drawn. The small
photo can be resized (Image/Resize) up to 150-200% (not
more, otherwise the contours will be fuzzy).
You
can use this photo from "Burda Moden".
|
|
1.
The original photo will be placed on Background layer.
Create new layer "body". Choose Draw tool with
options: 
Foreground
Color -
beige (#A58C7D) Background
Color - null |
|
2.
Accurately begin to draw the contour of the girl, clicking as
often as possible. You`d better to resize the photo (2:1 or
3:1). It is not necessary to fit to the original exactly
- you can edit the outline lately. 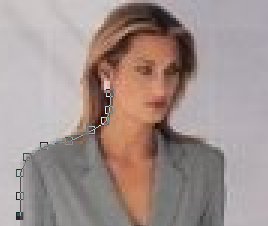
|
|
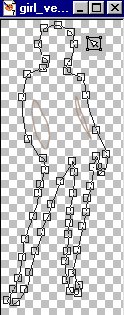
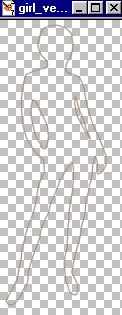
3.
The outline should be closed. The lines of the separate body`s
parts (for example, legs or hands) you can think out yourself. 4.
Turn off the Background layer visibility to control the
results of your work. To edit outlines choose Object
Selector tool, select the contour, right click and
choose Node
Edit. Now you can move the squares changing the outlines. As
soon as you will satisfy with the results, save you work and
delete Background layer with the original image. I
made such a silhouette: |
|
|
|
5.
Layers/Convert to Raster Layer. |
|
6.
Those, who don`t like to work with vectors, can draw the
outlines by means of Paint Brush tool with options: Shape
- Round Size
= 1 Foreground
Color - beige (#A58C7D) Background
Color - null
It
seems to me that such outlines are edited more hardly, but it is
up to you. |
|
|
|
So
we have a silhouette. I recommend to decrease its sizes
before finishing, because otherwise the ready image will be dim
and diffused. Optimal height of image is about 280-300 pixels.
My final image looks like: |
|
|
|
Page
2
Basebody
1 - 2 | Hair
| Face | Clothes
|
|

|
|
PSP
Tutorials
|
|
Home
|
|
Optimized
for resolution 800 х 600, Internet Explorer 5.0 Graphic
and Design: Country
City © Copyright 2002
|
|