Note: Were almost done! There is just one more thing to do. We’re going to create reflective water in the cave (don’t worry it’s really easy to set up ;).
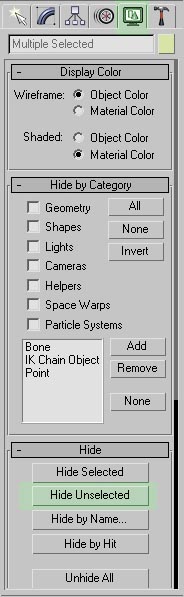
-. Select the cave object.
-. In the display panel click on 'Hide Unselected' button.
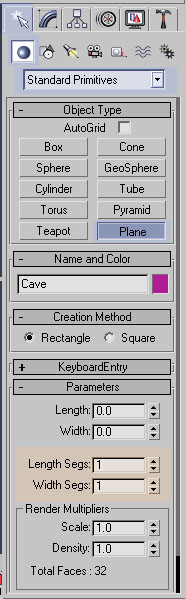
-. Open the create panel>click on the geometry button>make sure standard primitives is selected in the list below the geometry button>click on the plane button under object type. Use the following image as a reference.
-. Apply the following parameters before you create the plane object.
Length Segs: 1 Width Segs: 1 (If you don’t change the Segments to 1 the
flat mirror material wont work, and that is just the effect we need for our
reflections). Use the following image as a reference
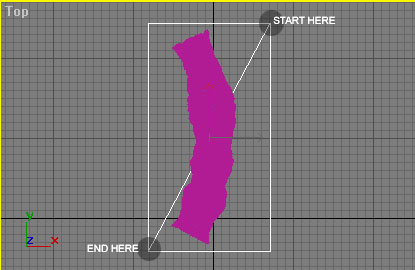
-. In the top viewport create the plane just make sure it’s bigger than the actual cave. Use the following image as a reference.
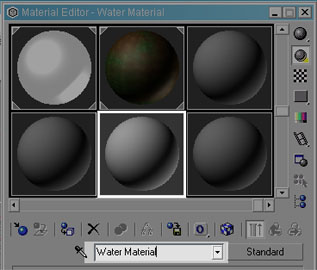
-. Press the M key on your keyboard to open the material editor.
-. Click on any empty material slot (Empty material slots are displayed in a dull gray)>Rename the material to 'Water Material'.
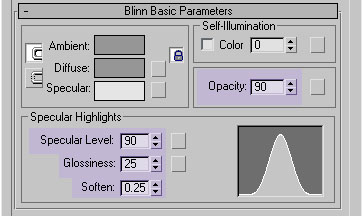
-. Under the blinn basic parameters rollout change the following parameters.
Opacy: 90, Specular Level: 90, Glossiness: 25, and Soften: 0.25
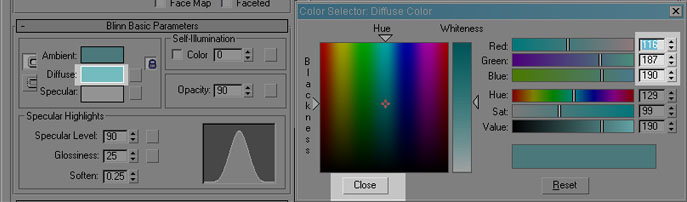
-. Click on the diffuse color slot and apply the color shown on the following image. Click close to close the color picker.
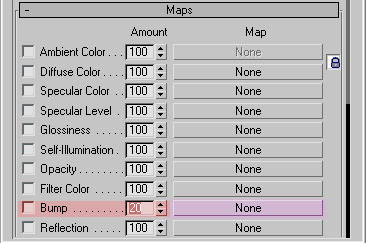
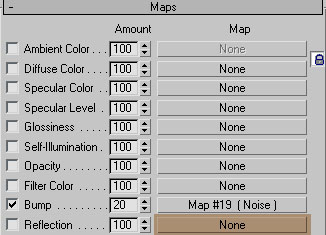
-. Expand the 'maps' rollout> apply a value of 20 to the bump amount>click on the empty bump slot.
-. In the material/map browser select 'Noise' and click ok.
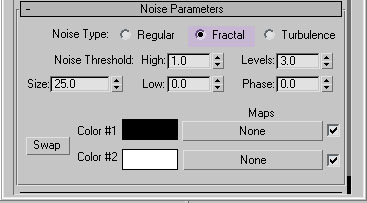
-. Change the noise type to 'Fractal'.
-. Click on the go to parent button. ![]()
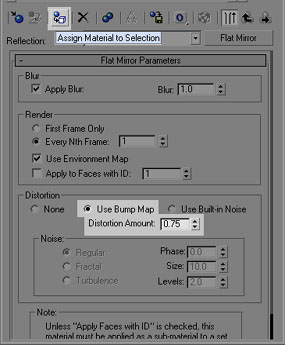
-. Under the maps rollout, click on the empty 'reflection' slot.
-. In the material/map browser window select 'Flat Mirror' and click ok.
-. Under the flat mirror parameters rollout apply the following parameters.
Distortion type=Use bump map and Distortion amount=0.75
- Make sure the plane object is selected in the viewports and click the assign material to selection button.
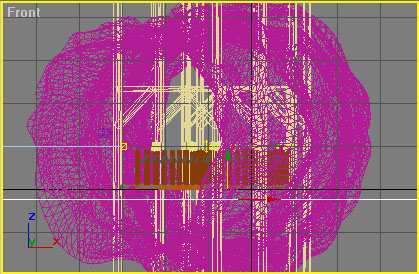
-. Open the display panel and click on the 'unhide all' button to unhide all your objects.
-. With the plane object still selected go to the front viewport and move the
object down on the Y axis. Give the bridge and the water object a little more
space of separation.
Use the following image as a reference.
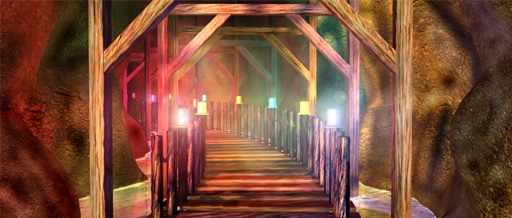
You are DONE!!!! Just render your scene in the camara view and be amazed at what you created. You're image should now look similar to this render.
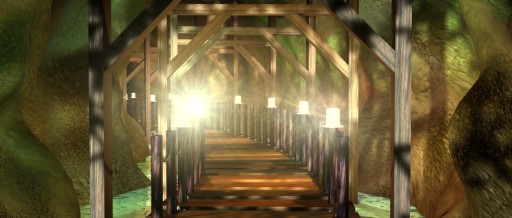
Side Note: Hope you enjoyed this tutorial, It's up to you to be more creative!, play around with the colors. See what you can make.
This tutorial was written by: Riddlaz C.
Page01 Page02 Page03 Page04 Page05 Page06
