-. Open the select by name window and select all your lamp objects.
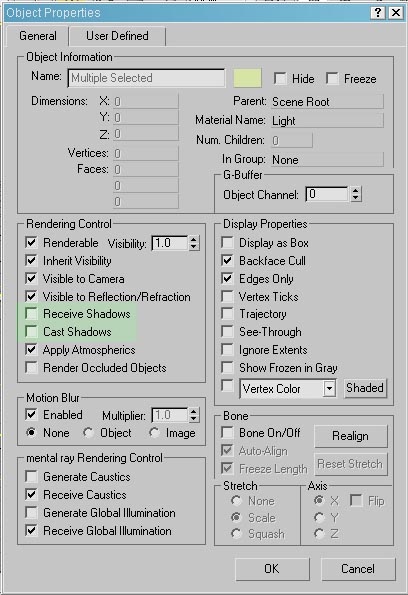
- While lamps are still selected right click on any viewport and select properties.

- In the object properties dialog box ‘uncheck’ receive shadows and cast shadows then click ok (since there supposed to be the actual light emitters we don’t want them to cast or receive shadows).
-. In the display panel click on the Unhide by name button
-. Select the cave object from the list and then click on unhide (if you didn’t change the name when you created the object it would probably be called ‘tube01’ but if you downloaded the scene files the object will be called 'cave').
NOTE: Right now the lighting looks allot brighter in the viewports. Don’t worry about it, the lighting won’t look even close to that when it renders all thanks to the adjustments we made to the attenuation parameters for each light.
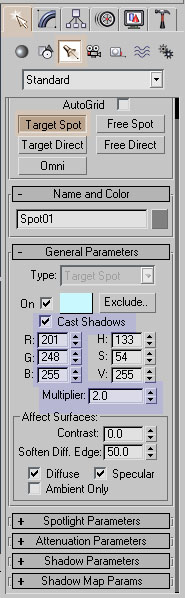
-. Go to the creation tab>click on the lights icon>click on the target spot button from the list.
-. Before creating the light adjust the parameters as shown in the following image. Make sure you check 'cast shadows'.
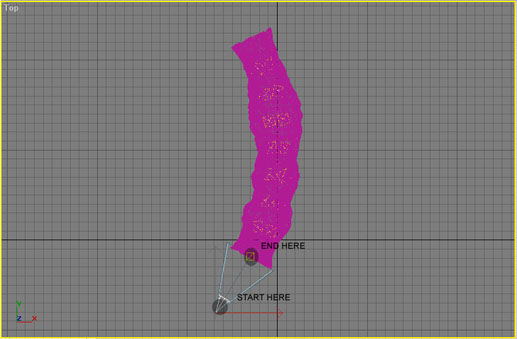
-. In the top view port click and drag to create the spot light, it should be pointing toward the main opening of the cave.
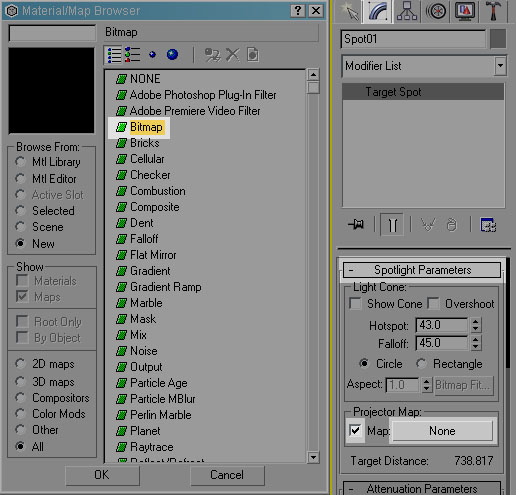
-. With light the spot light still selected, go to the modify panel>scroll down to the spotlight parameters rollout>put a check on projector map>click on the projector map slot (were it says 'none'). Use the following image as a reference
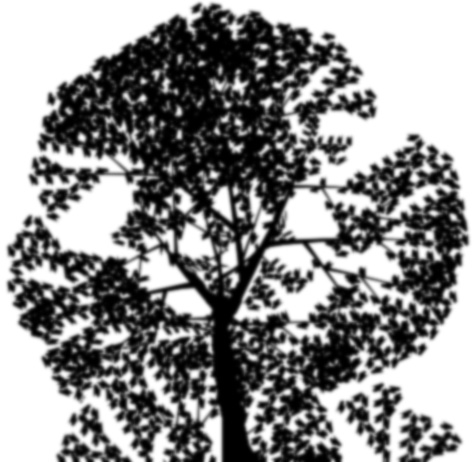
-. select bitmap from the material/map browser. Open the TreeShadow.jpg file, included in the scene files or you can download it here. TreeShadow Image
Note: when using projector maps the white part of the map is where the light will be casted and the black part is where the light will not be casted, this is very useful when adding more depth to the lighting. In our case were using a tree image as our shadow map, this will give the appearance that there is a tree in front of the cave.
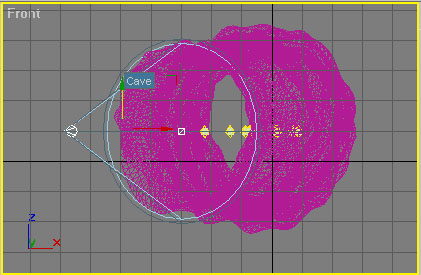
-. Open the select by name dialog box and select the newly created spotlight and its target (most likely it will be called spot01 and spot01.target).
-. In the front viewport move the spotlight up in the Y axis so it's pointing toward the center of the cave.
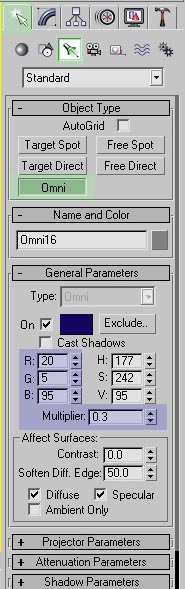
-.Go to the creation tab>click on the lights icon>click on the omni button from the list>make sure AutoGrid is ‘NOT’ checked (Yes we have just three more lights to create)
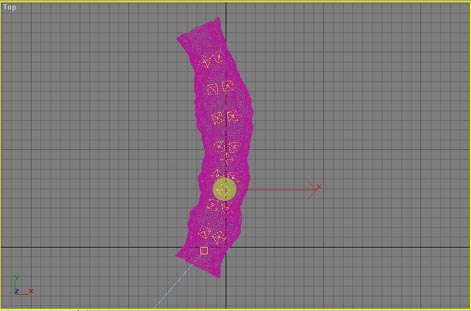
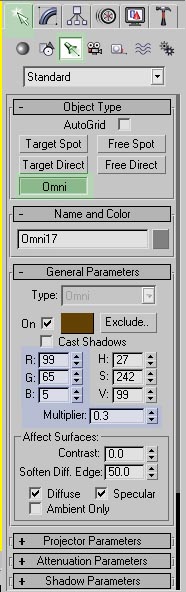
-. Change the settings shown on the image before you create your first light.

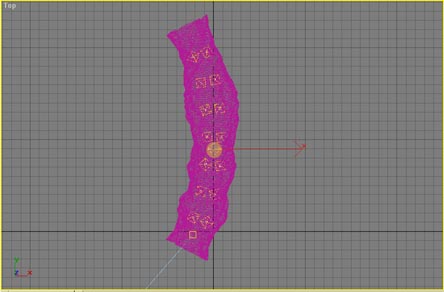
-. On the top viewport create the light somewhat in the middle of the cave as shown in the image.
-. Right click to end creation process.
-. Click on the omni light button in the create panel to begin the creation of the second light.
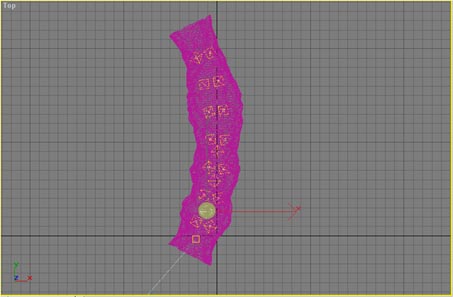
-. Adjust the parameters as shown in the image before you create the second light.
-. Still on the top viewport create the second light, use the following image as a reference.
-. Right click to end creation process
-. Click on the omni light button in the create panel to begin the creation of the third light.
-. Adjust the parameters as shown in the following image before you create the third light.
-. Still on the top viewport create the third light, use the following image as a reference.
-. In the front viewport move the three lights you just created in the Y axis, make sure there centered within the cave.

-. With the three new lights still selected go to the group menu and select group. In the group name window enter 'Extra Lights' and click Ok.