Tutorials
Weight Maps
Alternative Methods
of using Bones and WMaps
Advanced IK Setup
Set Driven Key Basics
Assigning Motion Capture
Customizing Lightwave
Lightwave Basics

Gallery

Links
Flay
VisualFX Pro
The Lightwave Mailing List
Lightwave Tutorials on the Web
About me
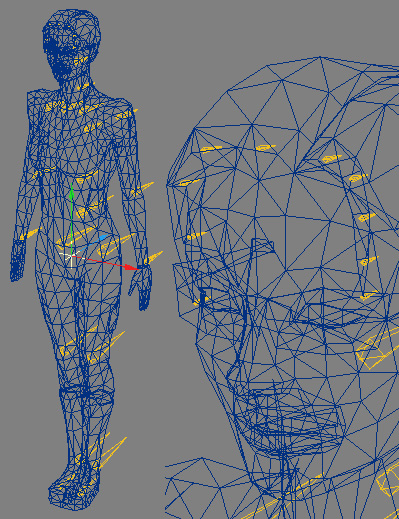
This tutorial covers how to use the "Use Weight Maps Only" feature in Layout to setup a character. Most of the time, this kind of setup is not ecessary. You can usually get away with using the techniques discussed in my first Weight Map tutorial. This technique is for those power users out there, who like me, like to have absolute control over how things work. The basic idea behind this technique is let the Weight Maps do all the work and only use Bones as Pivot Points for the Weight Maps. Figure 1 shows the completed object with its skeleton.
 Figure
1
Figure
1
All the Bones that point down the Z axis are in their default orientation. This totally eliminates any and all Gimbal Lock. Every Bone is free to rotate since none of the Child Bones have inherited rotation from their Parents. Because the Bones will be told exactly what points they are allowed to affect through Weight Maps Only, they don't have to conform to the character. The advantage is, you control exactly the range and strength and falloff of every bone. The disadvantage is you don't get to use Joint Compensation or Muscle Bulging since the Bones are not joined end to end at the joints. But, if you can't get the joints to work with Weight Maps Only, you can always make an Endomorph of the arm bulging and blend it over the model when the arm bends.
There are two very important things you must remember... Every point on your model must have a combined Weight Map Value of 100%, it can be spread over 3 Weight Maps, say 25%, 25%, 50%, and it can even go over 100%, but if a point is under 100% you may start seeing some weird stuff happening. Just make sure that when you start assigning the Weight Maps, you don't miss any points. Also, every active bone must have its own Weight Map. You will not be able to share Weight Maps across multiple Bones like in my original Weight Map tutorial. Bones that are rotational helpers (commonly used at the hip and shoulders) and need not be activated do not need Weight Maps assigned to them.
Again, you will be much better off if you create your skeleton ahead of time and determine how many Bones you are going to use. Its more important here than in the previous tutorial because the number of Weight Maps you create will be determined by the number of active Bones.
If you haven't read my basic Weight Maps tutorial, you should do so, I'm not going to cover basics like how to assign Weight Maps or Mirror them, etc.
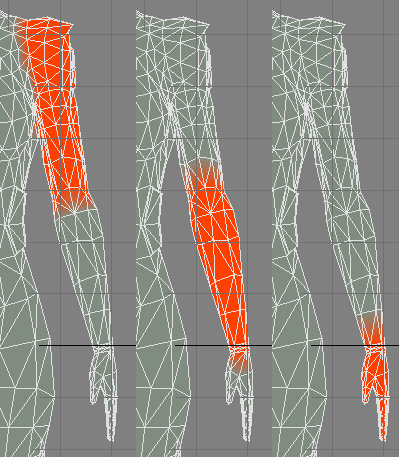
After you have your skeleton created, load your model into Modeler. Using the techniques described in the Weight Maps Tutorial, start assigning rough Weight Maps, one for each Bone. Figure 2 shows a series of Weight Maps for the Arm.
 Figure
2
Figure
2
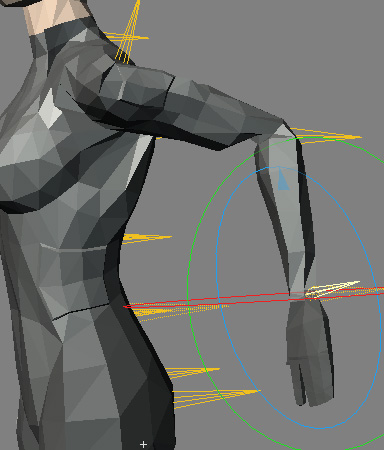
Once you've created all your Weight Maps, it's time to assign them to your skeleton in Layout. Switch to Layout and go through your Bones one by one and assign them the appropriate Weight Map. This time, however, as you pick your Weight Maps, check the box that says "Use Weight Maps Only". The option next to it, "Weight Normalization" will also activate, leave it on (not sure what this does exactly, the manual's description was kinda vague, anyway, just leave it on). Now you can start rotating your Bones around. Notice how the Weight Maps work in conjunction with the Bones. Sections of your model are moving as whole, and the joints are acting as if they are separate objects. Figure 3 shows some examples of the default setup in action.
 Figure
3
Figure
3
As you can see, the Weight Map for the Upper Arm has too much influence on the Shoulder, it's pulling all those points with it as the arm reaches back. The elbow is totally out of whack and forearm doesn't twist smoothly enough at the Wrist. All of this is easy to fix though once you've mastered editing Weight Map values using the methods described in the previous tutorial.
Go back into Modeler and start tweaking your Weight Maps. Remember to only work on half of your model and Mirror over Weight Maps using the .YO_MirrorWeights plugin.
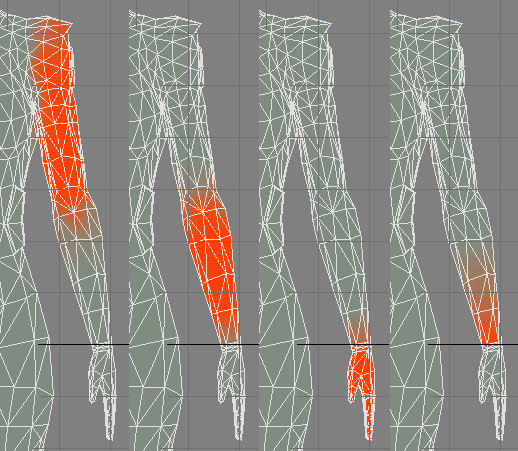
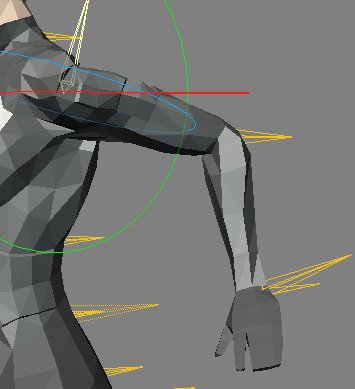
Figure 4 shows the tweaked Weight Maps for the Arm and Figure 5 shows them in Layout.
 Figure
4
Figure
4
 Figure
5
Figure
5
Some of you may have noticed a 4th Weight Map on the Arm. That is because I wanted just that little extra control over the wrist area when the forearm twists. In Figure 5 you can see 2 Bones at the Wrist. One controls the twist of the forearm, the other controls the Wrist. You can see the Shoulder doesn't pull as much as it used to (it could use some further tweaking, if I wasn't so lazy I'd be the worlds most notorious perfectionist), and the elbow area blends smoothly.