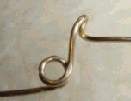
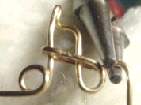
2. Working on the long piece of the wire; pinch a little less than � of an inch and bend to the back.
3. Press it down at the top, roll the top to the right just a little bit. You are rolling two wires together (picture #1)
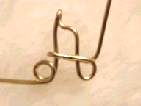
7. Grasp it at the cross of the �A� this time in the front and bring the wire around and to the back of the �A�. Hide this wire behind the one in the front.( It should looks like the picture # 4)
9. Grasp the wire next to the tip of the loop (picture #5) bring it down to make a hump.
11. Grasp in the back the top of the leg you just made and bring it over to the right. (second hump)
12. Grasp the wire and bend it to the back and up again; grasp it in the back and make another hump. You should have a complete �m�.
. 14. Grasp it at the bottom bring to the right and up.
15. Grasp it at the top (a little higher than the first part of the �y:�) bring it to the back and down; press it at the top and roll the two wires together a little bit. (you should have the �y� )
16. From the back grasp the tail (wire should be in front of the pliers) bring to the left and up to the right.
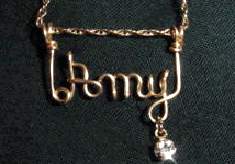
17. Congratulations you finish the name. Now, take the end; grasp it a little higher than the tip of the �A (look at the picture for reference) and bend it up, fold it back and around the pliers twice, to form a double loop; then around the wire twice to finish it; cut the excess in the back. This is for the chain; do the same with the piece of wire that you left in the very beginning. Finish filing the ends and carefully crimp the ends. Polish it a little and Enjoy it!!!
Any questions e-mail at Maggie
|
|
| Lesson one |
|
Lesson two |
|
Lesson three |
|
Lesson four |
|
Lesson five |
|
Lesson six |
|
Lesson seven |
| Back to Index |