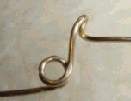
1. Start about 1� inches from the end of the wire, turning the long piece of the wire to the front of the pliers; make a loop {one complete circle}.
2. Working on the long piece of the wire; pinch a little less than � of an inch and bend to the back.
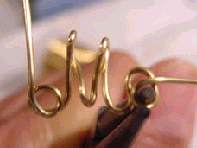
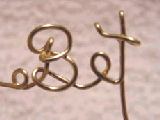
3. Press it down at the top, roll the top to the right just a little bit. You are rolling two wires together (picture #1 in tutorial #1)
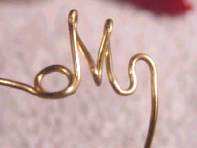
5. Grasp the wire at the middle, and bend it back and up, pinch a little; pull it to the right.
6. Grasp the wire at the top even with the first part of the �M� and bring it down; pinch at the top
( you made the �M�)
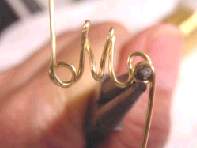
7. Grasp the wire at the bottom even with bottom of the �M� and bring it up
8. Grasp it about half way from the �M� , bring it down to the right to
make a hump (see picture #1)
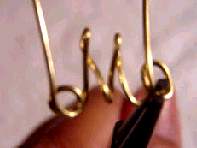

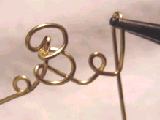
14. Grasp it from the back at the tip; bend it to the right
15. Grasp the wire that you just bend, an bring it around the pliers and the wire; to the front of the �t� you are making the cross of the �t� (see pictures in tutorial #2)
17. Grasp it at the bottom of the �t' and bend it up
18. Grasp the wire even with the top with the �t� bend it down and to the front looks like an �L�
19. Grasp it at he bottom and bend it up, toward you and pinch it a little
20. Grasp it in the back about the level of the �o� and bend it to the right, to make a hump
you made the �h�
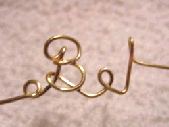
21. Grasp the wire at the bottom and bring it up; grasp it even with the �o� and bring it down through the front to make the �e�
22. Grasp it at the bottom and bring up, (grasp it even with the �e�) and bend it back and down, pinch it at the very top and bring it up. Grasp it close to the bend top and bring down (see picture #6) you have the �r� Grasp it at the bottom through the back and bring it up

|
|
| Lesson one |
|
Lesson two |
|
Lesson three |
|
Lesson four |
|
Lesson five |
|
Lesson six |
|
Lesson seven |
| Back to Index |