
 Welcome To Candles!
Candle making caught my eye in the mid 1970's when I was walking through the local church flea market and spied one of those candle making kits. The box was all brightly colored with the vast possibilites of the kinds of candles I could make. My mom had made some candles from time to time, so I thought this would be fun, too
It was fun, melting the wax, adding in colors and fragrance, although my candles never turned out quite like the ones on the box. Still, it was fun and I continue to do it today. These days my reasons are more practical, and I tend to make tapers that I'll use on the dining room table and some other areas around the house.
The process is pretty straight forward - get wax, melt wax, add colors, add fragrance, pour into mold, cool, light, save scrap wax, repeat.
Of course, each step has its details.
Getting the wax - clean fresh candle wax, or parafin, can be bought at many craft stores in large and small blocks. Bee's wax, which burns hotter but a bit smoother than regular candle wax, can be found in various places (try small shops and fairs which also sell honey) and can be added to the mix. Also, gathering up scrap wax and half used candles is a great way to recycle instead of tossing it all in the trash.
Melt the wax - use a double boiler to do this, it prevent the wax from melting too fast and burning, or worse, from catching fire. The wax should be cut up into small chunks so they melt faster. One big chunk will work, too, but it usually takes longer to melt. The water in the double boiler should be near boiling but not actually boiling. The melting temperature of wax is pretty low, so there isn't a need for a high water temperature. Further, boiling water can cause a mess in the work space, and depending on your setup, the water could splash into the melted wax, which is something you definitely don't want.
Adding the accessories - once the wax base is melted, add in the bits of color and fragrance you want for the candle. this takes some practice and plenty of trial and error. With colors, remember that it can always be made darker by adding more color, but if it's too dark already, the only way to get it lighter is to add more non colored wax to the mix. With fragrance, I suppose it's possible to have too much, but i haven't had this happen. if anything, my problem has been not adding enough.
Pour into the mold - anything without big holes can be a mold for a candle. there are , of course, the comercial molds from the craft store, the antique metal molds found from time to time, but I have also used tin foil, juice cans, and shot glasses. Before pouring the wax in, it is important to spray the mold with something like a cooking spray or other oil to act as a release agent, so the candle will slip easily out of the mold when it's finished. The wick also needs to be attached to the mold before pouring. Sometimes the wick is held in place at one end with a screw, or something similar, depending on the mold, and the other end, where the wax gets poured in, should be secured around a rod or pencil. This will keep the wick tight and straight in the candle and keep it from falling into the wax. Sometimes, wax will leak out of mold after it's been poured, so I often keep a plate or bowl under the mold to catch anything which does come out. I've been known to put the molds in the freezer before pouring so the first wax which touches it cools fast and creates a seal, sometimes, near any leaking points. A cold or ice water bath can also help cool the wax quickly.
After pouring - when wax cools, it also contracts, so often a second or third pouring is needed to completely fill a mold. Once the pouring is finished and the wax has completely cooled, the candle can be removed from the mold. If it sticks a little, put the candle into the freezer for a half hour. This should make the candle contract a bit more and it should then pop right out of the mold. The surface can be shined up a little by rubbing it with nylon, like nylon socks and such.
Lighting and Enjoying - now that your candle is finished, it's time to light it and enjoy it. Standard safety warnings apply here - make sure there is a non-flammable base under the candle to catch any dripping wax; keep the wick short, about an inch long at most; don't leave a burning candle unattended; don't play with the candle unnecessarily; keep your body parts out of the flame, and unless you are being kinky, keep them out of the melted wax as well.
Welcome To Soap!
I haven't been making soap for very long, just a few years, but it can be fun, easy and makes a great gift for everyone. I did a fair bit of research before embarking on this new hobby and there are several ways to make soap. There's the totally-from-scratch method (that's a lot of work, and seems like a big pain), the cold method using a soap base and adding in color and fragrance, and hot (melting) method very similar to making candles. in fact, a number of candle making items, but not all, can be used in soap making.
I opted for the quick and easy melting method using an existing soap base, and the process is very much like making candles. I picked up some glycerin soap blocks, both clear and opaque, and the coloring, fragrance and molds from eBay and Michael's Craft Store. Opting to skip the double boiler method, I used the heavy feezer and boiler Ziploc bags to melt the soap base in the microwave.
Same process as candlemaking - cut the soap into small blocks for faster melting. Microwave on high for 30 seconds at a time, check the bag each time. Once all the soap is melted, about two minutes or so, add in coloring, and fragrance. Stir to thoroughly mix, and pour into the molds (precoated with cooking spray or some other release agent). The soap hardens mostly within an hour, but I tend to wait overnight before remving the soap from the molds, just to make sure it has thoroughly cooled and set.
Once removed, i wrap the soap in plastic wrap and get ready to send them off to family and friends. Everyone needs soap, some need to actually use it, but everyone loves what i've sent them. There is something pleasantly refreshing about having handmade soap, and it seems so much nicer than commercially made soap.
From Nature With Love
Elaine White
Walton Feed - Soap
Chase
Holly Deyo
Soap Crafters
Rainbow Gardens
Bramble Berry
Florida Soap Supplies
The Scent Shack
Wholesale Supplies
Soap Nuts
Magic Mountain Sage
Snowdrift Farm
Sun Soap
Miller Garden - Soap
Soap Berry Lane
Soap Saloon
Sweetcakes
Sun Soap
 Welcome To Trains!
I've had toy trains since I was a kid but haven't really gotten into the hobby of railroad building until recently. A few years ago I set up one in my work office, because I had the space to do so, and it was a fun conversation starter. Then I had one set up at home for awhile, which got put away when it took up too much space. Then Garth bought me a new train set last Winter, and I turned around and got us the Harry Potter train set this year. Now we need more space.
Caboose Hobbies
Discount Trains online
Discount Train
Great American Yankee Railroad Society
National Model Railroad Association
Train Collector's Society
Model Railroading Sites
 Welcome To Wine Making!
I have been making my own wine for almost twenty years, ever since I got interested during a high school biology experiment. I extended that meager knowledge with some reading and plenty of experimentation. Some batches were good, some really bad and few turned out to be something quite special.
FIRST STEPS IN WINEMAKING by C.J.J. Berry: This book is written for the amateur winemaker. The book has been recognized internationally as the best "rapid course" in winemaking available for the beginner. It's chock full of recipes and facts about the winemaking process.
The basic steps of making wine are these:
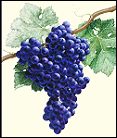
Get the grapes - other fruit and flowers can be used to good effect, but let's start with grapes. I used to grow my own, then for awhile I had access to other free vines, but when those aren't options, a grape base can be bought from suppliers, and if you are close enough, freshly harvested grapes can be gotten direct from vineyards.
Get the juice - commercial and some amateur winemakers will crush their grapes to extract the juice. Giant presses are used to do this, and indivuals resort to small hand cranked presses. I opted for boiling the grapes to get everything out of the grapes and skins. Dump the grapes into a large stock pot, fill with water to cover them by an inch or so, gently stir the grapes to allow bad grapes and other debris to float to the surface and be removed. Slowly heat the water and grapes to a slow boil. once the grape skins look pale, almost translucent, remove from the heat, allow to cool and then strain the juice into another container. I've used cheesecloth, collanders and pan screens to strain the juice out. The idea is to get as much of the solids out of the juice - seeds, stems, grape skins.
Fermenting - the juice needs to go into some container which can be mostly sealed against outside air. I've used large glass gallon sized jars, like the ones cherries come in, or cider bottles before i moved up to buying 6 gallon fermentation buckets with airlocks. For the jars and bottles, i cover the top with plastic wrap and held it in place with a rubber band. once the juice is cooled and in the container, I added sugar, which commercial wine makers cannot do, and then the yeast. Yeast could be the regular bread yeast, but there are also special made wine yeasts as well. Some people feel that the common bread yeast imparts undesirable flavors to the wine.
When the fermenting action starts up, it is quite vigorous and there can be a lot of foam produced. The very first time I did this, the foam bubbled up and over the edge of the glass jar and all over the white counter top. be aware that grape juice stains badly. Very badly. After three days, sometimes a week, the reaction will slow down, but it will still be visibly noticable for a month or so.
Racking - after three months, the wine needs to be strained again, or racked, to remove any settled solids, including dead yeast, which can impart bad flavors to the wine. A second raching should be done three to six months later. Sometimes after racking, the fermentation process seems to start up again, probably a result of the wine ingredients being mixed up again. Racking can be slow and laborius, but it is worthwhile and makes for a better product. Sometimes with a first racking, I'll use some strainer like the pan screen used to drain grease, but more often I'll use a large coffee filter. The coffee flters wrk best if the are already wet before use, and depending on the amount of suspended solids, they may need to be replaced several times during the process.
Bottling - after 9-12 months of fermenting, the yeast should be dead and the process should be over. to make sure it really is, i use Campden tablets to kill off any remaining yeast. All of the wine gets racked one more time to make sure the wine is as clean as possible, and then it gets poured into bottles and corked. Bottles should then be stored on their sides to keep the corks moist and maintain a good seal against outside oxidizing air.
Over the years, I've had plenty of bottles had the fermentation continue inside, and have had more than one bottle pop open from the increased pressure inside. It's disappointing and frustrating, and makes a huge mess, but it will happen, so take precautions in your storage area. One item i started using late in the game is a shrink wrap cover - it slip over the cork end of the bottle, gets dipped into near boiling water to shrink it down, and aside from a more finished look, the wrapper also hels keep a cork in place when it might otherwise pop out. It's a good idea to check the bottles on ocassion - if the cork seems to be bulging out or there is leakage from the bottle, those are the ones to open first and sooner rather than later. Usually the fermentation is still continuing in the bottle, or the cork hasn't made a good seal. Either way, open the bottle and enjoy the wine before there is any mishap.
Brewery Lane
Robert's Wine page
Home Winemaker's Page
Winemaker's Emporium
Jack Keller's Winemaking page
Sun Soap
Second Floor
Spirituality Power Gay Crafts Work Egypt
Bedroom Geneology HTML Tower Castle
Family Mike Danny Randy Jon Michael Garth
First Floor
Foyer Kitchen Living Dining Conservatory Greenhouse Garden
Media Game SciFi Collectors Library Gallery Computer Workout
Tower Lab Crypt Secret Garage Office Outside
The page last updated on November 7, 2003